
We may earn revenue from the products available on this page and participate in affiliate programs. Learn More ›
Using woodworking planes whose cutters are out of adjustment is like driving a car in the wrong gear: You may be able to make some progress, but the task is ever so much harder than it has to be. Planing with a properly adjusted plane should be a pleasure.
If you suspect your plane may be out of adjustment, hold the plane upside down. Sight down the length of the sole as you would the barrel of a gun. You should see the expanse of the sole broken only by a fine dark line where the plane iron protrudes ever so slightly through the mouth of the plane.
If you can’t see the plane iron at all, it’s retracted into the body of the plane and won’t cut anything. If the plane iron sticks out too far, the plane will be very hard to push and it will jam quickly with thick shavings or even chunks of wood. The line you see should also be even from side to side; if it isn’t, then the blade is crooked, and its corners will tend to gouge into your workpieces.
Larger planes often have double blades. The second iron keeps the cutting iron stiff and helps cause the shavings planed from the wood to curl up and out of the plane’s throat. The relative position of the second iron to the first is adjustable, regulating the thickness of the shavings. The second iron is most often set about a sixteenth of an inch back from the cutting iron.
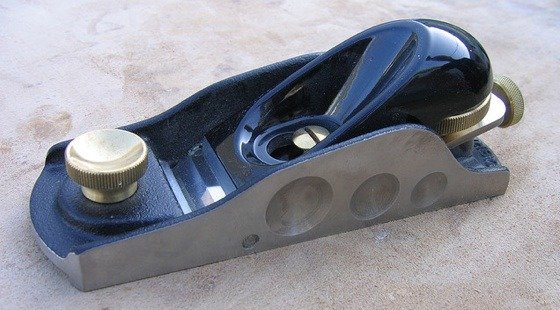
Metal Planes. Setting the cutters in most metal planes is relatively easy. There are mechanical aids to help reset the blade, both laterally and for depth.
Begin by getting the blade square to the plane’s sole. A lever is attached to the mechanism (called the frog) that supports the blade. When the lever is shifted from side to side, the angle of the cutting edge also shifts in relation to the sole. Sight down the sole, then reset the blade so that the shadowy line you see squares with the plane’s bottom.
Some planes allow you to adjust the mouth, the rectangular opening in the sole through which the blade appears. For finish planing on hardwood a narrow space in front of the blade is best; at the other extreme, rough planing on softwood is easiest with a wider mouth. A setting about midway between will allow the plane to be used for the widest range of jobs.
Next, experiment with the knob or nut at the rear of the frog that drives the adjustment screw. When you turn this knob, the cutter protrudes farther from (or withdraws within) the plane’s mouth. Set the plane so that the cutter just barely peeks out from the sole, then run the plane along a length of scrap stock. Back off or advance the adjustment screw and retest until the tool is working to your satisfaction. Keep in mind that there’s a very fine line between taking too little (which means that any planing job takes more strokes) and too much (when you risk tearing the grain with cuts that are too deep). Practice, as our grandmothers liked to say, makes perfect.
Wooden Planes. Adjusting a wooden plane is both easier (there are fewer parts to be concerned with) and more difficult (it takes a light and careful touch). With a wooden plane, the first rule is: If it ain’t out of whack, don’t fix it. Try a stroke or two on a piece of scrap board before fiddling with the plane’s adjustment. If the tool doesn’t work to your satisfaction, only then should
you adjust it.
Wooden planes have fewer parts than metal ones, usually just the solid wood body, the iron blade, and a wooden wedge that holds the iron firmly in place. If the plane isn’t cutting deeply enough, set the plane sole down on a piece of scrap stock. Then tap the end of the plane iron with a mallet, striking it gently. Test and, if necessary, tap again. A few trials will tell you when the
plane is properly adjusted.
If the blade protrudes too far, you will need to free the blade and the wedge. For a large (jointer or jack) plane, this can be done by holding the plane vertically and thumping its heel on a solid wooden surface such as a benchtop. If there’s a strike button on the plane’s top, rap it while holding the plane with its toe in the air. Striking the heel of a smaller, smoothing plane with a mallet while holding the plane iron and wedge will do the job, too. These blows should he delivered firmly but gently, and repeated as necessary to loosen the plane iron and wedge. The blade on a molding plane can be released by tapping the notch in the wedge with the mallet.
Reposition the blade in the plane, with the bevel at least an eighth of an inch shy of the mouth. Reset the wedge firmly, tapping it tight with a few gentle mallet strokes while holding the iron tight to the frog.
If the blade isn’t set square to the sole of the plane, a tap or two to one side or other on the portion of the iron that protrudes above the wedge should align it. Then set the depth as described above.
Keep the Iron Honed. Whenever you have the blade out of a plane, inspect the edge care-fully. If there are any nicks or the blade has dulled, sharpen it. Get into the habit of honing your plane blades periodically. The time required will probably be a great deal less than that consumed by trying to work with the tool when it’s too dull to do its job.