
We may earn revenue from the products available on this page and participate in affiliate programs. Learn More ›
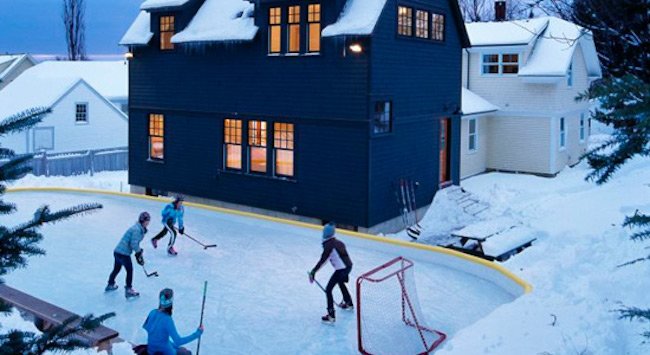
Over the snowy-white winter, adults and children make the most of the cold by taking part in a smorgasbord of seasonal activities—ice skating chief among them.
If a member of your family loves to play hockey or pirouette, you can, with some effort and elbow grease, bring the enjoyment closer to home. That’s right, you can build a backyard ice rink!
Don’t worry, advanced degrees in engineering are not a prerequisite; this is a simpler project than it seems, with just three steps from start to finish.
MATERIALS AND TOOLS
– Plastic tarp
– 2-inch-thick lumber
– Rebar stakes
– Garden hose (with spray nozzle)
– Staple gun
1. BUILD THE FRAME
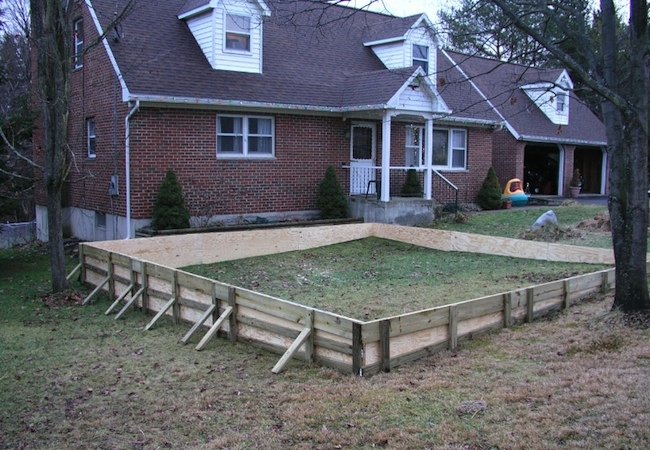
Plan to make the frame for your backyard ice rink on the flattest part of your property. Why? Because each of the four corners of your frame ought to be on the same level. That’s easiest to achieve, of course, on an even surface, but it’s certainly possible to build a frame that corrects for the slopes and dips of changing terrain.
In ideal circumstances, you would need to use only 2″ x 4″ boards. However, to correct for changes in ground elevation, you can buffet the construction with boards in other dimensions, say, 2″ x 6.”
Once you’ve devised a plan, enlist a helper and set to work, bearing in mind that each piece of lumber should be secured with a rebar stake. (Most commonly employed to pitch tents on camping trips, rebar stakes brace the frame against the force exerted by expanding ice.)
2. LAY THE TARP
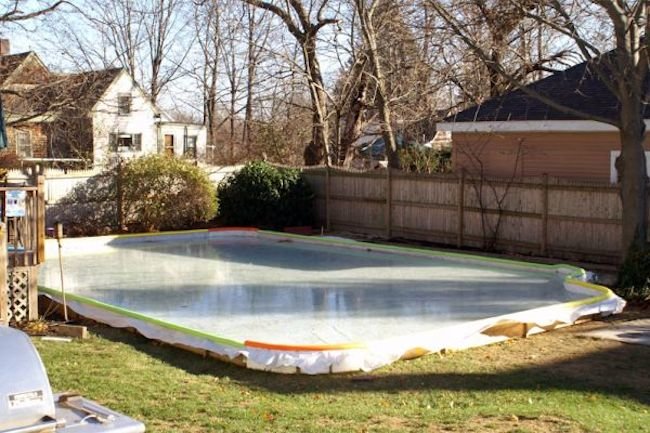
Once you have succeeded in building a rink frame, proceed to line it with a white or clear tarp. It’s essential to use a light-colored tarp, because dark colors naturally absorb heat, causing ice to become slush.
Push and smooth the tarp until it covers the bottom of the frame as well as its sides. Keep bunch-ups and wrinkles to a minimum. Extend the tarp over the edges of the frame and onto its exterior, leaving enough material so that you can staple the tarp into position. Secure it at the corners and at three-foot intervals along the sides.
Trim away any excess, or simply roll the tarp against the frame, so nobody trips accidentally.
3. FILL THE RINK
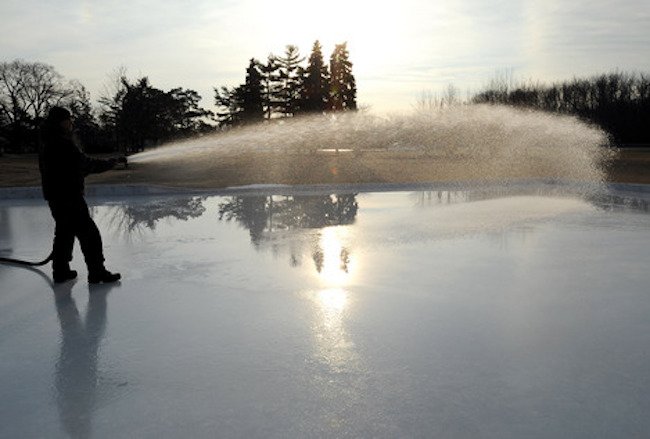
You’re almost there. Resist the temptation to jump ahead, however, or you might end up skating on thin ice!
When you’re ready to fill the rink with water, first check the weather forecast. Provided the next couple of days are expected to remain below freezing, go ahead and fill the tarp with about one inch of cold water. It should freeze within six to eight hours.
Next, with the spray nozzle fixed to the end of your garden hose, apply one inch of hot water. Repeat the process until you have three to five inches of rock-solid ice.
Test the ice for stability by tapping its surface all over with a broomstick—or a hockey stick, if you have one ready and waiting. Assuming that all has gone according to plan, the ice should now be ready to support you and the figure eights you’ve been itching to do since summer.
Tip: Don’t rush inside after you’re finished skating! Keep the ice surface smooth by shoveling up the shavings and spraying on an additional layer of hot water.