

We may earn revenue from the products available on this page and participate in affiliate programs. Learn More ›
Traditional plastering consists of three separate coats of plaster. The first two, called the brown and scratch coats, are coarse, often with sand, horsehair, and other binders added to the mix. The third or finish coat is a smoother blend, made of water and finely ground lime and plaster.
The three-coat method, which requires strips of wood or metal lath for reinforcement, is relatively rare today. The advantages remain, as it’s durable, adds significantly to soundproofing, and, in the opinion of many people, has more character. Yet because it is both labor- and material-intensive, it can be prohibitively expensive.
Skim Coat Plastering
This is a middle ground between three-coat plastering and simply taping and coating the seams between sheets of wallboard. The skim-coat approach, which involves the application of a single, eighth-inch-thick layer of plaster over the entire wall or ceiling surface, is a compromise, offering something of the character and quality of real plaster with the economy and speed of wallboard.
Skim coating requires some skill with a trowel, so it you’ve never held a trowel in your hand, you would be well advised to start out with a little patching work first. But you don’t have to apprentice to a professional plasterer for a year and a day to be able to produce a quite satisfactory finish.
What You’ll Need
You will need the same tools as a professional plasterer. The key ones are:
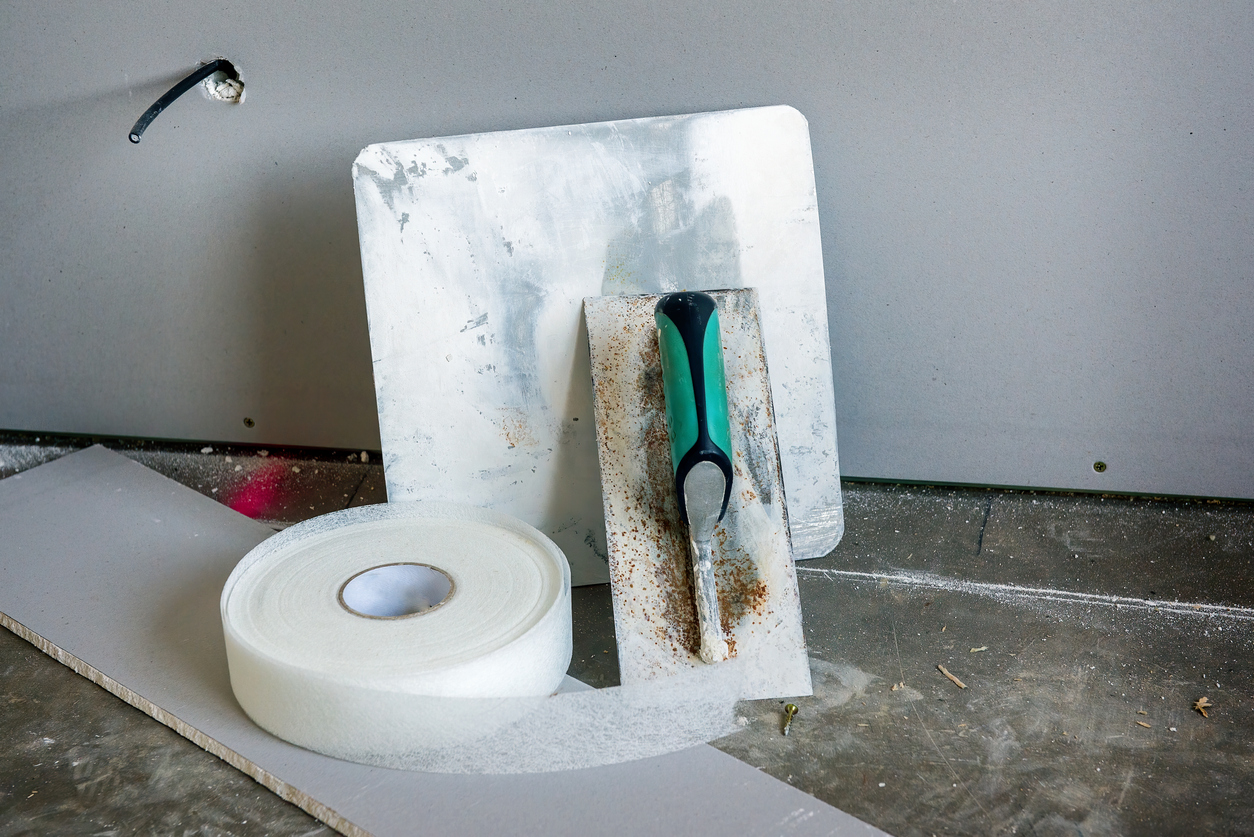
- the plasterer’s trowel
- a carrier called a hawk, with its square top surface and handle below
- a narrow trowel (or wallboard knife) for smoothing small areas and finishing around pipes
- a brush for applying water during final smoothing
Mixing equipment will be required, too, including an empty joint compound bucket or the equivalent, and a mixer bit for your drill.
PLASTERER’S TROWEL
This tool has a flat, rectangular steel blade, with a wooden handle mounted along the center of its back (view example on Amazon). It can be purchased in a number of different sizes, but a four-by-10-inch trowel is a manageable size for beginning plasterers. If you’ve used a similarly shaped trowel to smooth cement or apply mortar, the heft and feel of the trowel will be familiar. If trowels are new to you, however, some practice will be required to master the coordination required in manipulating plaster with the tool.
OTHER TROWELS
There are many purpose-made plastering trowels available, with short blades and narrow blades, trowel handles and scraper handles, at inexpensive prices and higher ones. To begin with, a pair of tools, one perhaps two inches and another four inches wide, will be sufficient. Corner trowels are also valuable. To start with, though, a joint-compound corner trowel, if you have one on hand, will prove quite adequate.
HAWK
This tool acts as a reservoir for the plasterer as he or she applies the material to the wall or ceiling (view example on Amazon). The hawk is held in one hand, a trowel in the other. The hawk has a flat top surface made of magnesium or aluminum, with a wooden or plastic handle beneath. The top is square with rounded corners; several sizes are available (12, 13 or 14 inches square), but to begin smaller is probably better.
WATER BRUSH
Any high-quality brush will suffice for splashing water onto a plaster surface to be smoothed, but I favor a purpose-made blister brush (view example on Amazon). It has a pair of felt pads and sponges a surprising amount of water. It will outlast most other brushes, and will help in the smoothing process when applied directly to the plaster, because it has no bristles to fall out or to mark the surface.
Preparation
Prepare the surface as you would for taping wallboard joints. However, use the less expensive variety of drywall that is designed for skim coating (it’s often called blueboard because of the color of its paper surface).
You can skim on regular wallboard, too, but you will need to apply a bonding agent first. This is put on with a roller, and is available at most building supply stores.
Apply fiberglass mesh tape to all joints between sheets of dry wall and at all junctions of wallboard and molding. This will help prevent cracking. While not every professional insists on it, I also recommend covering the joints first with a base coat of a perlited plaster.
Wet the area first, and then apply the coarse plaster as you would a first coat of joint compound, covering the tape but taking care to avoid leaving lumps or ridges that stand beyond the plane of the wallboard.
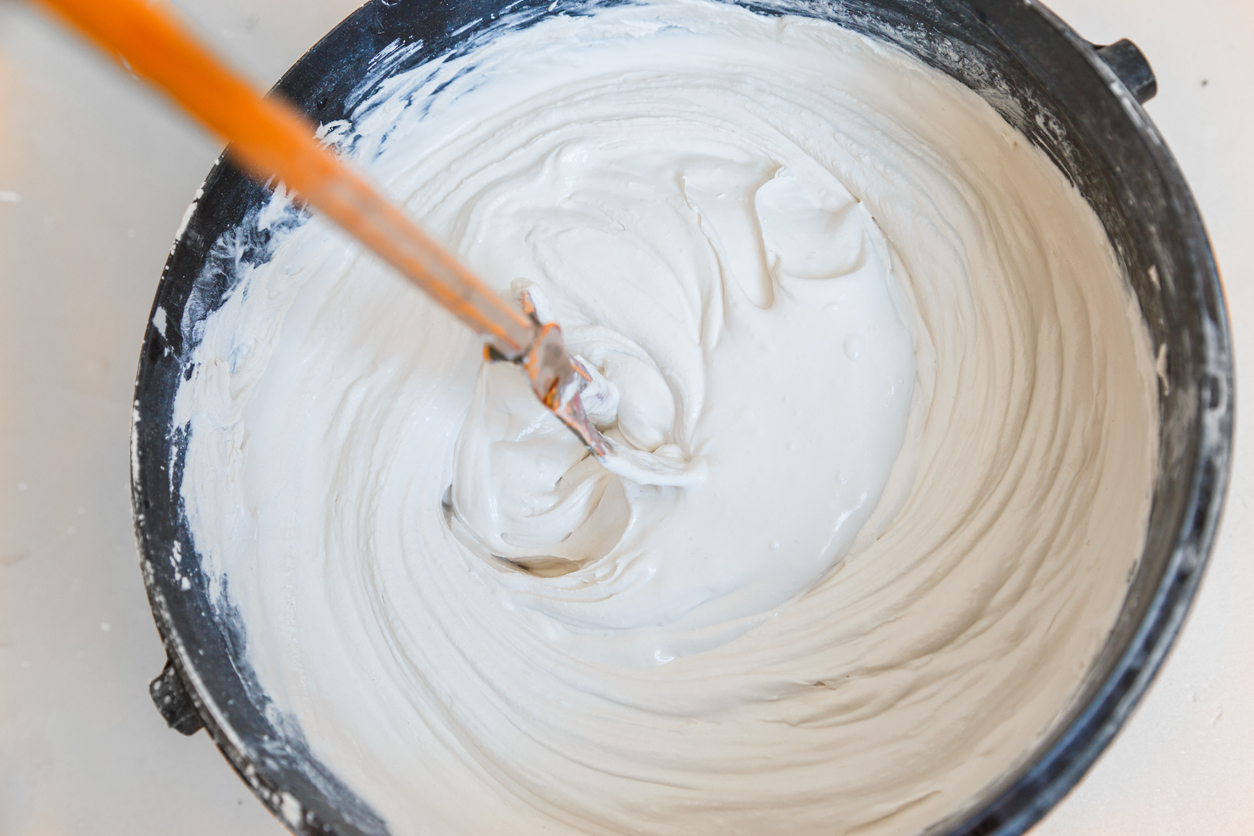
Making the Gage
I favor a mix of lime and finish plaster blended by hand in a gage (or gauge).
The lime is mixed first in a bucket: pour in the water, add the plaster, and mix, preferably with a half-inch drill and mixing bit. The lime should have the consistency of heavy cream.
Now for the gage:
- Pour a mound of the lime onto a mixing surface (a four-by-four-foot sheet of plywood works nicely).
- Using a plasterer’s trowel, shape it into a circle, empty in the middle, that resembles the mouth of a volcano.
- Pour water into the ring to a depth of an inch or more, then ladle in a mound of plaster, using a cup or other convenient receptacle. The amount of plaster and lime should be roughly equal.
- Use two trowels to mix the ingredients, wetting the dry plaster first, then working the blend away from you, then back, in a modified rowing motion.
When the concoction is uniform, you’re ready. And you now have fifteen or twenty minutes before the plaster sets.
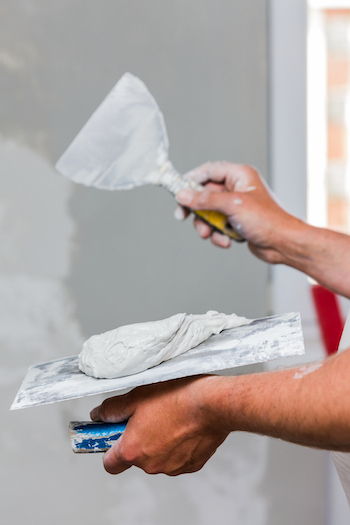
Applying the Plaster
Load up a hawk: Not too much at first, no more than you can handle. Don’t attempt to do too big an area at first, either. Start with an area no larger than three feet square.
- Working with a small amount on the trowel, apply the plaster to the wall with the tool held at a low angle to the surface.
- Push the plaster gently along the surface, with one long side of the trowel flush.
- Cover the area thoroughly, without worrying a great deal about smoothing it.
- Once it’s covered, go back over it with a small amount of plaster on your trowel. Apply more pressure this time (you may, in fact, remove as much plaster as you are applying in this pass).
- Work the surface over in parallel strokes, then do it again perpendicular to the previous pass.
- A third pass on the diagonal may be necessary.
- As you proceed to apply plaster to adjacent areas, keep in mind that plastering shares with painting the old rule, “Keep a wet edge.” Work in one direction, picking up where you left off.
The surface should be fairly smooth, but don’t worry about a mirror-like finish, as the final smoothing is done with the assistance of a little water.
Smoothing the Plaster
For smoothing, the plasterer’s trowel is again held at a low angle to the fresh plaster surface. If the plaster has set up (hardened), you may need to add some water. Wipe the blister brush over the surface, and try again (a paintbrush dipped in water can also be used to splash the area).
As you smooth, your trowel will accumulate a fine paste as it scrapes the plaster. Use that to fill holes, scratches, trowel marks, or other indentations.