We may earn revenue from the products available on this page and participate in affiliate programs. Learn More ›
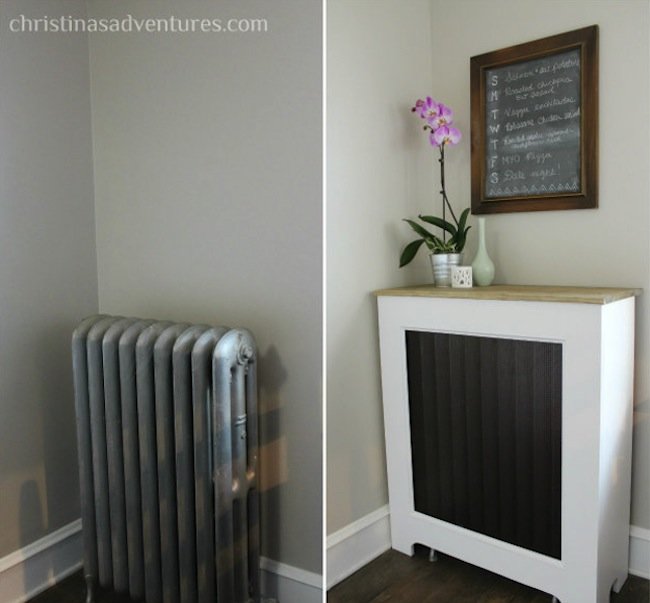
If your heat comes from radiators, you know the predicament: In the winter, you’re glad to have the heat. But no matter the season, you cannot escape the fact that radiators are usually ugly. Their clunky, utilitarian appearance is a source of lingering frustration for many. Plus, radiators occupy precious floor space you would prefer devoting to another, more exciting purpose (heating is many things, but exciting it is not). That’s the genius of Christina’s DIY radiator cover: It fits right over the cast iron, creating a usable surface on top, while allowing hot air to emanate through the room.
Radiator covers are somewhat controversial; some people say they compromise air flow, compromising radiators’ ability to do their job. Christina, who blogs at Christina’s Adventures, responds: “This is definitely a valid concern, but if the radiator cover is constructed correctly, it can actually help to improve the air flow! You have to make sure that you allow enough room around all sides of the radiator. Also, be sure to add a piece of sheet metal to the back. That helps project the air out to the rest of the house.” Good to know!
Christina lives in a 100-year-old house, and so with her DIY radiator cover, she felt it was important to respect history while making the space more functional for her family today. “We’ve developed our own style,” she says, and “we feel it’s a true mix of the old and the new.”
Find out how Christina made her DIY radiator cover, and how you can make your own!
MATERIALS
– MDF
– Aluminum sheeting
– Jigsaw
– Trim molding
– Miter saw
– Elmer’s ProBond Advanced
– Wood glue
– Wood filler
– Poplar board
– Paint
– Stain
– Polyurethane sealer
STEP 1
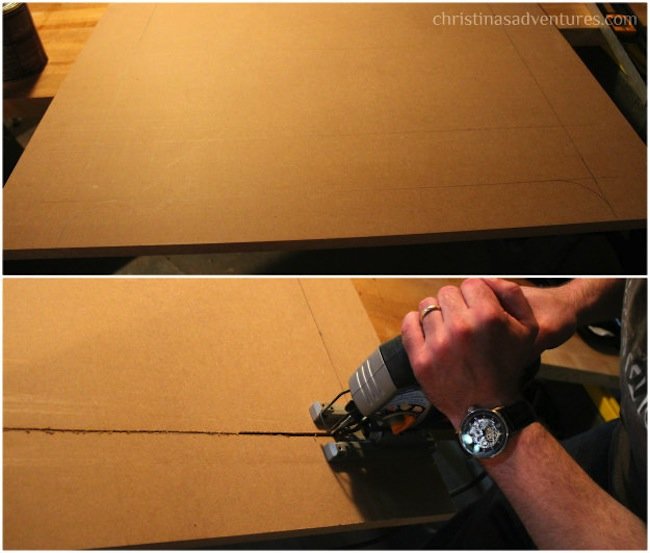
We measured out the area around the radiator, making sure to add 2″-3″ inches all around for appropriate air flow. Then we had our local hardware store cut down MDF for the front and the sides of the cover. Once home, we marked out a 4″ frame and little legs. After that, we drilled pilot holes and used a jigsaw to cut out the inner square.
STEP 2
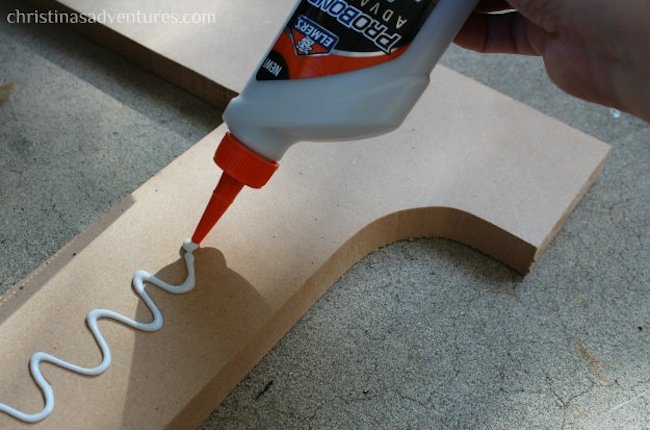
Now it was time to add the pretty aluminum grate to the middle of the MDF frame. I used Elmer’s ProBond Advanced to adhere the metal to the MDF. For this type of mixed material project, it’s the perfect adhesive to use.
STEP 3
Next, I used the staple gun to fastened the aluminum sheet to the MDF—they’re securely attached now. We also added two pieces of scrap wood to the back of the frame to make a fourth side.
STEP 4

Once the sheeting and the back were in place, we cut trim molding to fit inside the MDF frame, around the perimeter of the grate. The molding really gives the radiator cover a more finished look. At this point, I filled in the imperfections with wood filler.
STEP 5
After a few hours, I hand-sanded the wood filler and the sides of the MDF. Then I rolled three coats of white paint onto the cover, and we finally put it into place over the radiator.
STEP 6

On top, I added stained poplar to make a shelf. And on the back of the cover, I added a piece of sheet metal to radiate heat out into the room.
Thanks, Christina! If you loved this post, visit Christina’s Adventures for even more incredible home decor ideas.