We may earn revenue from the products available on this page and participate in affiliate programs. Learn More ›
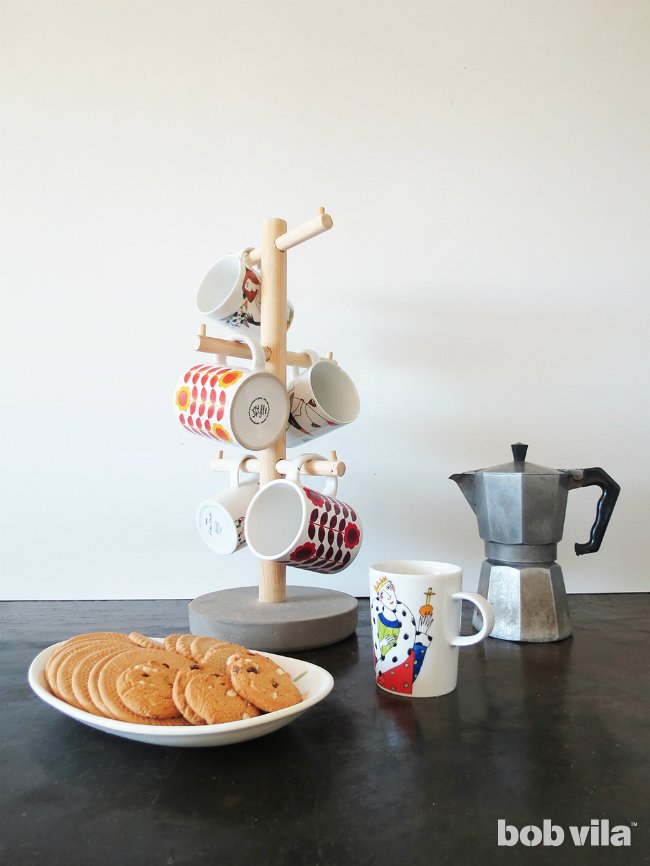
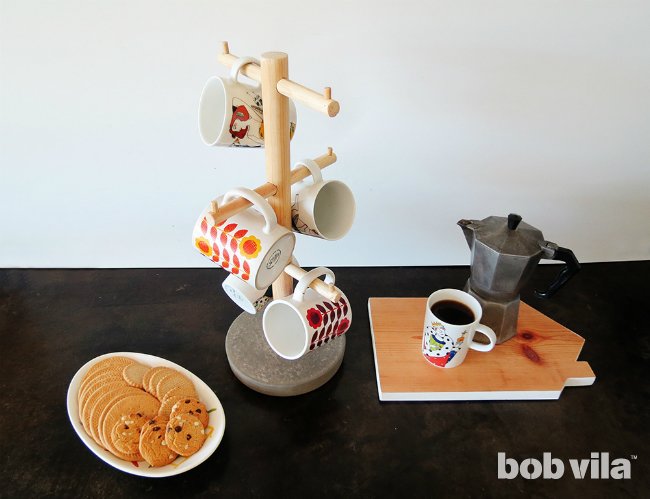
In a groggy morning, you want that first cup of coffee to be as accessible as possible. That means mugs at the ready so that you can find them even with your eyes half-shut. To remove fumbling in the cabinets from your morning routine, corral (and display) your favorite cups at your coffee bar using a DIY mug rack. Easily assembled with dowels and a concrete base, this modern mug tree injects warmth into your kitchen, breakfast nook, or drink station—all before your java begins brewing.
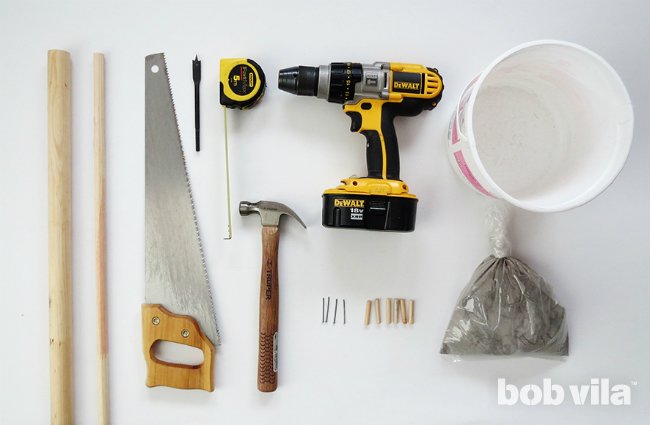
TOOLS AND MATERIALS
– 1-1⁄4-inch wooden dowel
– 5/8-inch wooden dowel
– 1⁄4-inch wooden dowel
– Ruler
– Pencil
– Handsaw
– Utility knife
– Drill with a 5/8-inch bit and a 1⁄4-inch bit
– 2-inch nails (4)
– Hammer
– 2.5 lbs of dry concrete mix
– Trowel
– Painters tape
– Plastic container (8 inches diameter)
– Level
– Wood glue
– Foam brush
– Mineral oil
STEP 1
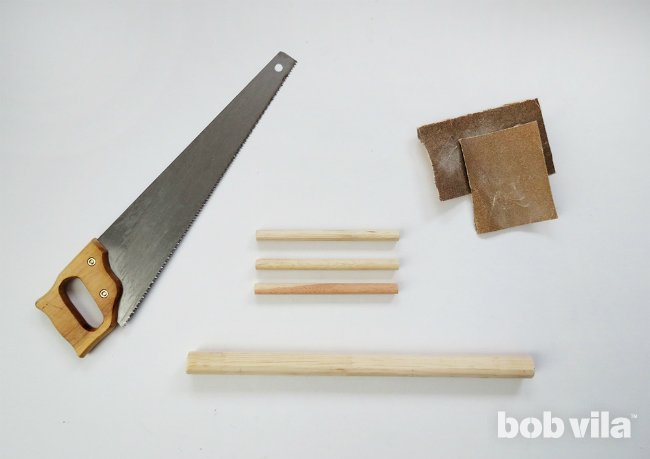
The thickest wooden dowel (1-1⁄4 inches in diameter) will serve as the “trunk” of your mug tree. Cut it to be 18 inches long. Then, you will use the 5⁄8-inch dowel to make “branches” for hanging cups; cut it into three pieces, each 8 inches long. Sand every piece to remove splinters.
STEP 2
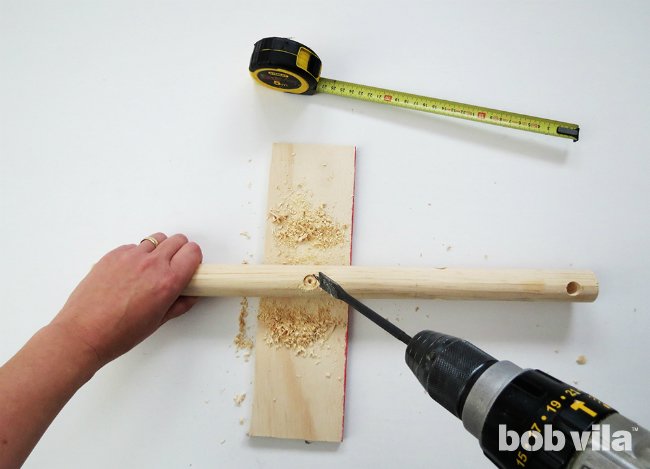
Next, you’ll drill three holes through the trunk that for the 5⁄8-inch dowels to slide through. Using a ruler, mark where to drill the first hole at 1 inch from either end—going forward, this will be the top of the tree. Then mark for the second hole 5 inches from the first, and a third hole 5 inches from the second.
As you’ll see in the photo of the finished project, the top and bottom branches run parallel, while the middle one is perpendicular. Keep this in mind while making the cuts: Hold the trunk firmly with one hand and use the 5⁄8-inch bit to drill the top and bottom holes through the same side of this large dowel, then roll it so that you can drill the middle hole perpendicular to the others.
STEP 3
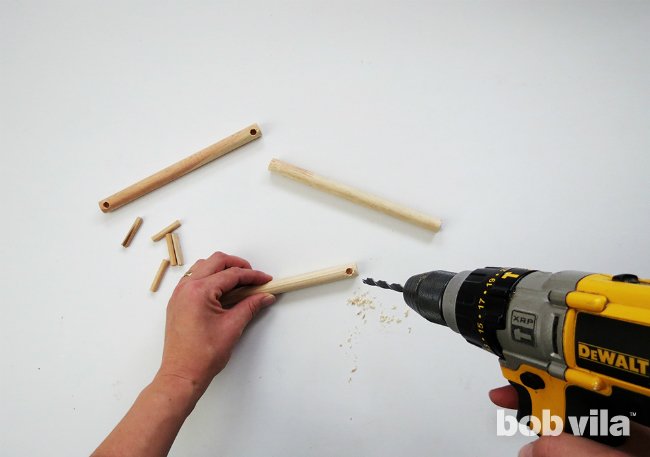
To prevent hanging cups from easily slipping off any of the branches, you’ll create a short hook at the end of each from the thinnest dowel. First, switch to your 1⁄4-inch bit and drill a hole at each end of the 5⁄8-inch dowels (the three branches), without piercing all the way through.
Then, cut the 1⁄4-inch dowel into six 3⁄4-inch-long pieces. You can use a utility knife or a small handsaw—just watch your fingers. Set all of the dowel cuts aside for now except for the trunk.
STEP 4
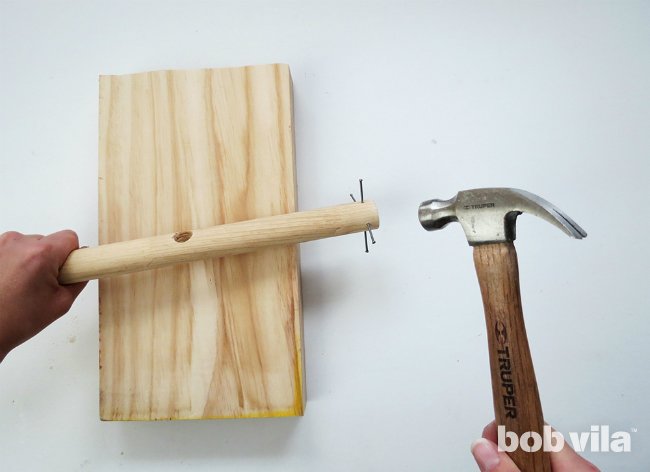
Take the end of the trunk that is without a hole—the bottom of the tree—and hammer in four nails, equally spaced around the dowel’s circumference. (If the nails were clock hands, they’d be at 3, 6, 9, and 12.)
STEP 5
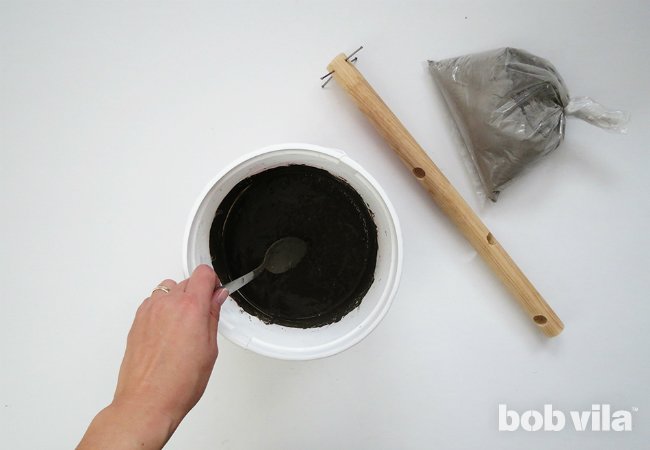
Now, mix up your concrete. Pour the dry mix into a plastic bucket that’s 8 inches or so in diameter (about as wide as your branches are long). Then add as much water as the package recommends, and stir. Your wet mix should be at least an inch deep to create a substantial base for the tree.
STEP 6
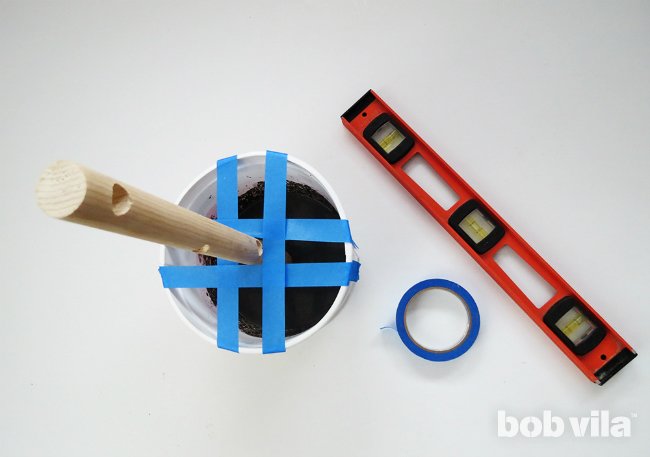
Push the trunk, nail-end down, into the center of the concrete-filled bucket. Check with a level to ensure that the stick is perfectly vertical, and then tear 4 long strips of painters tape and lay them across top of the container to hold your trunk steady while the concrete cures. Don’t move it for at least 48 hours.
STEP 7
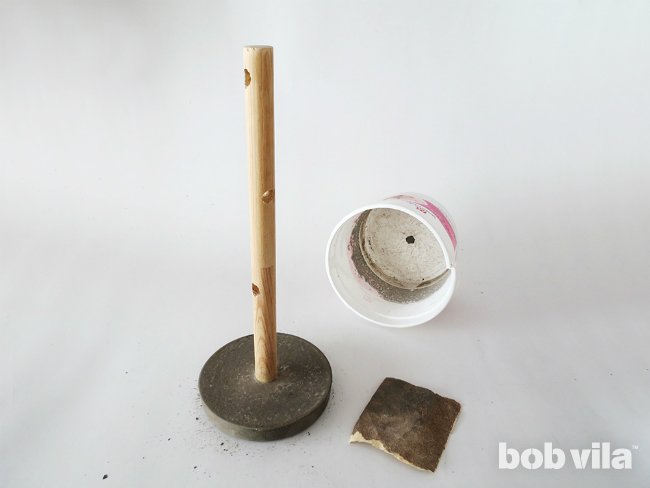
Once the concrete is fully dry, cut off the plastic mold. Sand the concrete base for a better finish.
STEP 8
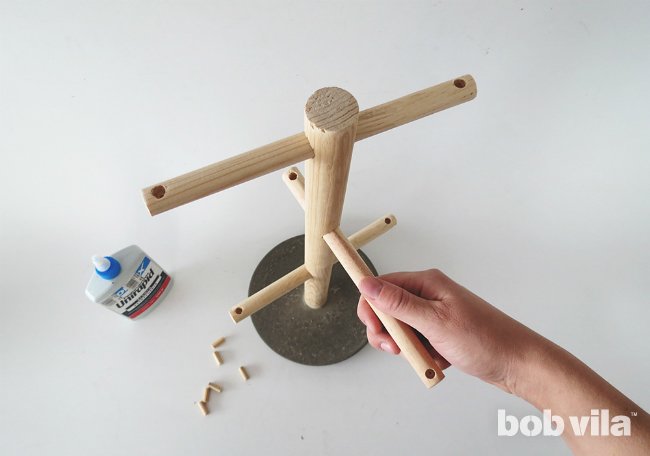
Slide the 5⁄8-inch dowels through each of the three holes. When they are pushed exactly halfway through, twist them so that the holes at the ends face up.
STEP 9
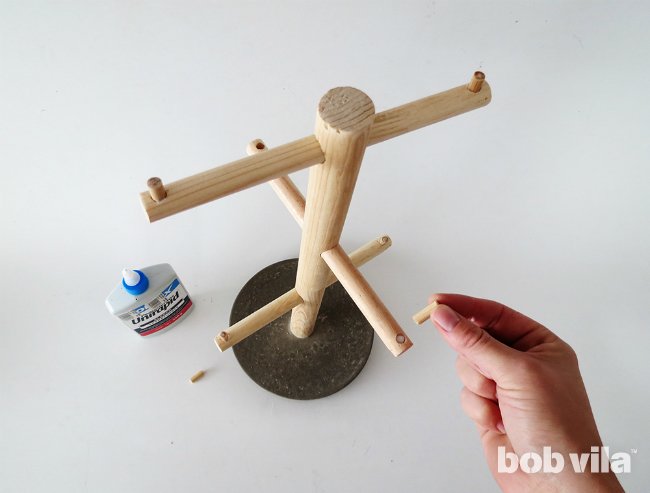
Squeeze a dot of wood glue into each of the remaining holes and fit a short, 1⁄4-inch-wide dowel inside. Allow the glue to bond for the amount of time recommended on the bottle, for best results.
Finally, brush a coat of mineral oil—or any other desired (food-safe) finish—and, while that dries, head to the cabinets to unload all of your favorite mugs. You’ll be able to hang them from your assembled coffee mug tree and enjoy the newly organized kitchen corner before the next morning!
Ama is a DIY addict and the creative mind behind Ohoh Blog. She likes home decor, lighting, and furniture projects that may involve painting, sewing, drilling…no matter the technique! Whatever she has on hand is inspiration to create, and fodder for her serious addiction to upcycling.