We may earn revenue from the products available on this page and participate in affiliate programs. Learn More ›
Few things say autumn more than fresh apple cider. So what if you could make your own from your backyard. That’s what Instructables user Mike Craghead and his friend John Saveliff set out to accomplish. And the execution of this DIY project is absolutely genius! Want to make your own? Read on to learn from Mike and John, and get the tutorial.
Note: This isn’t necessarily a beginner’s project. Mike stays humble about his own DIY prowess admitting, “I have a basic understanding of avoiding the pointy end of saws and drills and whatnot… but there is absolutely no way I could have managed the rest without John’s tools and expertise.” John adds that for anyone considering attempting a DIY apple cider press, “Intermediate woodworking skills and access to a drill press, table saw, router table or lathe, and screw gun is highly recommended.”
MATERIALS
– Square-head screws
– 1-1/2″ stainless steel nails
– Carriage bolts
– Jointer
– Power drill
STEP 1
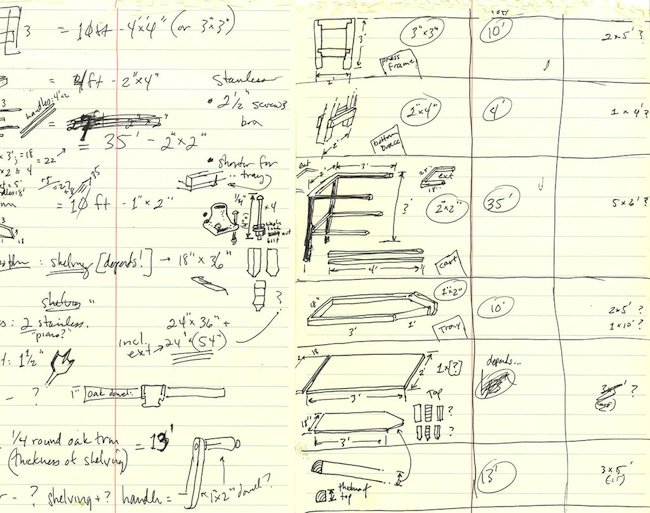
To create a design for our apple cider press, we “cherry-picked” our favorite features from the various versions out there, and there are endless ways to remix the various components: A bottle jack can be substituted for the big screw, for instance. There are approximately four gazillion ways to build one of these so I’ll leave it up to you to figure yours out, and will spare you the exact measurements.
STEP 2
We ran all the wood through John’s jointer, which is really fun if you’ve never done it with hardwood: a grungy-looking chunk of wood goes in on one end, and a beautiful piece of artwork comes out the other end, the grain suddenly visible on an almost perfectly smooth surface.
STEP 3
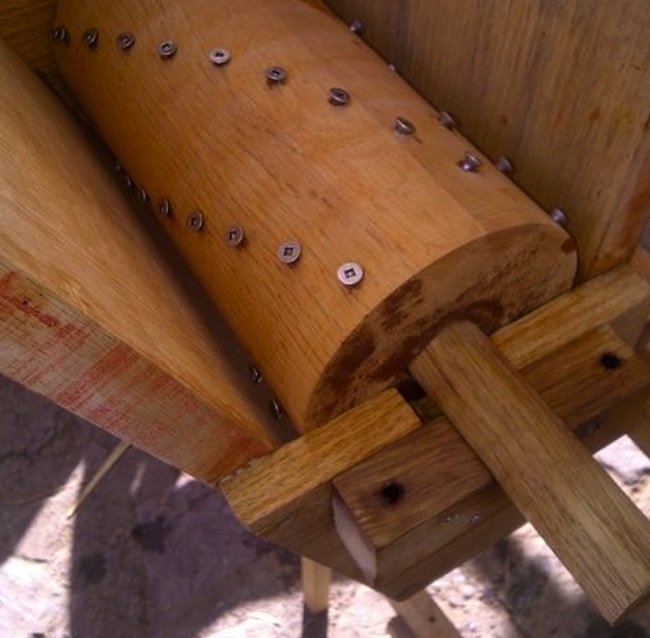
I drilled good pilot holes, soaped each screw… and still stripped the hell out of quite a few of them. So when you look at the parts I made, please do not look very closely.
STEP 4
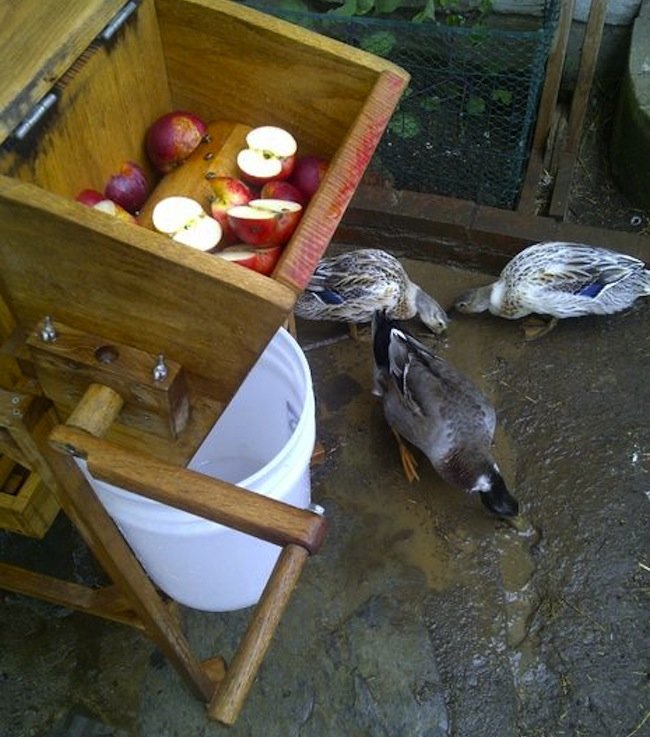
John’s grinder wheel was one of the first things we were able to really play with as the frame was coming together. The hopper is removable, both for cleaning and so it can all be packed up smaller when the season is over. A small clamp provides a little insurance so the act of grinding doesn’t pull the hopper off of the frame.
STEP 5
Once the apple cider press is built, it’s time to grind your fruit. But first, sanitize by spraying all the surfaces with a diluted iodine solution and let that dry.
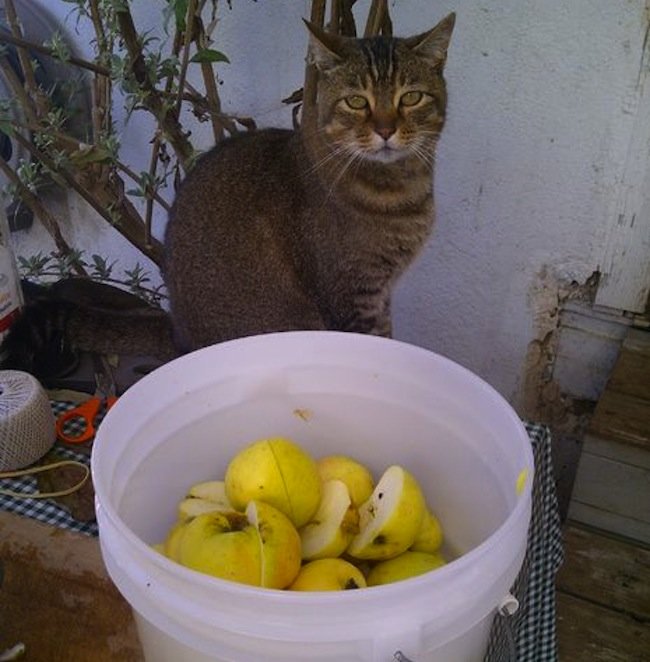
To maximize juice yield, we let the apples sit for a week or so. A mix of sweet and tart apples usually tastes best, but I’ve never met a batch I didn’t like. The apples are cut in halves or quarters (otherwise they’d just roll around in the hopper!). We toss any brown gross bits in the compost, but minor blemishes on the fruit are no big deal.
A 5-gallon bucket sits under the hopper to catch the ground apples, held in place by a little wooden arm that swings out into position. Then we fill up the hopper and start grinding!
STEP 6
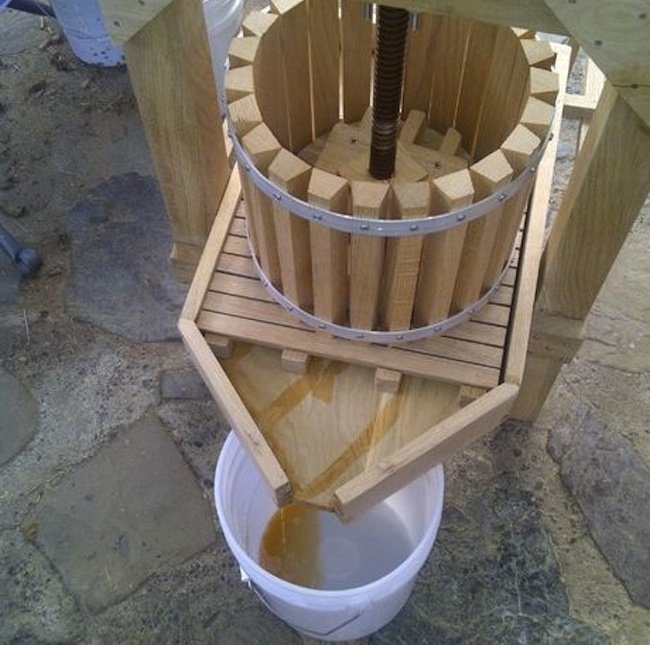
The bucket will collect the ground apples, or pomace. When it’s about 2/3 full, stop grinding. Place the pomace in a plastic bucket lined with netting and tie into a bundle. Place the bundle into the barrel or “pressing tub,” then place a disc made of cutting board material on top. Repeat until you have stacked four bundles of pomace.
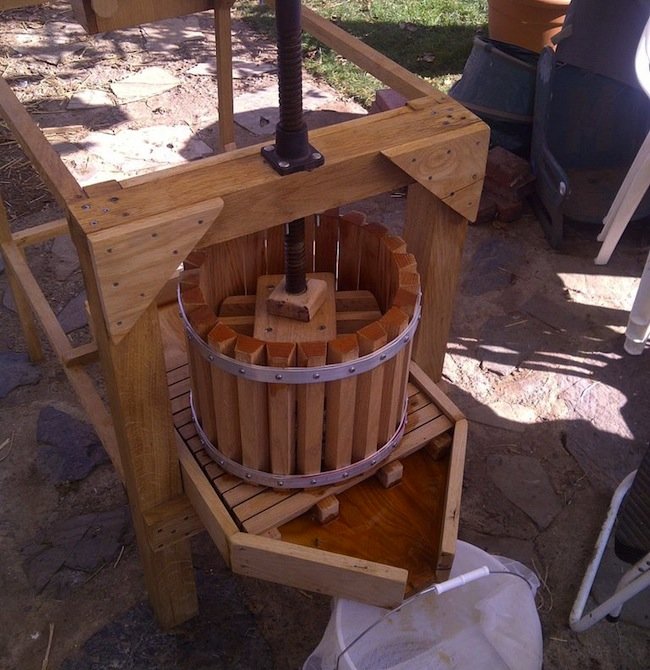
STEP 7
The barrel, drain, and tray all slide under the screw, and a small sacrificial bit of oak protects the pressing board from direct contact with the screw. Place a bucket with netting below the spout.
Spin the screw until it hits the board and slows down, then crank it a few more turns until the whole structure gives a little groan. Depending on how juicy the batch is, the cider starts pouring out immediately, and the first couple of gallons happens right away. When the juice slows, turn the handle another half turn, and continue that for at least 15 minutes.
When Mike’s cider press is not pressing cider, he stores it under a backyard awning. “My garage is a terrifying no-man’s land so it won’t fit in there just yet, but that’s always been the plan… I’m still in search of the best way to cover it up against all elements, whether or not I manage to eventually squeeze it into the garage.”
As for clean-up, Mike says hosing down the press just after use, works well, “followed by a damp cloth.” He adds, “We also sanitize with a very diluted iodine solution before use. The whole thing comes apart pretty easily, and once it’s hosed off I hang all the parts out to dry. We don’t use anything too powerful because we’re not fond of drinking chemicals. I’ve read that oak has some natural cootie-preventing properties, too.”
Thanks, Mike and John! Check out their Instructables for the full tutorial! Or find even more inventive DIYs on Mike’s Instructables page—including lots of ideas for pumpkins.