We may earn revenue from the products available on this page and participate in affiliate programs. Learn More ›
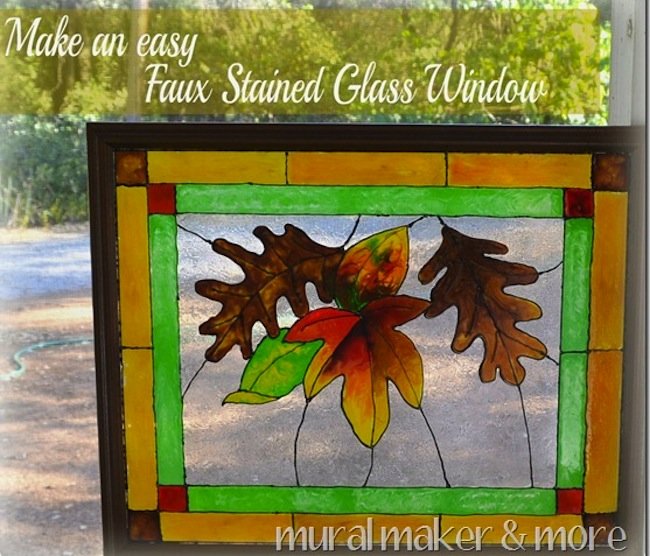
There’s something about the nostalgic and timeless beauty of stained glass… but genuine stained glass comes with a hefty price tag. So, innovative DIYers like Colleen from Just Paint It are making their own—and so can you!
Colleen’s a self described self-taught artist. “Years ago I was a display designer in a large craft store. Faux finishes were just coming into vogue and there were no glazes or tools locally available in California.” That was pre-Internet, which means Colleen got really creative with new craft products to create different effects. Eventually her love for the craft took her inside people’s homes, painting faux finishes and murals.
But for this paint lover, not all paint is equal. For home decor projects, she favors chalk paint and for artwork, watercolors. “I’m new to both of them and I absolutely love them. Chalk paint is incredibly forgiving and watercolors give a ‘painterly’ look with very little experience or effort.” She says she stays away from crackle finish, though. “I can’t think of one time I’ve had success with it.”
If you tackle this or any other paint project, here’s Colleen’s advice: “First and foremost—it’s only paint! If something doesn’t turn out, just paint over it and start over. Also, we are our own worst critics. Give yourself a break and some time to get the hang of a technique or new product.”
So with that in mind, here’s how to make your own faux stained glass!
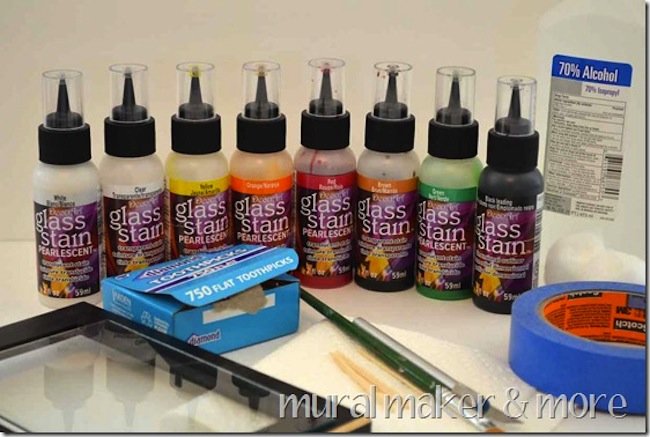
MATERIALS
– Glass surface (I used a thrift store frame)
– Rubbing alcohol and cotton
– Pattern
– Glass stain leading
– Utility knife
– Glass stains (clear, yellow, orange, red, brown, and green)
– Toothpicks
– Paper towels
– Small paintbrush
– Painter’s tape (optional)
You can use anything for a pattern, or my fall leaves, if you like. All you need is an outline. Or you could use stencils.
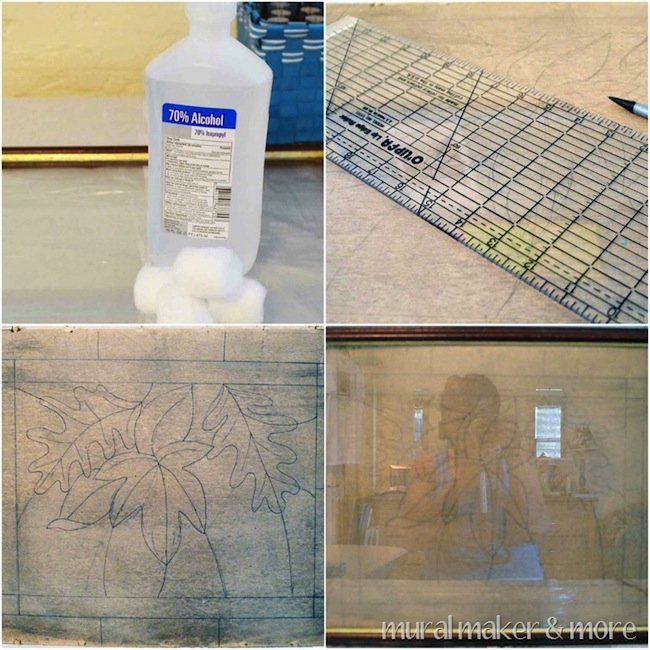
STEP 1
Thoroughly clean the glass with rubbing alcohol and allow to dry. While it’s drying, mark off the borders. I used the cardboard that came in the frame, created the borders and transferred the leaves.
STEP 2
Pour your glass stain leading. Think about real stained glass—it’s a bunch of pieces of glass that are soldered together. So you want to create that effect with your leading and “solder” the glass into the frame. Leading takes about 6-8 hours to fully dry.
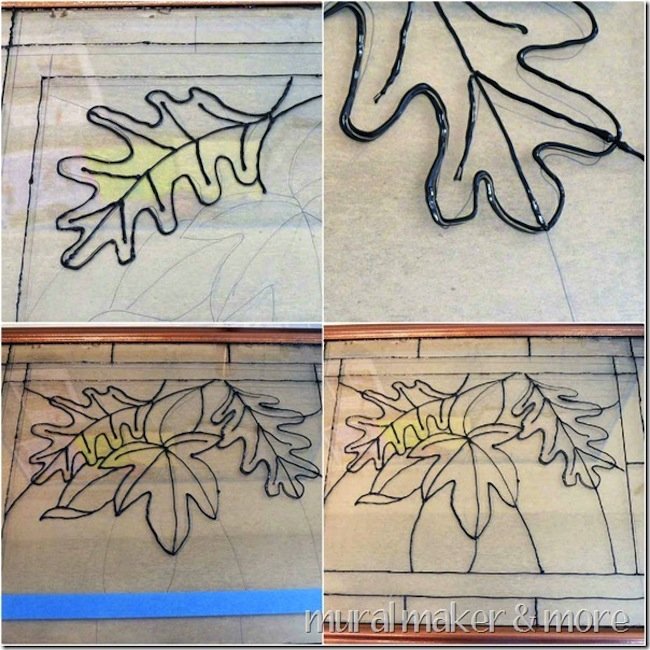
I had some goopy clumps. No worries, ok? Just allow the leading to completely dry and then remove any clumps with your utility knife.
I missed a spot here and there. Again, no worries. Just come back with your leading and fill it in.
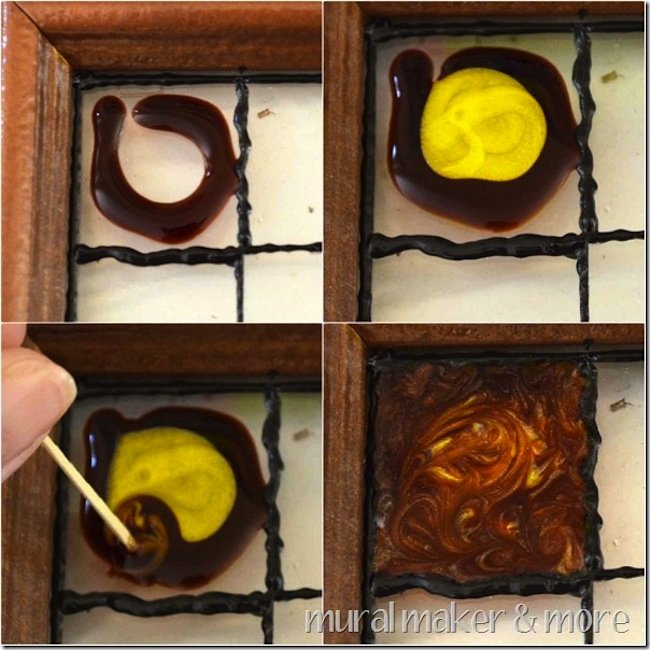
STEP 3
Next, mix and pour your colors. It’s so easy! Just squirt a little brown, then a little yellow, take a toothpick and swirl it all together. So much fun!
Couple of tips: “Pull” the colors to the leading with your toothpick. As the paint dries it shrinks a bit, so you want to make sure you’ve completely filled the space in with color.
I found it more comfortable to work in smaller portions, rather than filling in an entire leaf.
Thanks for sharing, Colleen! To use Colleen’s pattern to make your own faux stained glass window or to watch her video tutorial to get started, check out her website.