We may earn revenue from the products available on this page and participate in affiliate programs. Learn More ›
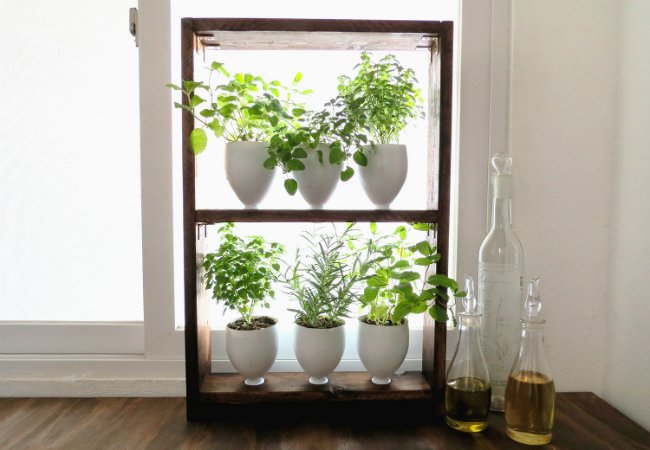
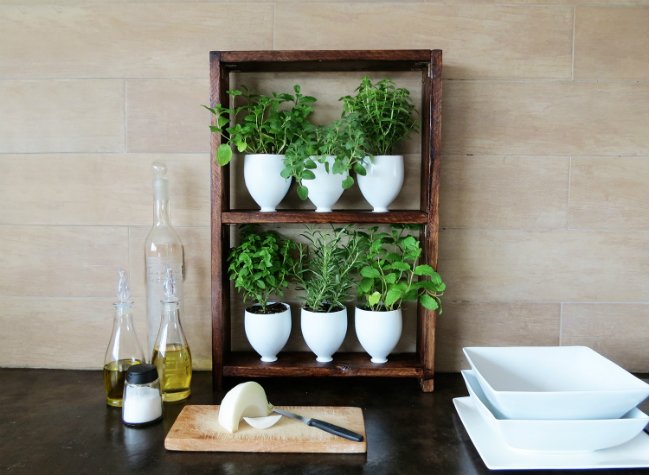
As you welcome spring, bring a pop of the season into the house with a newly handmade vertical garden. This space-conscious upcycling project takes up minimal counter space considering the amount of herbs you’ll be able to squeeze into it. You don’t need to have a lot of room or even serious exposure to power tools for this easy DIY—just a few plastic bottles, some wood, and a can-do attitude will suffice. What could be more convenient than to have a selection of fresh herbs out on the counter ready to season your home-cooked dishes and sprinkle into summer salads?
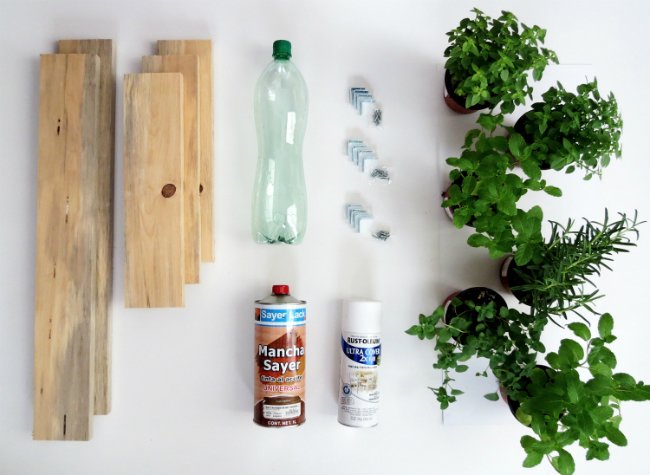
YOU’LL NEED
- 8 feet of 1″ x 4″ lumber
- 6 plastic bottles (choose a medium size, around 1.5L)
- 6 ready-to-plant herbs
Tools & Materials
Bobvila.com may earn a commission from purchases made through these links.
- Utility knife
- Carpenter's pencil
- Ruler
- 1-1/4" hole saw
- Sandpaper
- Electric drill
- Screwdriver
- Angled sash paintbrush
Step 1
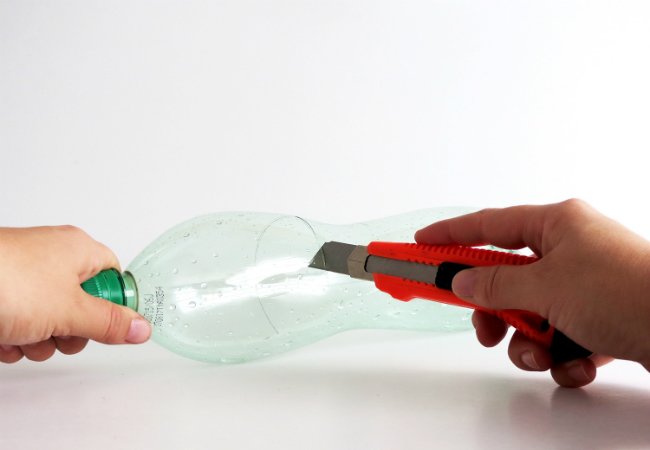
Use a utility knife to cut the tops off each of the six plastic bottles to form six goblet-shaped “planters.” (Tip: Draw a line 5 inches or so from the cap on both sides of your clear plastic bottle to give you a little bit of guidance.) Do your best to cut as straight as possible.
Step 2
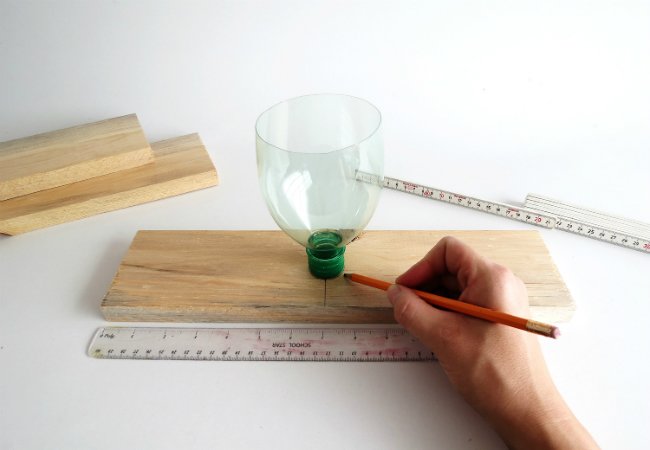
Cut your lumber into five pieces: three 15-inch-long pieces (for the shelves and the top of the frame) and two 25-inch-long pieces (for the sides of the frame). Make it easier on yourself and ask for the cuts at your local hardware store. Once your pieces have been cut, grab a 15-inch length of wood and trace one of the bottle caps at the exact center of the piece.
Step 3

Trace two additional cap shapes on either side of the first, roughly 5 inches apart. Before you do any cutting, stand the bottle tops next to one another to make sure you’re leaving enough room for all three to fit comfortably.
Step 4
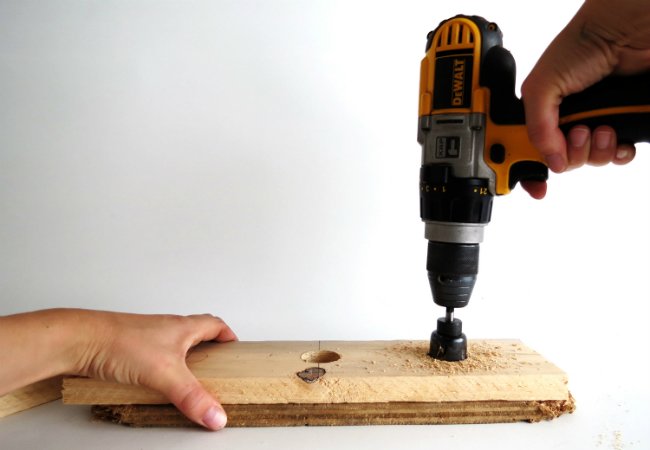
Secure the wood with clamps. Then, following the marks, drill three holes in the wood piece with a 1-1/4 inch hole saw.
Step 5
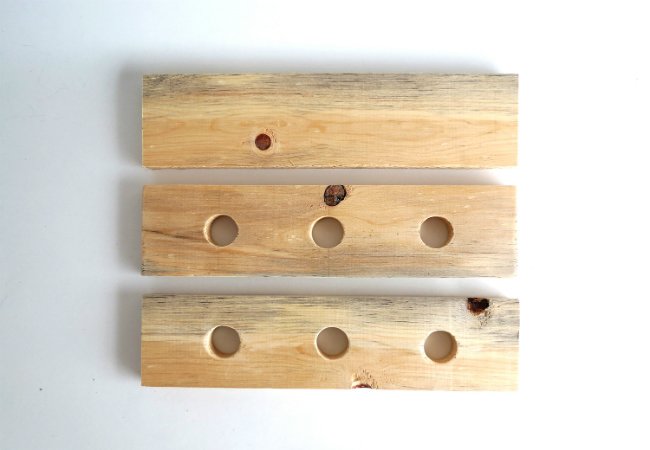
Repeat Steps 2 through 4 on one more 15-inch piece of wood. At this point, you’ll have two 15-inch lengths of wood with three holes in each and one that is still solid; the solid piece will serve as the top of the frame. Erase the pencil marks and lightly sand away any rough edges.
Step 6
Now, set aside the 15-inch pieces while you use the longer pieces to assemble the frame.
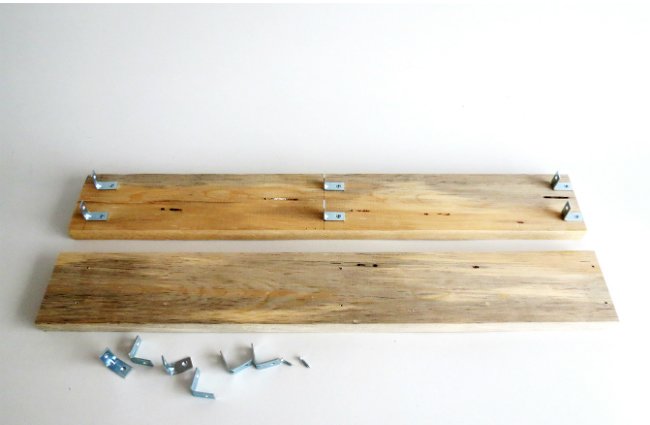
First, position six brackets on one of the 25-inch lengths. Two brackets at the bottom will support the bottom shelf (leave about an inch below the shelf to give your planter feet); two in the center will support a shelf; and two at the top will support the top of the frame (position these brackets an inch from the top to account for the thickness of the wood). To be sure of the screws’ positions and help prevent the wood from cracking, drill small holes before screwing the brackets to the wood.
Repeat on the second 25-inch piece of wood.
Step 7

Now you’re ready to fit the shelves into place. First, put the solid shelf on top, and mark the screw positions through the bracket holes.
Step 8
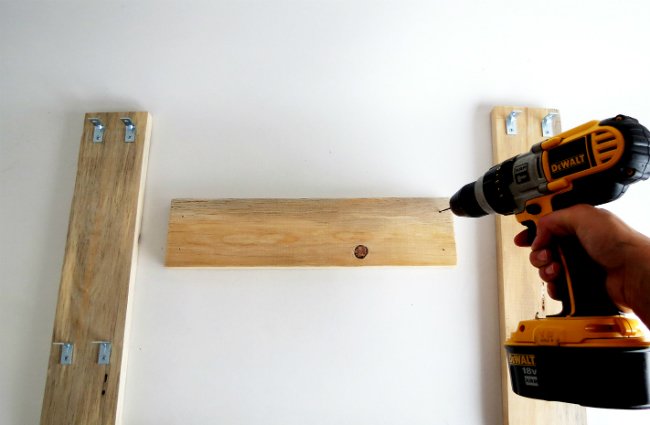
Following the pencil marks you’ve made, drill small holes and then use a screwdriver to secure the top of the frame to the brackets.
Step 9

Repeat Steps 7 and 8 for the middle and bottom shelves, the pieces with the drilled holes.
Step 10

Once the frame is assembled and the shelves are mounted, you can stain and varnish it.
Step 11
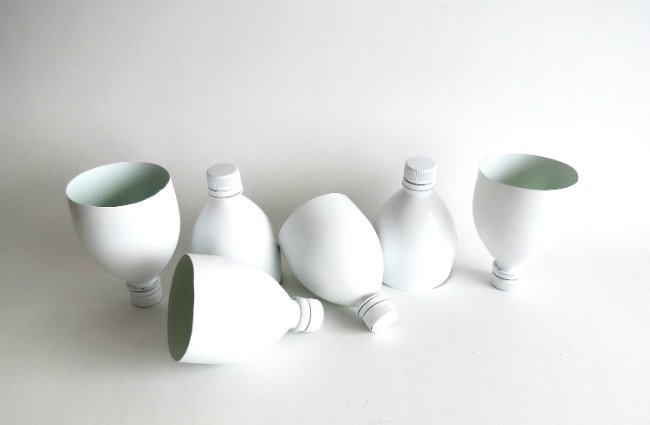
While the shelf dries, turn your attention once more to the plastic bottles. Poke a few holes in each cap to provide drainage. Then, spray-paint the plastic bottles in your favorite color. (We kept it simple with white!) Check the can before you get started to make sure the paint will adhere to plastic, then head outside to spray in a well-ventilated area.
Step 12
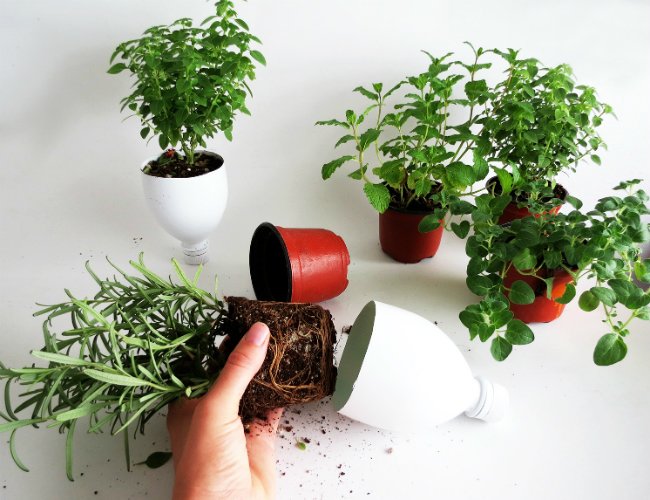
Give the painted pieces time to air-dry. When everything looks good, unpot the herbs and transfer them to the bottle top “planters.” Then, simply slip the caps into the holes in the shelves of your ready-to-grow vertical garden! Whether you choose to leave your garden on the kitchen counter or move it next to a window, having fresh herbs close at hand will make it easy to spice things up.
Ama is a DIY addict and the creative mind behind Ohoh Blog. She likes home decor, lighting, and furniture projects that may involve painting, sewing, drilling…no matter the technique! Whatever she has on hand is inspiration to create, and fodder for her serious addiction to upcycling.