We may earn revenue from the products available on this page and participate in affiliate programs. Learn More ›
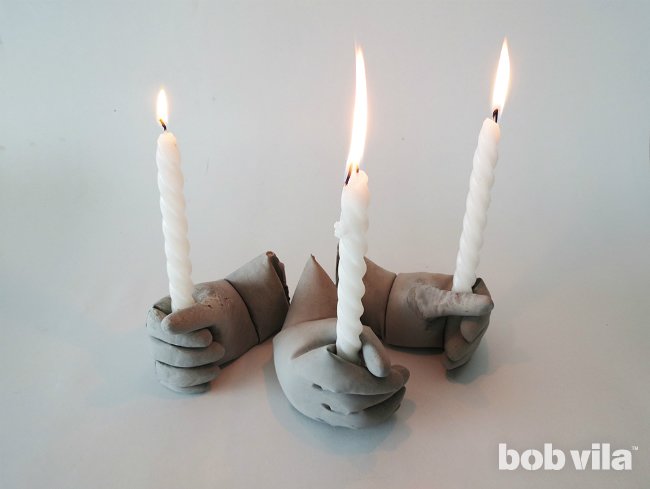
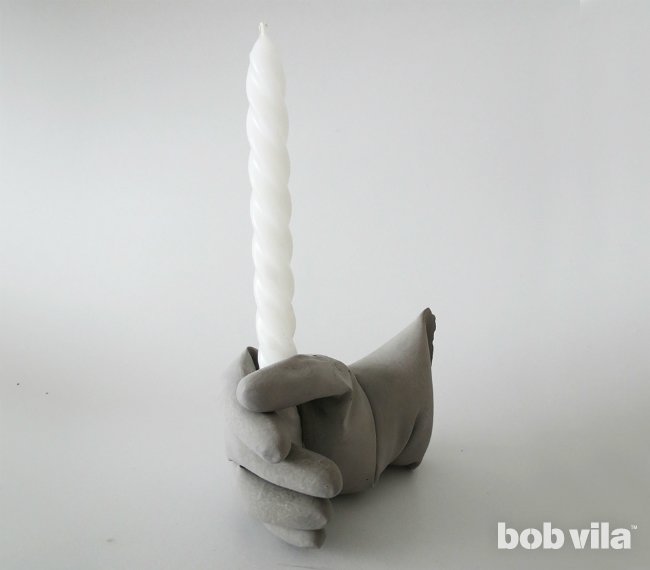
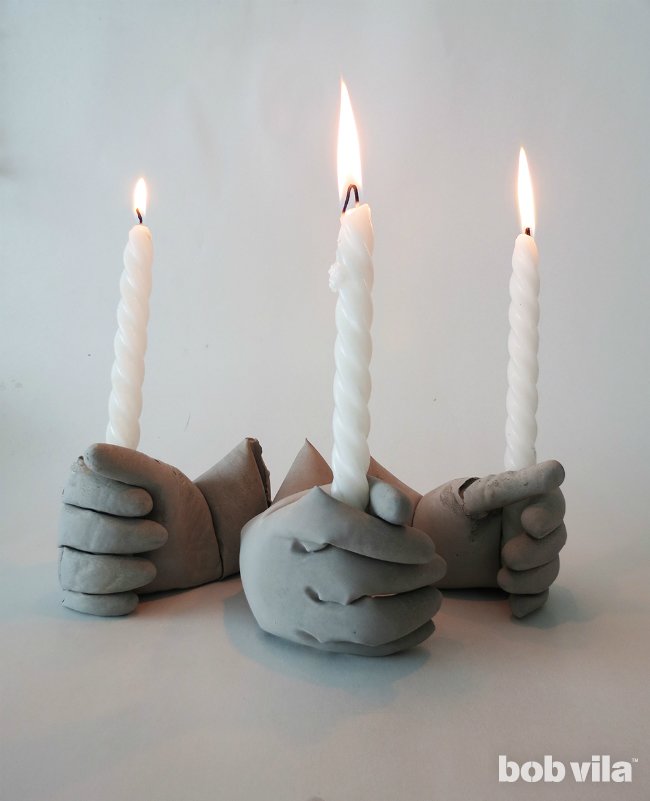
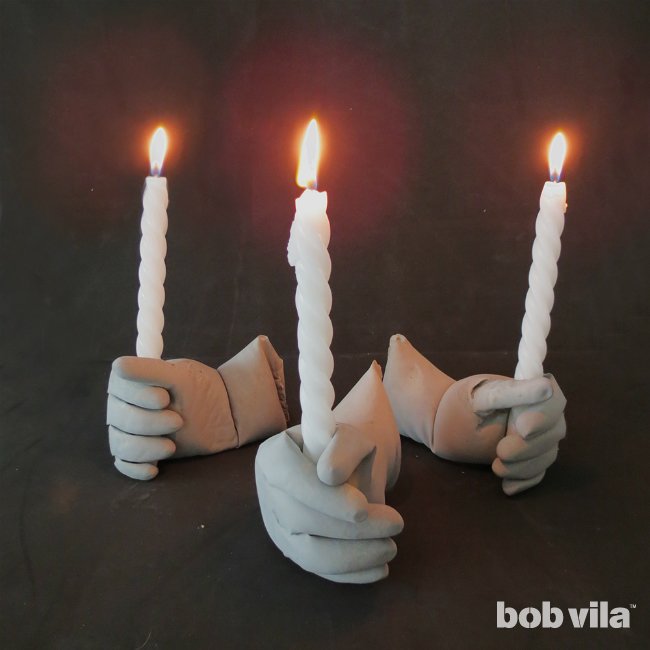
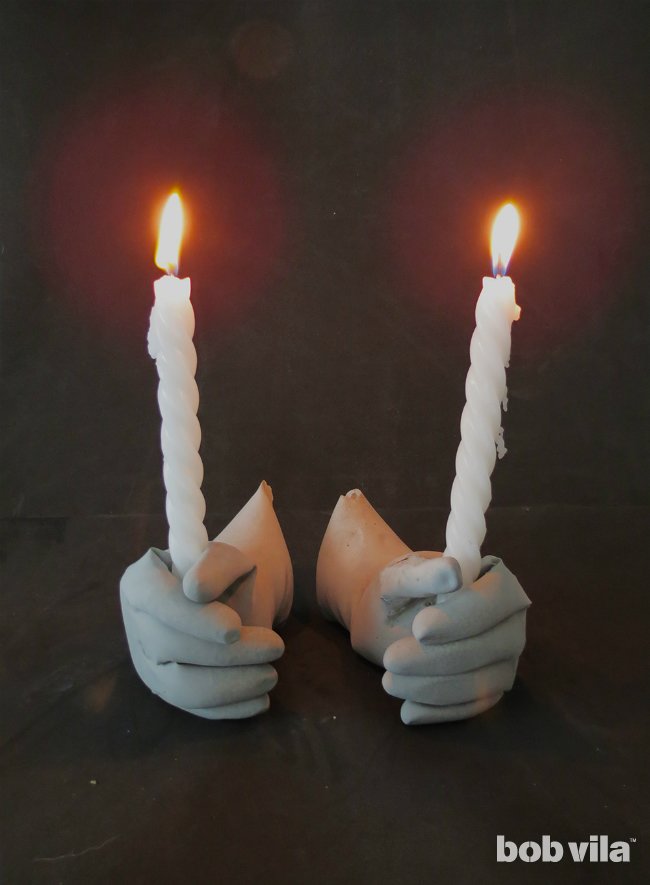
Looking to make your own creepy decor for October’s main event? This easy DIY molds concrete into the shape of a cold, statuesque hand to hold mood lighting at your Halloween festivities. Rest the finished product on a table outside your door to light the way for trick-or-treaters, or have it haunt a dimly lit corner indoors. Wherever you set them up—we recommend making a batch of three of four, for all of your lighting needs—these concrete candle holders are sure to thrill.
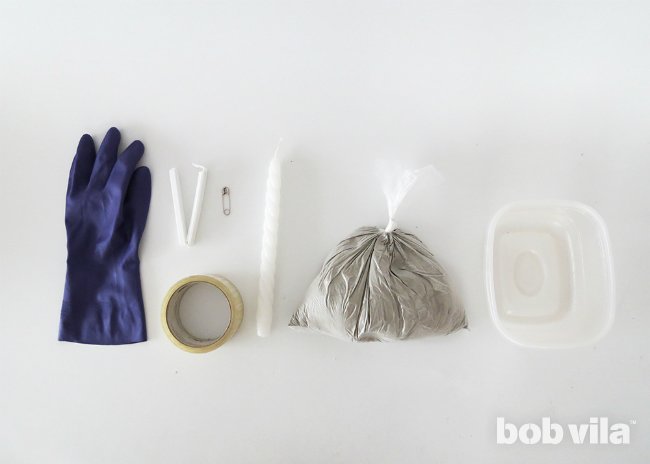
MATERIALS AND TOOLS
– Reusable rubber gloves (4 or more)
– Safety pin
– Concrete (about 2 pounds)
– Spoon
– Bucket
– Chip clip
– Medium-size disposable container
– Tapered candles (4 or more)
– Scissors
– Utility knife
– Tweezers
– Microfiber cloth
– Matches
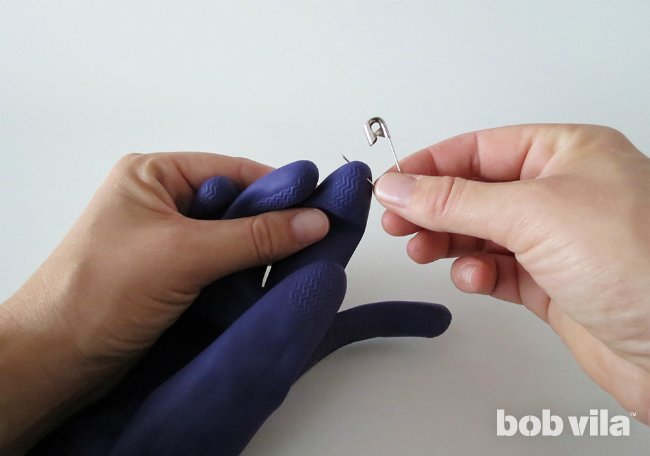
STEP 1
Hold up your reusable rubber gloves and, using the safety pin or a needle, prick a hole at the end of each finger. These holes will allow any air to escape once you start filling the glove with concrete, leaving you with a smoother appearance and fewer visible air bubbles.
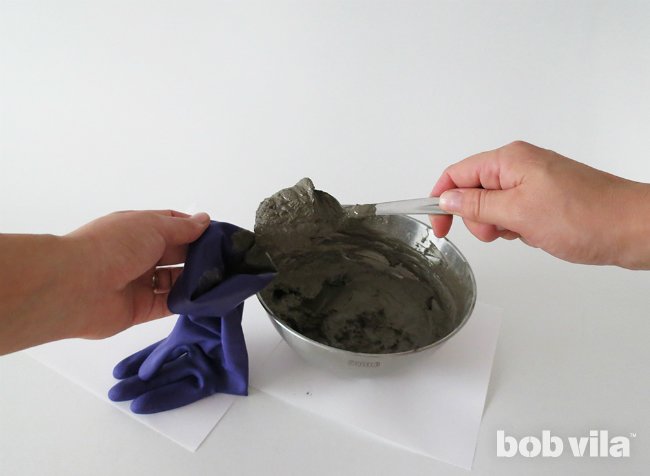
STEP 2
Pour your concrete powder with water in a bucket, according to the package’s recommended ratio, and mix with a spoon (preferably one that’s designated for crafts and won’t make it back to the dinner table) until its consistency looks like that of cookie dough.
Then, shovel the concrete into the opening at the base of each rubber glove. Wiggle each finger to ensure that the concrete travels all the way to the fingertips, and lightly shake the entire glove to prevent an excessive amount of air bubbles as the concrete cures.
STEP 3
Once you’ve filled the glove, clamp the end with a long chip clip to hold the concrete inside.
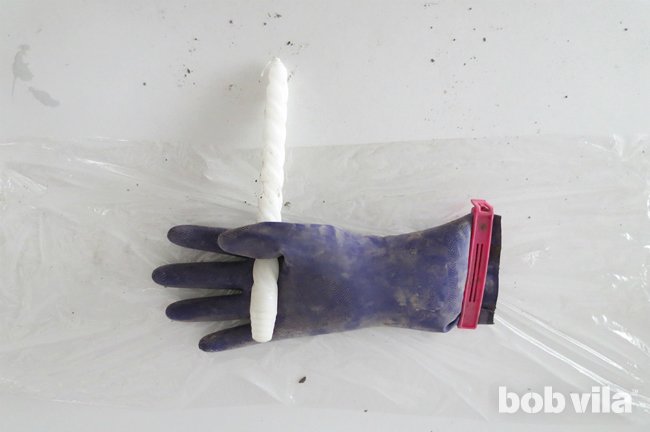
STEP 4
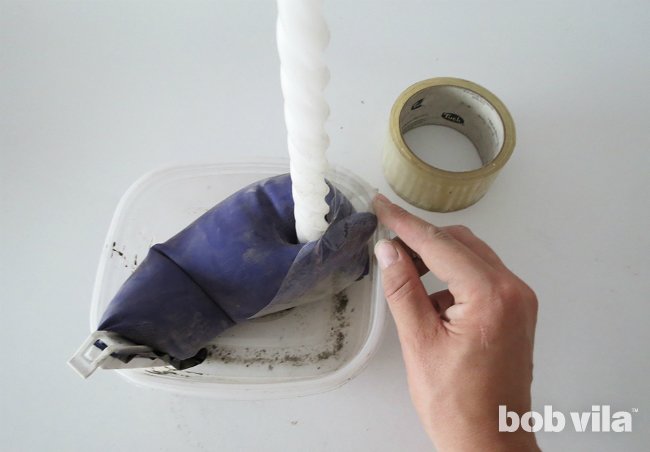
Take your filled glove and and place it on its side (pinky down) into a medium-size container. Then, stand a tapered candle between the fingers and thumb, and carefully curve the glove to grip the tall candle. Try not to fold the fingers too much, or else you might separate the concrete in the palm from the concrete in the fingers!
Once you are satisfied with the shape of the hand, eyeball each finger one last time to see that there is still enough concrete so that none snap when you peel away the rubber in the next steps.
STEP 5
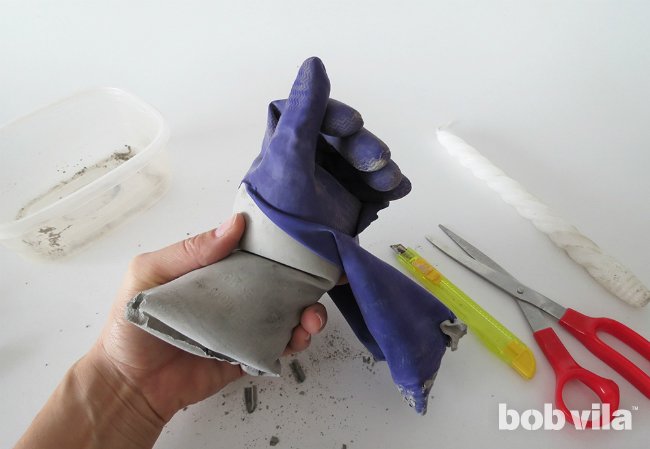
Leave the concrete to cure for the required amount of time specified by your mix (we let ours dry for two days). Once completely cured, you can undo the chip clip and begin to cut away the glove.
Hint: It will be easier if you can remove the candle from the clutch of the concrete hand, but that’s not always possible. Do your best, or snip the rubber off around the in-place candle, if needed.
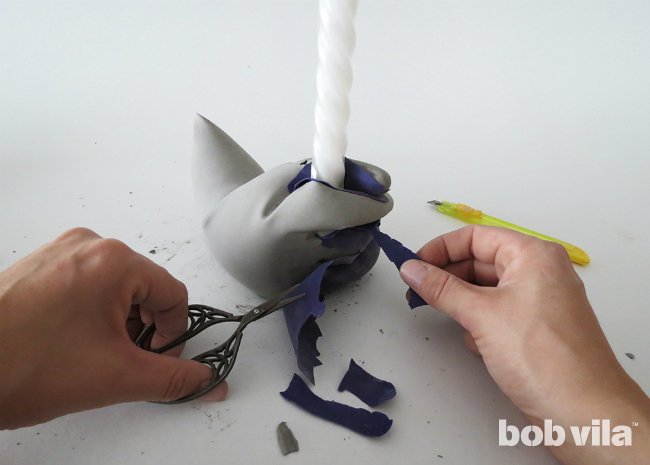
STEP 6
Be patient while removing the rubber between the fingers. Work with small scissors and a utility knife to snip the rubber free, and carefully lift away each piece using tweezers. Peel away rubber slowly and gently in order to avoid breaking any of the fragile concrete fingers.
STEP 7
Wipe off the dust with a microfiber cloth, replace the tapered candle, and strike a match! If you light their wicks early and let the flame go long enough for a few drips of wax to roll, your concrete candle holders will be looking their creepiest in time for the Halloween party.
Ama is a DIY addict and the creative mind behind Ohoh Blog. She likes home decor, lighting, and furniture projects that may involve painting, sewing, drilling…no matter the technique! Whatever she has on hand is inspiration to create, and fodder for her serious addiction to upcycling.