
We may earn revenue from the products available on this page and participate in affiliate programs. Learn More ›
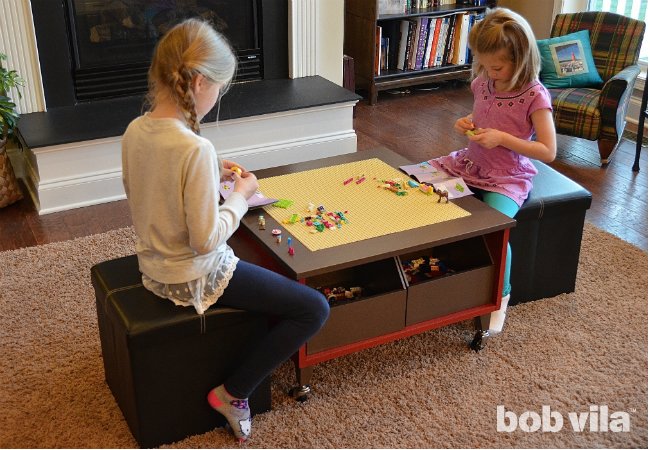
My kids love LEGO so much that it borders on obsession. We have a lot of these plastic bricks and, until recently, no way to keep them easily accessible and ready for play. So, we decided to make a LEGO table.
Sure, you could buy one—but they’re both expensive and not necessarily the most attractive piece of furniture to place in your living room. However, making a LEGO table that’s functional and good-looking is possible by upcycling a piece of furniture you already have, or tracking one down at a thrift store or garage sale. In fact, if you can let your imagination see the potential in something that’s been cast off, creating a LEGO table can be surprisingly easy.
SKILL LEVEL: EASY
If you know how to spray-paint and glue, you can DIY a LEGO table! We also added casters to ours so we could roll it from room to room, but even that process was not difficult and required only a drill and hammer.
Depending on their ages, kids can help with most parts of this project. However, when it’s time to spray-paint, I recommend letting them hold the top of your hand while you apply the spray paint, rather than allowing them to spray-paint by themselves. Small fingers may not have the strength and control necessary for a quality job. Likewise, be cautious with the superglue, as it can cause irritation if it makes contact with skin.
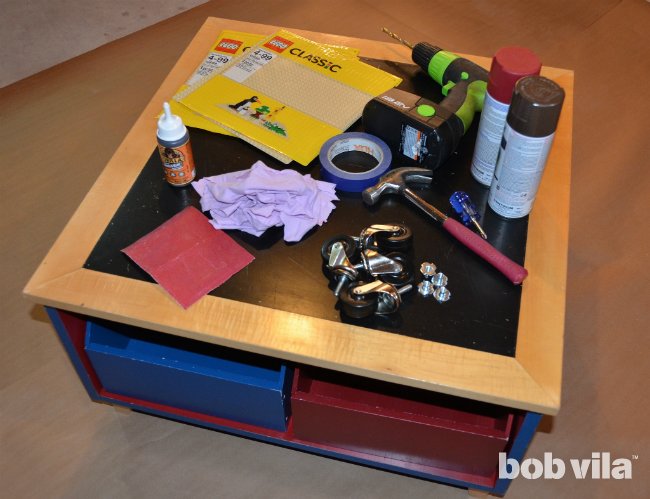
Tools & Materials
Bobvila.com may earn a commission from purchases made through these links.
- Clean rags
- Casters and hardware (optional)
- Drill and bits (if you’re attaching casters)
- Pencil
- Tape measure
- Utility knife
- Cutting mat
- Steel ruler
How to Build a LEGO Table
Building a LEGO table involves planning, gathering supplies and tools, and modifying a piece of furniture. From the paint colors chosen to the set-up of the brick play area, kids can be involved in helping create their ideal LEGO table. The best part about this project is that homemade LEGO tables can be customized to suit a child’s size and style of play. Keep reading to learn how to build a LEGO table.
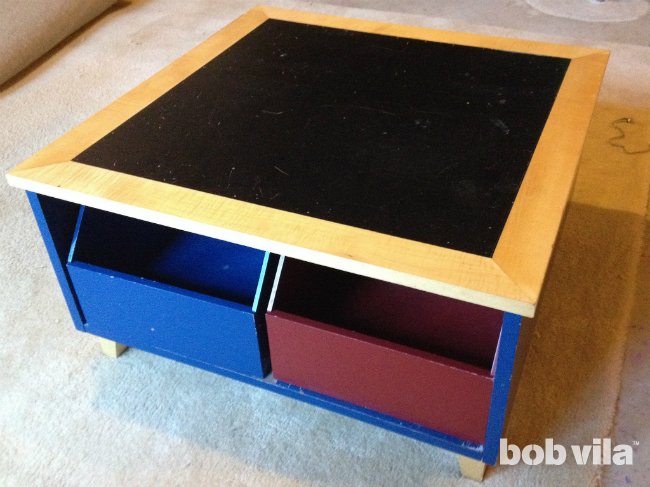
STEP 1: Source an appropriate table.
For this project, we started with an old thrifted table so we wouldn’t have to build the base from scratch. Coffee tables, end tables, side tables, and play tables make great candidates for upcycling into a LEGO table—especially when they’re already equipped with room for storing all those tiny pieces.
Our table came with bins in it, as if it were born to be a LEGO table. If your table doesn’t have drawers, consider how you might solve this storage dilemma, whether by fitting a bin on an open shelf under the table or attaching hooks and buckets to one side.
STEP 2: Repair and prepare your thrift table.
After acquiring a table, find a spot to work that’s well ventilated. Select a spot where it’s OK to create some dust and a little mess, like in an open garage, open shed, or backyard patio. Then, carefully inspect your thrifted table for any areas that might need repair.
Check the legs and secure them to make sure the table is sturdy and ready to safely handle children playing. If there are any loose or broken pieces, use glue to reattach them. The appropriate glue for a LEGO table repair depends upon the table’s material. For example, wood glue can work well for wood tables.
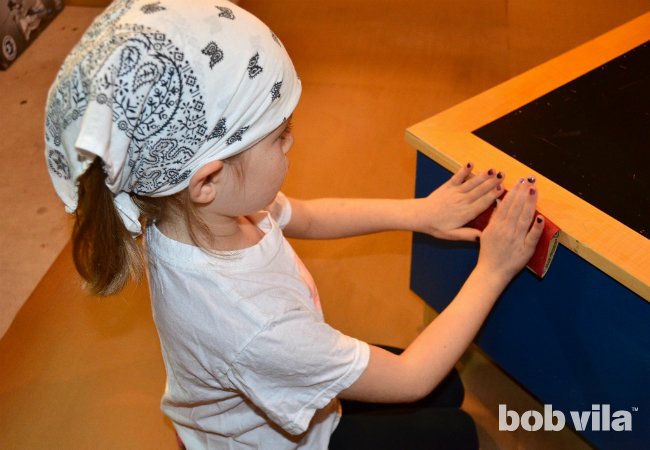
After the table is stable and the reattached pieces are glued and dry, sand down any rough spots to create a smooth finish that’s paint ready. Then, vacuum and wipe the table thoroughly, and allow it to dry before you start the next step of painting.
STEP 3: Spray-paint the table in a well-ventilated area.
Lay out a drop cloth where you plan to paint. If you’re using more than one paint color, prep your piece by properly masking the areas that you don’t intend to paint in the first round. For ours, we removed the legs and bins, and masked all but the top of the table so we could paint those elements hammered brown. After those pieces dried, we coated the bottom of the table in red. (I chose a color scheme that I would enjoy seeing, whether in the playroom or the living room.)
Hold the can of spray paint about 12 inches from the surface, and apply using a back-and-forth sweeping motion. Distribute the spray just a little wider than your piece. Start depressing the nozzle a couple of inches off the left edge of the piece, sweep across, and let go a couple of inches outside the right edge. For best results and fewer drips, apply several light coats (leaving an hour to dry between each) rather than a single thick one.
To protect the newly painted finish and help it resist chipping during the playtime that’s sure to ensue, apply at least two coats of spray urethane, employing the same technique you used for the spray paint. Allow the urethane to dry for at least 48 hours to completely cure.

STEP 4: Reassemble the disassembled table parts.
Once all the painting is complete, make sure the paint is cured before reassembling any pieces you took apart to paint. Cure time is longer than dry-to-the-touch time, so check the fine print on the spray paint can for the manufacturer’s recommendations on when painted items are ready to be touched.
If assembling the table before the paint is fully cured, there’s a risk of damaging the finish and causing bins or drawers to stick. When our project was cured, we screwed the legs back into place to prep them for casters.
STEP 5: If desired, attach caster wheels for easy mobility.
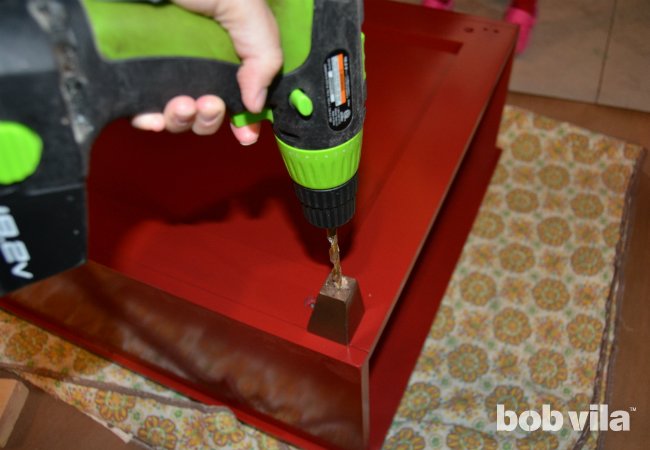
If you choose to use casters, flip your table onto its top so it’s easier to attach them to the legs.
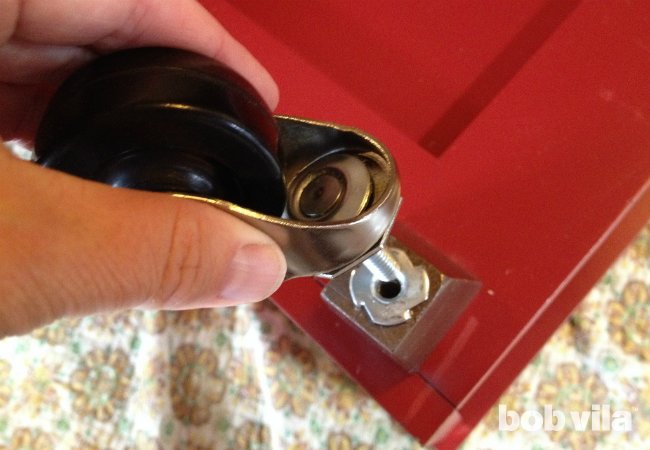
- For wheels with a threaded stem, drill a hole using a drill bit that’s sized for the threaded stems into the bottom of each leg. Then, hammer a T-nut into each one, and screw the casters into place with a drill.
- If you’ve picked up a set of plate casters, simply use four screws to attach each metal plate to one leg.
Before moving on to the next step, flip the table right-side-up and check it for level and stability. Then, check that the table rolls smoothly and lock the casters in place.
STEP 6: Determine how many LEGO baseplates will fit your table.
This step involves creating a surface that’s ready for LEGO construction. By covering the top surface with baseplates, which function as LEGO pads for a table, bricks can easily attach to the surface for sturdy construction play.
Ideally, you’re repurposing a table with a square or rectangular top that makes it easier to size the baseplates that come in 10-inch and 15-inch squares. To determine how many baseplates will fit, measure the length and width of the available tabletop surface. Then, divide each measurement by 10, and then by 15. If you’re lucky, one of the answers will be a whole number. If not, one or more baseplates may need to be trimmed.
STEP 7: Cut the baseplates to size to fit your table (if necessary).
It’s unlikely that a tabletop will be perfectly sized to fit LEGO baseplates without any modification. Since baseplates are plastic and brittle, scissors don’t work and a power saw can damage the little studs. The easiest way to cut a baseplate without risking damage is using a utility knife, metal ruler, and cutting mat.
Mark the baseplate with the desired new measurements, then align the baseplate with the squares on the cutting mat. Using the knife and ruler, score the baseplate. When the score allows the plate to bend, it may separate easily or it may need gentle movement to pull apart. Sand the cut edges smooth.
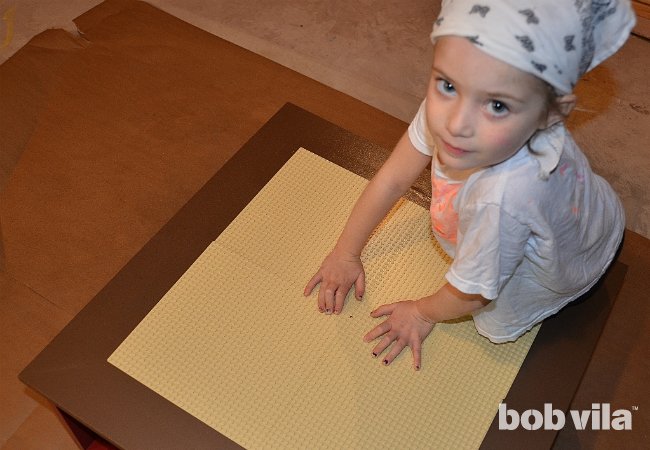
STEP 8: Attach the LEGO baseplates to the tabletop.
It’s time to attach the baseplates using superglue, which will bind them to almost any tabletop. Lightly dampen the surface of the table according to the glue manufacturer’s directions. Apply glue to the bottom of each baseplate, one at a time, and place it on the table. When all of the baseplates are in position, either clamp them down or weigh them with something heavy like thick books to help them bond while the glue cures.
Some superglues (for example, Gorilla Glue) expand by three to four times as they cure, so do not apply glue too close to the edges of the baseplates, or you may end up with a mess. If some glue does seep out during the curing process, lightly chip it off with a sharp screwdriver. Then sand down any chipped paint, mask the LEGO baseplates, and touch up the top with spray paint.
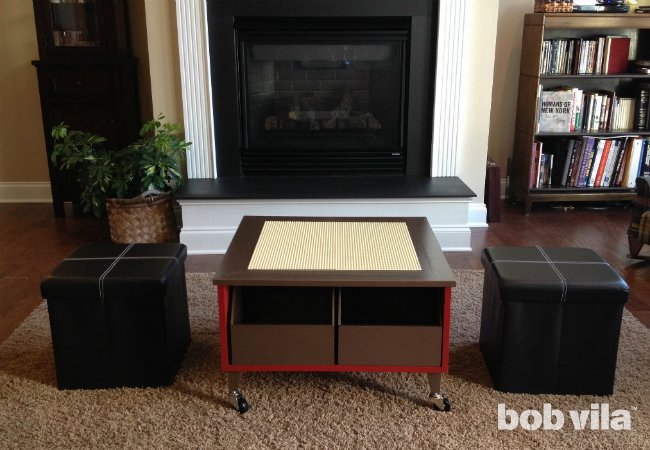
When everything has cured and dried, roll your new LEGO table into the designated play zone and call in the troops! My kids can’t wait to build on it, and I can’t wait to see where their imaginations take them.
FAQs About Making a LEGO Table
Creating a custom LEGO table can be a fun weekend project to do with the entire family. While the how-to steps above can help make this experience easier, every thrifted table may be different and raise specific questions that need to be addressed. To help with concerns, below are answers to some frequently asked questions about how to build a LEGO table.
Q. What’s the best height for a LEGO table to be?
The best height for a LEGO table depends on the size and age of the children who will use the table. Many children enjoy sitting while they build with bricks, but some may like to stand. Consider the size of the other tables and chairs that your child uses to select a height that’s most appropriate for your family.
Q. What’s the minimum child age for LEGO?
The recommended age for kids using traditional LEGO bricks is 4 years old or older. Most children between 2 and 4 can safely enjoy the chunkier version called DUPLO bricks. However, whether the bricks are safe to use can depend on the particular child.
Q. How many children can use a LEGO table at once?
The size of the table usually determines how many children can use a LEGO table. Each child may need a minimum amount of space that’s similar to a place setting at a dinner table. However, building styles vary, so some children may need more space to create larger creations.
Q. What’s the best colored paint for a LEGO table?
The best paint color for a LEGO table depends on your preferences. While you can use primary colors to create a bold color statement, you can also use colors that blend in with the room or create a child’s favorite theme like outer space or roadways.
Final Thoughts
Customizing a LEGO building table can be a fun project that the entire family can enjoy. The easiest way to create an inexpensive table is modifying thrifted furniture with paint and accessories. By following these steps to create a space that’s dedicated to LEGO play, those little bricks will have a home and a place to keep kids entertained.