
We may earn revenue from the products available on this page and participate in affiliate programs. Learn More ›
If the very thought of cutting glass makes you cringe, perhaps it’s because you remember a painful occasion when glass cut you. Yet while caution is required, cutting a piece of glass—to, say, replace a broken window, frame a picture, or top a table—is literally a snap to DIY. And it can certainly save cash: Hiring a handyman or professional window installer to replace a pane can cost upwards of $100.
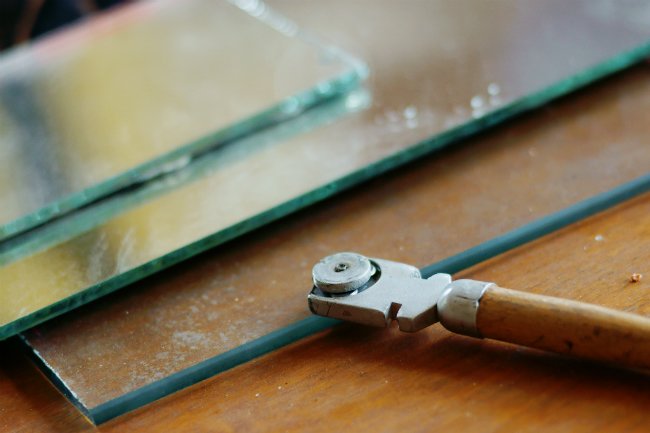
The essential tool at play in your project is a glass cutter, though its name is somewhat misleading. This inexpensive, pencil-sized implement with a carbide- or diamond-tipped wheel in its head scores, rather than slices through, the surface. Once that’s done, you simply snap the pane along the straight line. A beginner with any fears about the process should wear goggles (in the unlikely event of flying shards) and work gloves for protection (keeping in mind that thicker gloves could impair dexterity). It’s also smart to practice on scrap glass till you get the hang of it, but soon you’ll be custom-fitting panes like a pro!
The process for cutting glass follows these simple steps:
- Thoroughly clean the glass you intent to cut.
- Lay the glass on a clean, flat, layered surface.
- Measure the glass to the required dimensions.
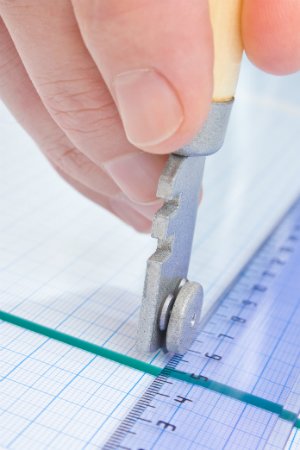
- Score the glass with a glass cutter, using a straightedge for guidance.
- Snap the glass along the scored line.
- Smooth out any sharp edges.
Tools & Materials
Bobvila.com may earn a commission from purchases made through these links.
- Glass cutter
- Work gloves
- Safety goggles
- Framing square
- Ruler
- Tape measure
- Marking pencil
- Square-jaw pliers
- Dowels
- Sharpening stone
Step 1
First, get your glass squeaky clean. Dirt or grime will interfere with the cutter’s operation, resulting in an uneven edge. Using glass cleaner or solvent, thoroughly wipe down both sides of the pane. Make sure the wheel of the cutter is clean as well, by dabbing a bit of lubricating cutting oil on the tip with a rag.
Step 2
For best results, prepare a clean, flat, layered surface on which to cut the glass. A plywood or a similarly resilient work table is best, cushioned with a few sheets of butcher paper, newspaper, or fabric, smoothed to eliminate bumps.
Step 3
Place the glass on your prepped surface and use a framing square, ruler, or tape measure to measure it to the required dimensions.
When cutting windows of identical size—such as double-paned windows—you can use a cut pane instead of the framing square to measure the second window.
To measure a replacement pane for a window frame, remove about ¼ inch from the length and width of the frame’s opening so the glass fits well once glazing is added to its edges. Mark the score line with a marking pencil if you want a visual guide, but it’s not necessary to mark more than starting and stopping points for simple, straight cuts; a straightedge works as a scoring guide.
Step 4
Score! If you plan on wearing goggles and gloves, gear up now. To score the glass, place the straightedge along the line or marks you made. If the straightedge feels slippery, put a piece of masking tape on the underside to improve its stability. Dab a drop of cutting oil on the cutter wheel, and place the side of the tool against the straightedge at the far end of the cut line. Pull the tool toward you, using moderate force in one smooth glide. If you hear a ripping sound, you’ve got the pressure just right; if it sounds like there’s grit on the glass, easy up. Keep going in one single motion until you reach the end. Retracing the score mark increases the likelihood of ragged edges and a bad break.
Step 5
Remove the straightedge and lift the glass. Lay a long dowel directly under the score line and place one palm on either side of the mark. Press firmly to snap the glass in two.
Step 6
The edge of the glass will be sharp! Trim residual slivers or chips with square-jaw pliers if your glass cutter’s head doesn’t have nibbling slots. If using pliers, put cloth or cardboard scraps between the glass and the plier jaws to pad the glass. Use fine-grit sandpaper or a sharpening stone to dull the edge and make the pane safer to handle.
Your next move is perfectly clear: Time to place the glass you’ve cut and cross one more household repair from your to-do list.