We may earn revenue from the products available on this page and participate in affiliate programs. Learn More ›
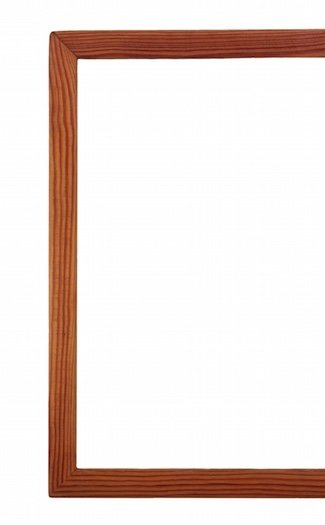
Done any shopping for your home recently? In perusing the aisles, you may have noticed that even a very simple mirror can be surprisingly expensive, considering it’s just a piece of glass flanked by wood on four sides. If you have intermediate woodworking skills—or the willingness to persist through a bit of trial and error—you’ll get a better deal on one by buying the materials separately and frame the mirror yourself. Apart from saving money, taking the DIY route also means you can customize the dimensions, ensuring that the framed mirror will fit precisely in the spot where you’re planning to hang it. Read on to learn how to frame a mirror. It’s easier than you think!
Tools & Materials
Bobvila.com may earn a commission from purchases made through these links.
Note: This step-by-step tutorial describes how to use a pair of 1″ x 3″ boards (each 7 feet in length) to frame a 30″ x 22″ mirror. That said, so long as you’re working with lumber that measures at least 3/4 inch thick, you can freely modify these instructions as necessary to frame a mirror of virtually any size.
Step 1
Measure the length and width of your unframed mirror. Let’s say that it’s 30 inches long by 22 inches wide. Meanwhile, being that stock 1″ x 3″ boards are actually (and yes, confusingly) 2-1/2 inches thick, we know that there would be a border of 2-1/2 inches running around the glass. So, from your twin planks of wood, proceed to cut four pieces—two that are 35 inches and another two that are 27 inches. (Don’t forget to wear safety gear, as there are hazards associated with any cutting tool.)
Step 2
Cut a dado into each of your four wood pieces. In an assembled frame, the dado serves as the groove in which the mirror sits and remains securely held. In other words, you can’t skip this step.
Though it’s possible to create a dado using a router, it’s much easier and more accurate to use a table saw. Here’s how to set up your cuts. First, attach a 1/4-inch dado blade to the table saw, being sure to set a 1/2-inch blade height. Next, align the table saw 3/8 inch away from the fence. Finally, having turned on the saw, slide the boards, one by one, along the fence. (Again, safety first!) Each board now has a 1/4-inch dado, designed to accommodate the thickness of the mirror. If your mirror happens to be thicker than the standard 1/4 inch, simply adjust the dado blade accordingly.
Step 3
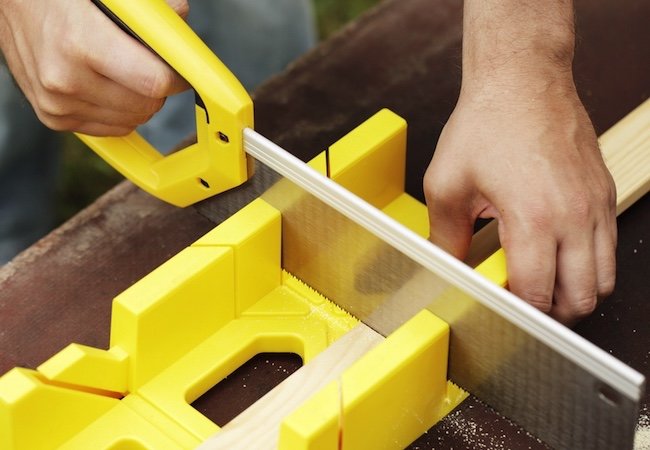
Select any one of your four wood pieces and get your miter box and saw ready for action. Being sure to keep the dado oriented toward what’s going to be the inside of the frame, cut one end of the wood piece at a 45-degree angle.
Next, select an edge of the mirror that matches up with the length of your board. Slip the mirror edge into the dado, lining up one of its corners flush against the angled miter cut. Then, holding the corner of the mirror in position, carefully mark where the opposite corner of the mirror meets the dado.
Now, go back to the miter saw and shift the saw to the opposite side. At the point where you made your pencil mark on the dado, cut an opposite-running 45-degree angle. At this point, the board has two angled ends, each pointing away from the other. Using the same technique outlined above, proceed to cut angles into both ends of your remaining three wood pieces.
Step 4
Sand down any rough edges of your wood pieces, taking the time to remove sawdust with a damp cloth. Once the wood has dried out completely, go ahead and apply silicone glue to each joint and along the inside of the dadoes. Before the glue has begun to dry, fit the boards together around the mirror and wipe away any excess glue. Then, with a band clamp, apply compression to the frame so that the wood pieces remain in the correct position as the glue dries.
At this point, if you would like to conceal the seams as much as possible, consider applying caulk where the mitered boards meet. If you decide to use caulk here, follow the instructions printed on the package and be sure to smooth the sealant with your finger before allowing it to dry. Having glued and clamped—and perhaps caulked—the frame, give it at least a couple of hours to set.
Step 5
If you trust yourself to handle the framed mirror gently at all times and if you don’t plan to move it very often in the future, you can probably stop here, trusting the glue to hold the frame together. But if you want to strengthen the construction, then you need to drive a nail or two into each corner. Be careful, though; a forceful impact could potentially undo what you’ve accomplished with the glue. If you have access to a finish nailer, use it. This power tool is capable of setting nails with precision (and only a concentrated jolt); it’s ideal for this application. That’s not to say you can’t use a hammer. You can. Just be sure to do so with care.
Finally, once the nails are in place, you have the option of concealing their presence with wood putty or wood filler. If you use either, you may want to sand again, cleaning off the sawdust and letting the frame dry once more. Beyond that, consider applying paint or stain (either will help disguise your wood filler even further) to give the perfect finish to a job well done!