
We may earn revenue from the products available on this page and participate in affiliate programs. Learn More ›
Installing new trim should be easy, right? Just measure the boards, cut the miters, and nail the trim in place. Well, it’s not exactly that easy.
If you’ve ever tried to install baseboards on your own, you’ll probably agree that looks can be deceiving. All too often a DIY baseboard installation is compromised by gaps or ill-fitting joints, resulting from walls that aren’t flat, floors that aren’t level, or corners that aren’t square.
Keep reading to find out what you need to know to achieve a professional looking baseboard installation.
Before You Begin
As with any DIY project, there are some things that are worth knowing about finish carpentry before diving in. Also, finish carpentry is one of the most difficult aspects of home improvement to truly master.
The following are some of the most important considerations to keep in mind when cutting baseboard corners.
Inside vs. Outside Joints
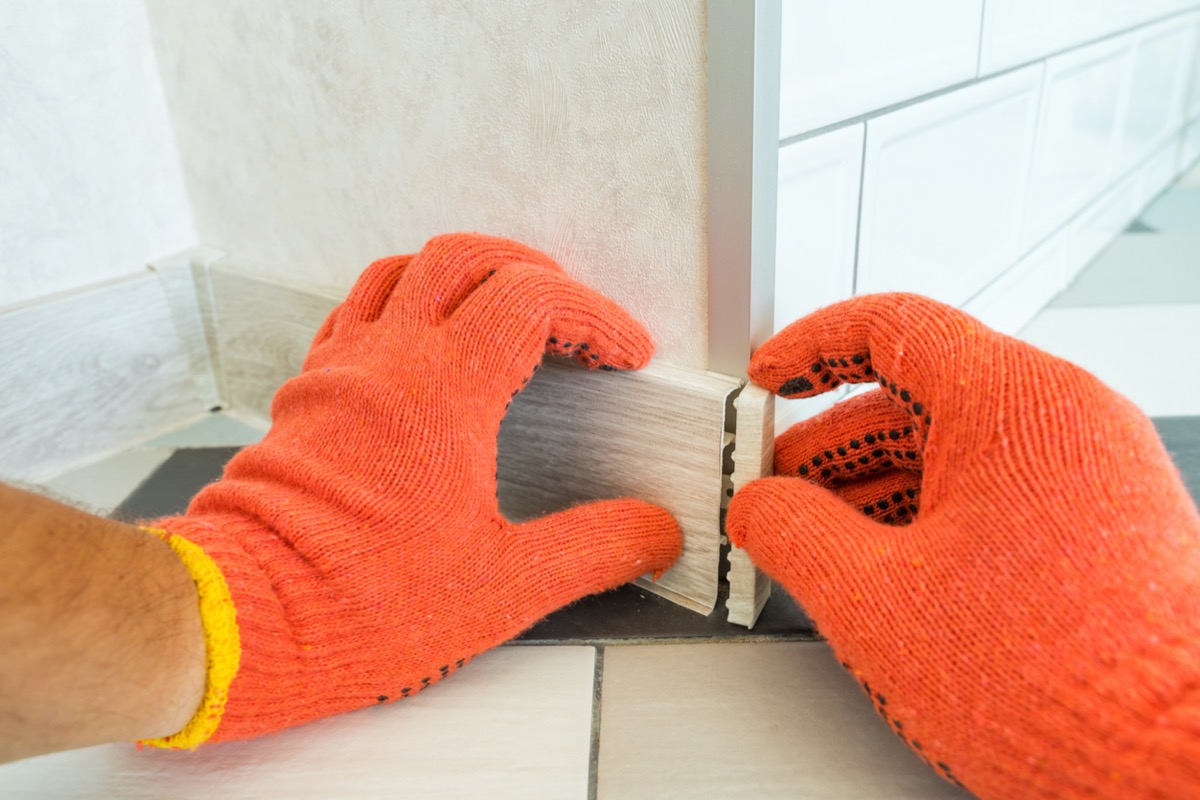
Inside corners can be especially tricky to pull off. For a tight fit, use a coped joint. “Coping” means using a special handsaw to cut and shape one piece of trim to fit over the profile of the other piece. This results in a very tight, clean gap.
A mitered corner might be ideal for an outside corner, but an inside corner joint will be better formed if you cope the profile of one baseboard to fit snugly against the contours of its mate.
Measuring for Baseboard Installation
When it comes to trim carpentry, the less measuring you do, the better. But, for instances like boards running between inside corners, measuring is a necessary evil. There are two approaches, however:
Measurements can be rough, and slightly over length to give the carpenter something to work with. With these boards cut slightly long, the carpenter marks the board in place or simply makes repeated cuts until the board fits snugly, using the actual space in which the board will fit for reference.
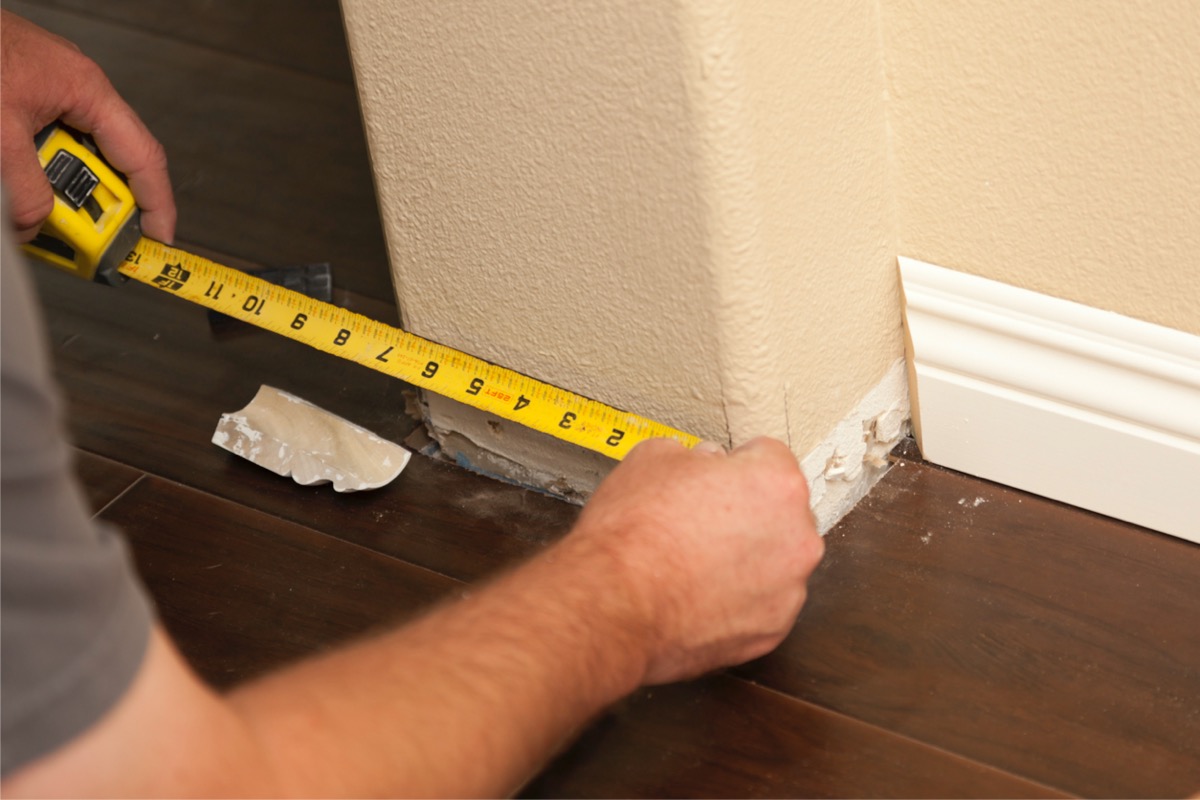
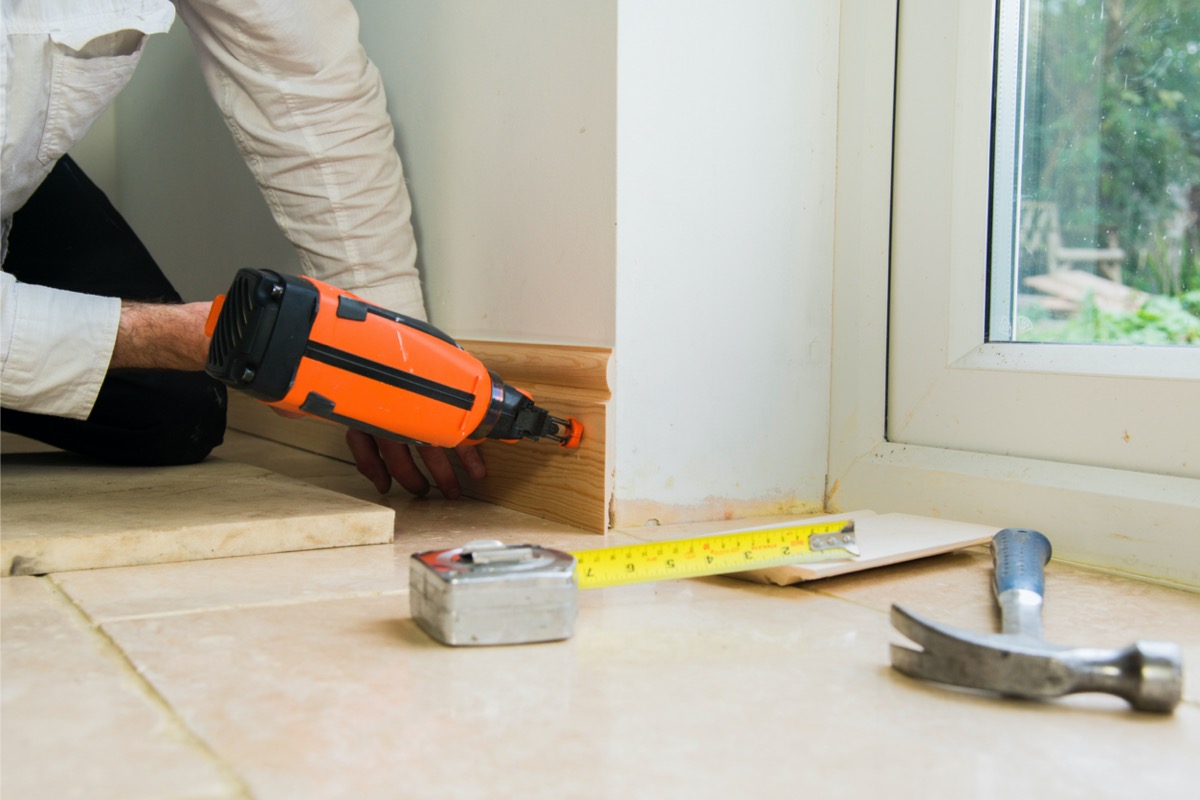
Should measuring be necessary, a folded tape measure will not do for inside measurements. Instead, use the tape measure to mark 10 inches from the corner. Then, place the end of the tape in the adjacent corner and measure out to the mark. Simply add the 10 inches to the measurement, and the board should be close to the proper length.
Tips and Tricks for Installing Baseboard
- Prior to installation, use a putty knife or paint scraper to clean excess material from the wall and floor.
- To speed the work (and avoid unsightly hammer marks), buy or rent a finish nail gun in combination with a compressor, or use a cordless finish nailer.
- Standard 3/8-inch baseboard is a lot more flexible than 3/4 or 5/8. Greater flexibility means greater success when trying to fit the baseboard snugly against an uneven wall. Construction adhesive helps secure the fit, too.
- Do everything you can to make the baseboard trim fit tightly, but when you can’t, it’s okay to fill small gaps with caulk prior to priming and paint.
[resource-list]
How to Install Baseboard Trim
Installing baseboard in a new room or a room that doesn’t have any baseboard is a little easier than replacing existing baseboard. Either way, it’s important to make sure the surfaces are clean and accurate measurements are taken to ensure an excellent finished look.
STEP 1: Remove the old baseboards.
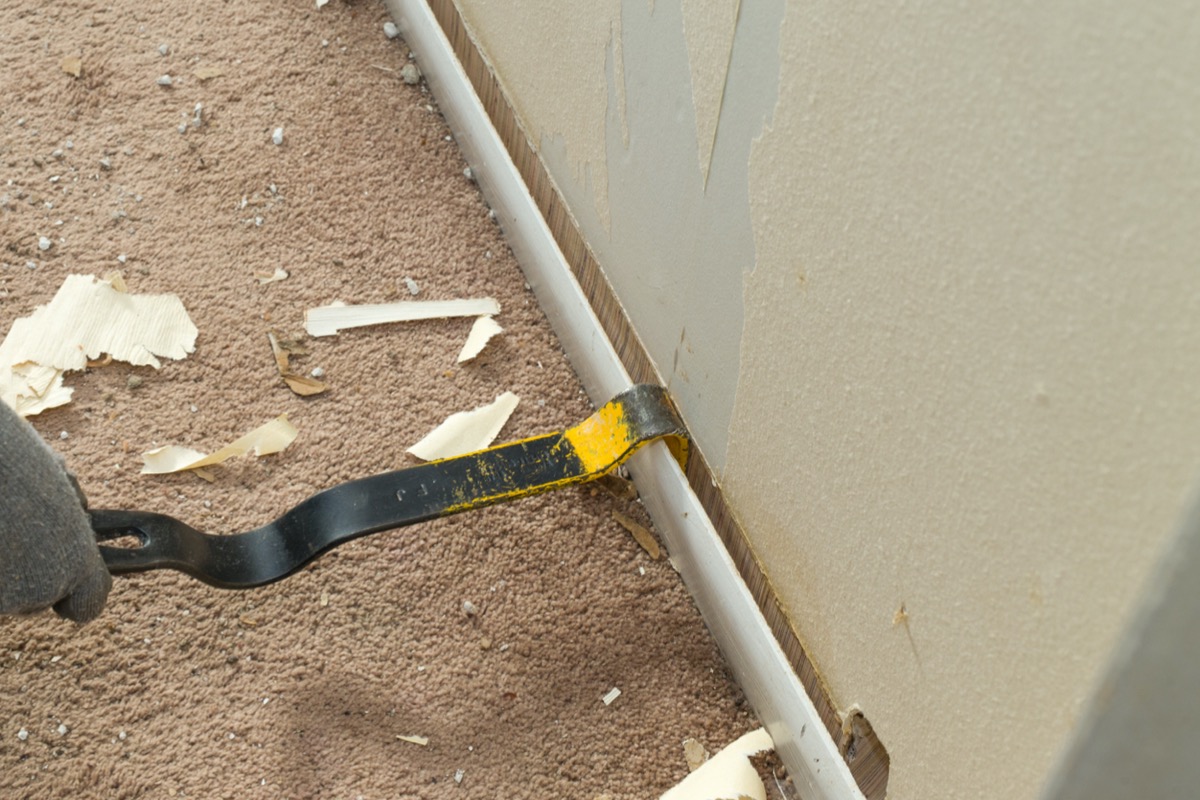
If the room is newly constructed, skip this step. Otherwise, score along the top of the baseboard with a utility knife to cut through the caulk. Then, slide the pry bar behind the baseboard from the top down. Pull the pry bar towards yourself to separate the baseboard from the wall without punching holes in the drywall.
It may be necessary to separate several boards at a time, particularly in the corners where coped joint or miters might prevent removing the board.
STEP 2: Determine if your floor is level.
Floors that slope more than ¾ of an inch from one corner to the other can be challenging when installing baseboards. However, slopes less than or equal to that measurement are easier to handle.
Find the highest corner and place a scrap piece of baseboard against the wall. Place the level on top of this scrap piece and draw a light, level mark out from the corner. Use the level to continue this mark around the room.
While this method works well for most every situation, for those working with period-correct moldings in historic homes, scribing the bottom of the baseboard may be necessary.
STEP 3: Prepare and measure your walls.
Use the painter’s multitool to scrape any residual caulk off the walls, and tap any loose drywall back in place with the hammer.
Since boards running from inside corner to inside corner are impossible to mark in place, measuring is necessary. In these cases, use the tape measure to mark the wall 10 inches from the corner. Next, flip the tape measure around and measure from the adjacent corner back toward the mark. Add 10 inches to the measurement, and the measurement should be accurate to within ⅛ of an inch.
STEP 4: Cut the baseboard corners.
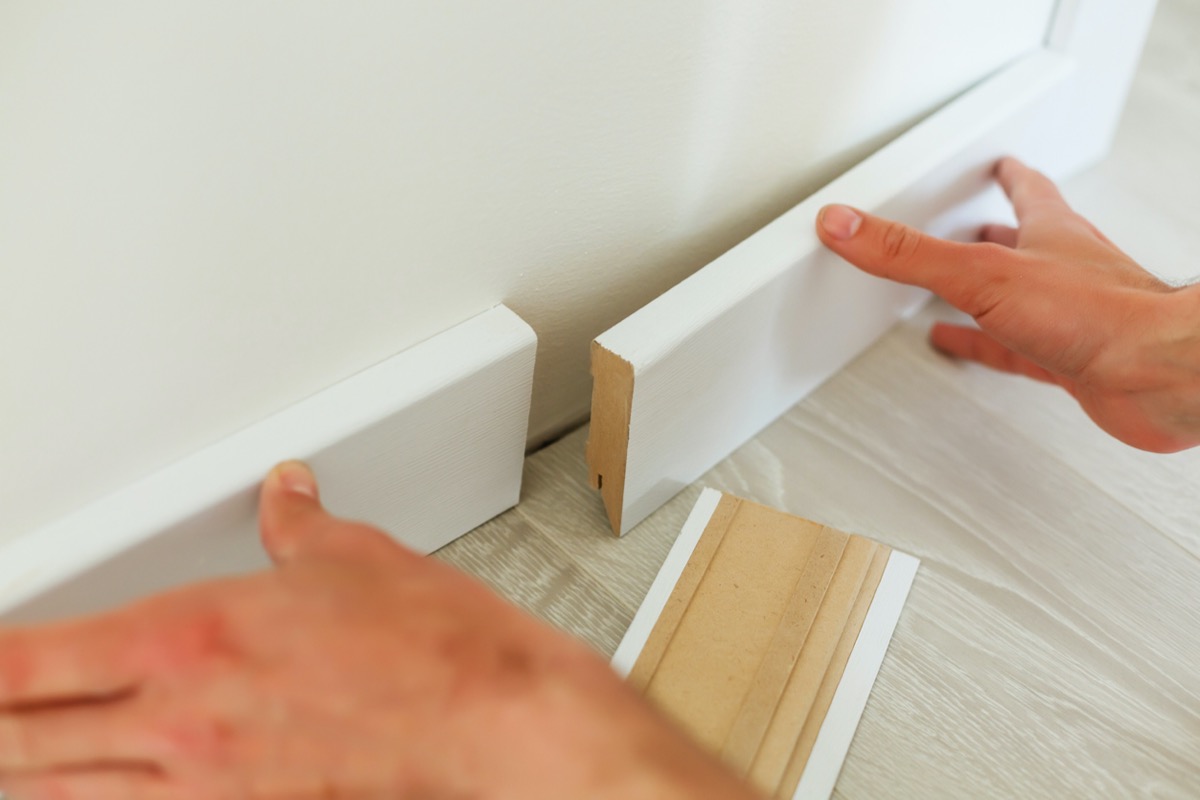
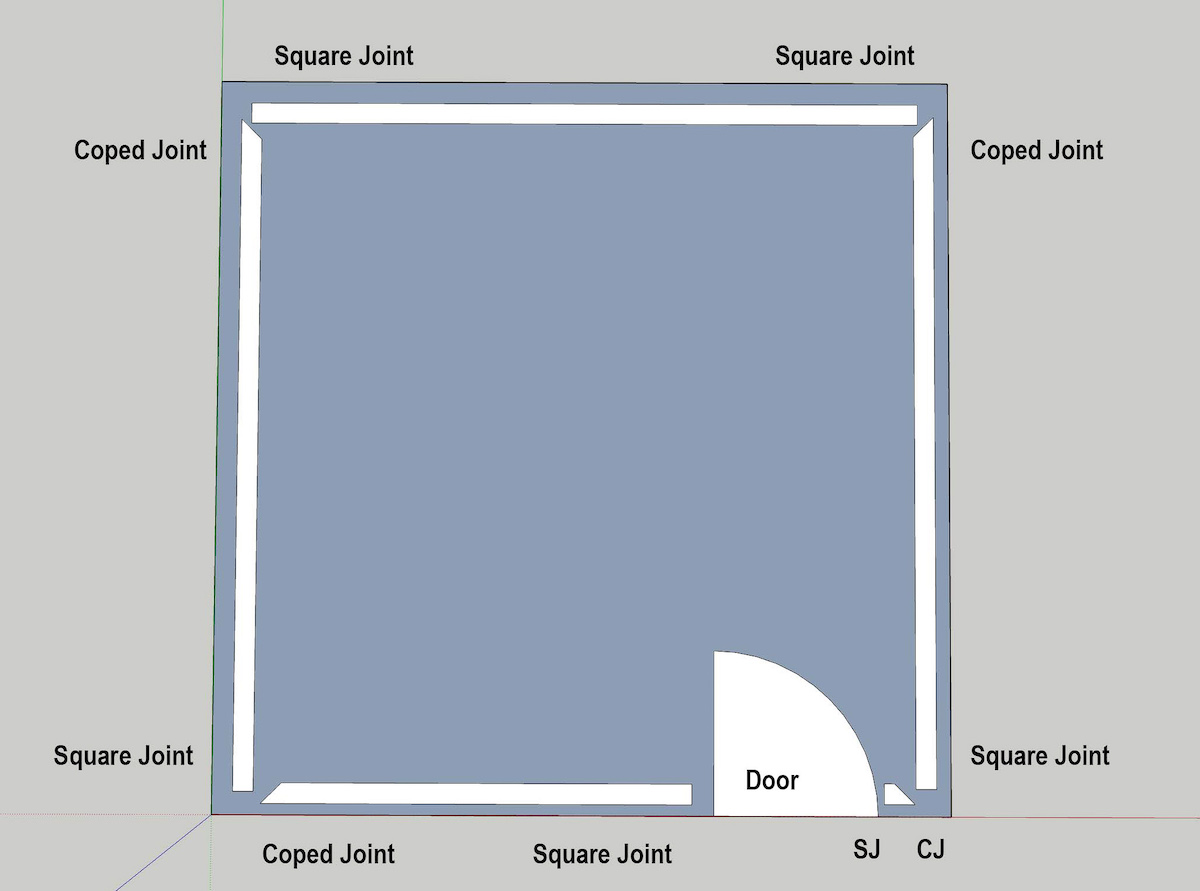
When using coped joints, some boards are cut square, while others are cut on 45-degree angles. For the baseboard running on the wall opposite the door, cut two square joints at either end.
For the walls to the left and right of the room, cut a coped joint on the end that meets the far wall, and a square cut on the other end of the board. For the walls on either side of the door, cut coped joints on the ends that meet the side walls, and square cuts on the ends that touch the door.
Cutting baseboard corners is itself a multi-step process. Please see How to Cut Baseboard Corners below for detailed instructions, and then proceed with Step 5.
STEP 5: Nail the baseboard to the wall.
After each piece is cut and coped, it’s time to nail them to the baseboard. For the pieces that are slightly longer than the wall (approximately ⅛ inch), bend the board out slightly and tuck each end of the board into the corners, and allow the board to snap into place.
Next, align the top of the baseboard with the pencil line drawn around the room. Use a finish nailer to drive a nail at each stud location (approximately every 16 inches, alongside doors and windows, and in corners), as well as throughout the bottom 1¼ of the baseboard. For any gaps that might exist at the corners, use shims placed behind the baseboard to close them as much as possible before nailing.
STEP 6: Install quarter round molding.
Install quarter round molding to close the gaps that might exist between the baseboard and flooring. Use the same method for cutting and coping as before, square cutting the ends of the molding that is on the far wall, and coped pieces to meet the square cuts and so on.
The quarter round gives the baseboard a finished look and removes the gap, and, in most cases, hides the fact that the floor isn’t level (at least from plain sight).
STEP 7: Caulk and finish the job.
Load the caulking gun with a tube of latex caulk and caulk along the top seam of each baseboard where it touches the wall, as well as the inside joints. Keep a damp paper towel on hand to wet a finger before dragging it along the wet caulk to create a finished look.
Be sure to close any gaps at the top of the baseboard that might be the result of humps in the wall, as well as the joints between the top of the quarter round molding and the baseboard for a crisp finished look.

How to Cut Baseboard Corners
There are a few different cuts needed when installing baseboards. Here are the steps to coping and mitering the ends.
STEP 1: Fit inside corners with a coped joint.
First, use the miter saw to cut a 45-degree angle on the end of the trim board. Using the edge of a pencil, rub the profile along where the primer meets wood exposed by the cut. This will leave a dark line along which you’ll need to cut to cope the joint.
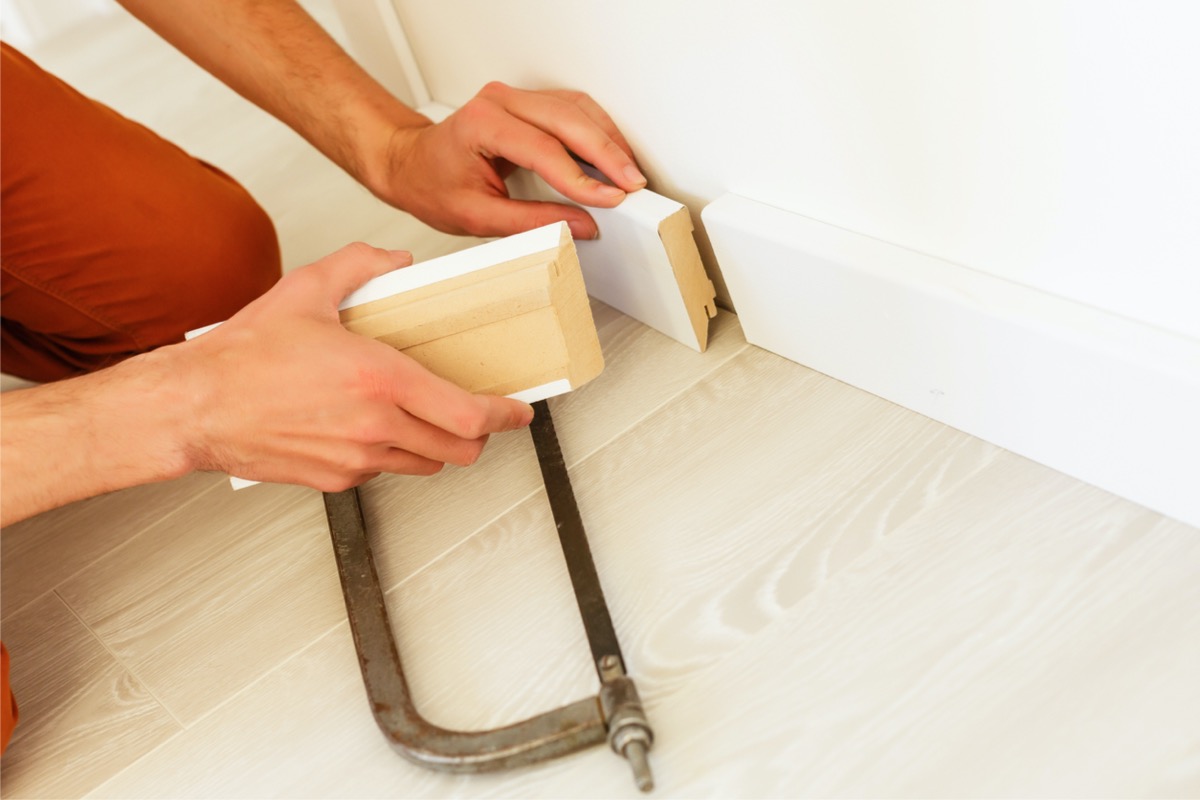
Then, clamp the piece of molding to a worktable. Use the coping saw to cut along the dark line that marks the profile. Be sure to hold the saw at an angle in order to backcut the saw, removing the material behind the joint to ensure a snug fit.
Finally, Test fit the joint and adjust the shape and contour of the coped board. Use a rasp, file, or sandpaper to fine tune the profile. A sharp utility knife is also helpful, especially for backcutting the joint and shaving small bits of wood for a tighter fit.
STEP 2: Fit outside corners with a mitered joint.
Whereas a coped joint is recommended for inside corners, a mitered joint is appropriate for outside corners. For a clean mitered corner, it’s a good idea to cut your baseboard about 1/16–inch longer than necessary. Doing so ensures a tight fit by enabling you to “spring” the next board into position.
When you’re installing baseboard—or any trim, for that matter—expect to do some re-cutting. Trial and error is all part of the game. When in doubt, it’s always better to cut a board too long than too short and trim it if you must.
Final Thoughts
There is a lot of effort that goes into a successful baseboard installation, and this guide on how to handle the project should help. Learning how to install baseboards means you’ll be able to save money and possibly even time when compared with hiring a contractor. Just be sure to follow the steps listed above for the best possible result.
FAQs About Baseboard Molding Installation
Every room has its quirks, so it’s natural that you may have some lingering questions about baseboard molding installation. Below are answers to some of the most popular questions.
Q. Should you glue or nail baseboards?
As with most molding installations, baseboards should be nailed in place. Nails driven through the baseboard and into the studs or bottom plate with provide an excellent hold. However, finishing the job with a bit of caulk is always a good idea.
Q. Do you have to nail baseboards into studs?
When performing baseball molding installation, it’s always a good idea to nail into the studs. However, the anatomy of a stud wall consists of a top and bottom plate (the horizontal boards at the top and bottom of the stud wall). It’s possible to nail into the bottom plate primarily, and then hit a stud whenever possible.
Q. Should I install carpet or baseboard first?
It’s better to install the baseboards before installing carpet. The tackstrips that hold carpet in place need to be nailed down in front of the baseboard, whereas if the baseboards aren’t in place, the installer might place the tackstrips under where the baseboard must go.
Q. How do you remove baseboard trim?
The steps to removing baseboard trim are:
Cut the caulking along the top of the baseboards with a utility knife.
Slide a prybar between the wall and the baseboard.
Pull the prybar toward the center of the room to prevent damaging the drywall.
Remove the boards from the wall.
Q. What are the differences between baseboard, quarter round, and shoe molding?
Baseboard is the flat molding, sometimes with a profile, at the bottom of the wall. It is usually between 3 ½ and 7 ½ inches tall.
Quarter round is shaped like ¼ of a circle, with a consistent radius, and it helps fill the gap between the baseboard and the floor.
Shoe molding is similar to quarter round, except that the bottom is wider than the top, creating a shoe-like molding when viewed from the side. However, shoe molding performs the same function.