We may earn revenue from the products available on this page and participate in affiliate programs. Learn More ›
Thanks to its ability to resist corrosion, withstand heat, and handle all sorts of chemicals, stainless steel is a common constituent of appliances, sinks, and cooking implements. Increasingly, with the proliferation of sleek, professional-look kitchens, stainless steel is also often incorporated in larger fixtures such as countertops. While stainless steel is a rugged and reliable material, it’s not impervious to the effects of use or age, and it does have an unfortunate tendency to dull over time. But it’s fairly simple and straightforward to resurrect the original gleam of your stainless steel surfaces. Follow the handful of steps below to defeat the dullness and make your stainless steel shine again.
Tools & Materials
Bobvila.com may earn a commission from purchases made through these links.
Note: In most cases you can polish your stainless surfaces using only ingredients pulled from the pantry. Tougher jobs may require an extra trip to the store for a specialty solution and, possibly, a handheld power buffer to restore that sparkly magic, but even then the process is still fairly quick and easy.
Step 1
Before you polish stainless steel, it’s important to make sure that the surface is clean and free of stuck-on gunk. Give the stainless steel a gentle but thorough washing with dish detergent, warm water, and a dish sponge or brush. Once you’ve cleaned the surface, rinse it off with fresh water and pat to dry. (For large, freestanding appliances, be sure to lay down a few towels first to protect the floor around the appliance from water damage, and be diligent about mopping up spills.)
Don’t worry if you see any streaks or smudges after you’ve dried the stainless steel surface; they’ll be taken care of later in the process.
Step 2
Olive oil can be a surprisingly effective polishing agent for stainless steel. Pour just a dot or two onto a microfiber cloth—or a bit more if you’re working with a large surface, such as a refrigerator or farmhouse sink—and use the cloth to spread a very thin layer of oil over the entire stainless steel surface of the fixture or appliance you’re polishing.
Step 3
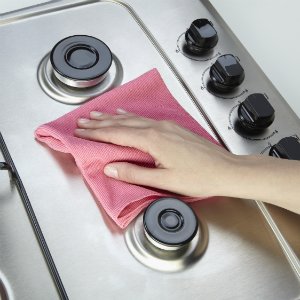
Once the whole surface has been lightly covered with oil, use moderate pressure to buff it, making small circles with the oiled part of the cloth. Work your way across the entire surface until it feels smoother than when you began. This should take just a couple of minutes.
Step 4
After you’ve finished buffing, go over the entire surface once more, this time with a clean, dry cloth, using the same circular motion and pressure. It’s important to get rid of excess oil, which can leave a sticky residue and, over time, dull the shine again. If you’re happy with the shine you’ve uncovered, then congratulations—you’re done! Otherwise, if you think that the stainless surface could use a bit more work, never fear: Read on for two more solutions you can try.
Step 5
If olive oil didn’t produce the results you wanted, try another common pantry dweller: flour! Start by covering the entire stainless steel surface with a thin layer of flour—just a fine coating, without any clumps. For reference, it takes about one-quarter cup of flour to completely cover a standard kitchen sink. Using this as a gauge, adjust your measurement accordingly. Once you’ve thinly covered the whole surface, repeat the buffing process, but this time with a dry cloth.
When you’re finished buffing, wipe away any excess flour. Your stainless steel should now be in good shape, but if it’s still dull, or if you notice scratches that need to be smoothed out, you may need to resort to one final option, a tool-assisted fix that’s described in the next step.
Step 6
For a difficult polishing job plagued by pesky scratches, you can always turn to using a handheld power buffer in combination with a commercial stainless steel polish like Cerama Bryte (view on Amazon). The point here is to get tough with the material, so you’ll need to use a pad that’s slightly abrasive. Affix the pad to the buffer and apply polish to the pad according to the manufacturer’s instructions. Then, plug in the buffer, turn it on, and begin buffing. Start at the edge of the surface, work in small circles, and let the buffer apply the pressure for you as you proceed.
Step 7
If you’re trying to buff away scratches, be sure to buff the entire area—not just the scratched sections—to ensure a uniform finish. Once you’ve finished with the buffer, grab a clean, dry cloth to go over the entire surface lightly one last time, making sure you’ve completely removed the polish.
Step 8
When you’ve finally achieved the sparkling surface of your dreams, look deeply into your handiwork and give your reflection a thumbs-up. You’ve finished!