
We may earn revenue from the products available on this page and participate in affiliate programs. Learn More ›
A staple of summer camp (and of America in the late ’60s), tie dye entertains and engages the young and young-at-heart. Whether you’re leading an activity for kids at a slumber party or making a batch of matching shirts for the family reunion, you’ll enjoy not only the kaleidoscopic colors of the final result, but also the process itself—this is fun stuff! And perhaps the best part is that in tie dyeing, you can’t really make a mistake. Anything goes (just about). Now how ’60s is that?
Step 1: Gather the materials.
White T-shirts are best for beginners. For better dyeing quality, work with 100 percent cotton. You will also need a fabric dye kit, soda ash (if not included in the kit), rubber gloves, tubs, spoon, plastic table cloth, rubber bands and glass marbles. You’ll also need squeeze bottles with nozzles, if you plan to jump head first into multicolor dye projects—and we wholeheartedly recommend that you do!
Step 2: Set up your station.
Minimize mess by covering your work station in plastic—a disposable plastic tablecloth would work nicely. Meanwhile, gear up in clothes you wouldn’t mind getting splashed. Wearing rubber gloves, mix one cup of soda ash and one gallon of warm water in a bucket. (This should be enough to pre-treat up to 12 adult shirts.) In separate buckets, mix up each of the colors, according to the instructions on the dye packaging. Bear in mind that the dye can stain a plastic bucket, so you may wish to use an enamel or glass container. For a lighter, somewhat faded end result, add more water than the amount stipulated in the instructions.
Step 3: Pick your pattern.
Using rubber bands, you can experiment and achieve several designs on your shirt. Of course, there’s a degree of randomness and chance to these designs. For many, that’s the appeal of tie dyeing. But if you’d like more control over the look of your shirt, skip to Step 4. Otherwise, keep the following techniques in mind:
• Circles
Lay your wet shirt on a smooth, flat surface. Pinch the cloth where you’d want the center of the circle to be, then slip a marble behind the shirt to that point. Tie a rubber band to secure the cloth around it. Add another marble behind the first, wrap a rubber band around it, and continue to do so until you have a string of marbles separated by rubber bands. When dyed, the bands will leave large white circles on the newly colored background. For smaller circles scattered on your T-shirt, tie marbles in clusters side-by-side rather than one beside the other.
• Stripes
Roll a wet shirt tightly into a tube. If you want horizontal stripes, roll the shirt side to side; for vertical stripes, roll from bottom to top. Place rubber bands around the wrap, spacing the bands at equal intervals. Once the shirt has been dyed, these bands will produce white stripes.
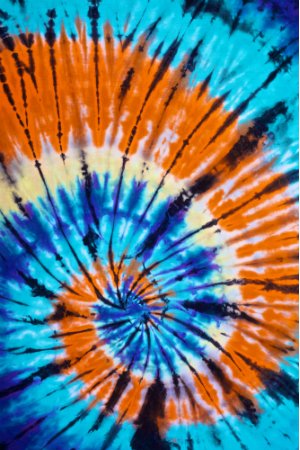
• Spirals
Place your finger in the center of the flat, wet T-shirt. Rotate the shirt clockwise, keeping your finger still so that the shirt twists around it like a pinwheel. When the whole shirt is tightly spiraled into a disc shape, remove your finger and carefully wrap three to four rubber bands over the shirt so that they cross like a starburst in the center.
Step 4: Soak your shirt.
Wearing gloves, stick your shirt into the solution of soda ash and warm water and let it soak for ten to 15 minutes. Doing so helps the dye cling to the fibers. After you remove the shirt, wring out any excess water, so it’s damp but not dripping.
Step 5: Get colorful.
If you are dyeing a shirt with a single color, the easiest method is to dip dye it. Fill a bucket with the dye you’ve mixed, then dunk the shirt in, making sure the fabric is completely submerged. Leave the shirt in the bucket for as long as the instructions specify, anywhere from ten to 30 minutes. The longer the shirt soaks, the deeper the color is going to be.
If you are creating a multicolored pattern, take the colors you’ve mixed and pour them into squeeze bottles. Place your white shirt on the plastic-covered work station, then squirt colors from the different bottles onto different parts of the shirt (flip the shirt over and add color to the back, too). When you’re finished, cover the garment in plastic wrap to keep it moist for as long as the instructions recommend.
Step 6: Rinse and roll out.
When soak time is up, rinse the cloth of excess dye, first in warm water, then gradually in cool water. Repeat until the water runs clear. Finally, unveil your masterpiece (if you used rubber bands, now is the time to take them off). The first time you wash the shirt, remember to put it in the machine on its own. That way, you can avoid any accidents. Dry the shirt on the dryer’s coolest setting. Or opt to air dry—somehow that seems most appropriate, no?