We may earn revenue from the products available on this page and participate in affiliate programs. Learn More ›
For DIYers eager to take on plumbing tasks, one of the most important skills to master is how to sweat copper pipe—a process commonly referred to as soldering—in order to achieve leak-proof joints. The job consists of two main tasks: first prep work to clean the pipes, and then the heating process for flowing solder to seal pieces (two pipes or, more commonly, a pipe and a joint) together. Be sure to dress for the job in a heavy, long-sleeved shirt and wear insulated gloves to protect against potential drips of molten metal. Also keep in mind that if your pipes aren’t already cut to length, you’ll need to do that prior to sweating. While sweating copper pipe can seem intimidating at first, with patience and attention to detail you should soon be a pro.
Tools & Materials
Bobvila.com may earn a commission from purchases made through these links.
- 120-grit emery cloth
- Wire fitting brush
- Lead-free tinning flux
- Acid brush
- Insulated gloves
- Safety goggles
- Lead-free solder
- Flame protector cloth
- Propane soldering torch
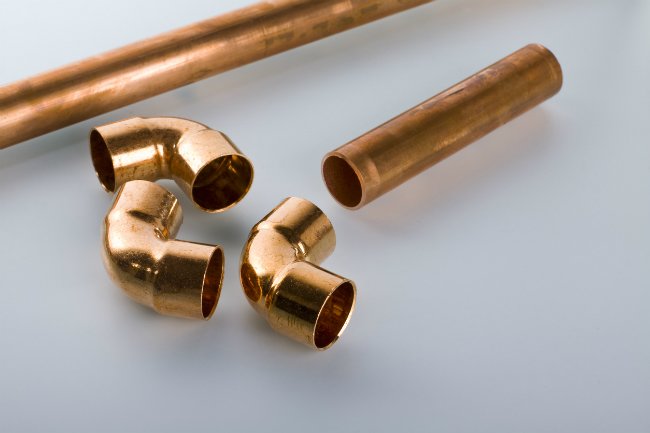
We recommend that you learn on practice pipes, a worthwhile investment until you build enough confidence to tackle plumbing in your home.
STEP 1: Check the pipe for burr and remove any that remains.
Examine inside all cut copper pipes to ensure that the burr (a ridge of copper shards caused by the saw where the cut was made) has been removed, to allow unimpeded water flow once the joints are sweated. If burr remains, follow the steps to remove it here.
STEP 2: Cleaning the the mouth of each pipe with emery cloth.
Clean both the outside and inside of the first inch or so of pipes (the cut lengths and/or the joint) with emery cloth, which you can find in home centers and hardware stores sold alongside flux and solder. If a wire fitting brush is handy, it will make short work of cleaning inside the copper pipe. Otherwise, wrap the emery cloth around your index finger, stick it in the mouth of the pipe, and twist to clean.
Cleaned copper will shine like a brand new penny. After cleaning, it’s critical to avoid touching the copper pipe with your bare hands, lest natural oils and dirt on your skin interfere with the sweating process.
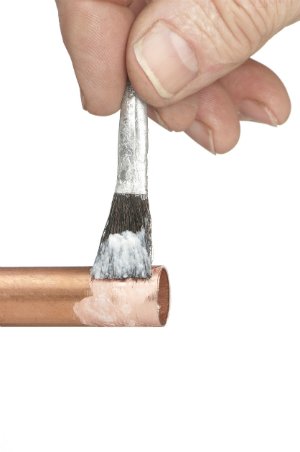
STEP 3: Apply a thin, even layer of flux to the pipes.
Don insulated work gloves for protection against the acid in the flux. Apply a thin, even layer of tinning or plumbing flux to the newly cleaned sections of the exterior and interior of the copper pipes with an acid or flux brush. Wipe off excess flux with a clean rag.
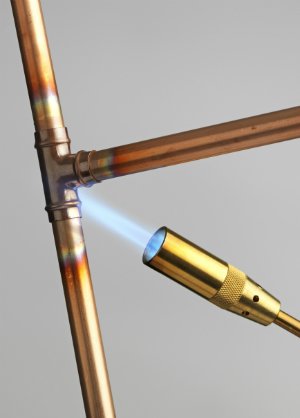
STEP 4: Pass your soldering torch over the flux-covered sections of pipe.
Hang flame protector cloth over any surface capable of scorching within 8 inches of the work area where you’ll be using the propane torch. Put on a pair of goggles for eye protection. Fire up the propane torch and hold it about 2 inches from the fitting. Pass it slowly over the flux-covered sections for 10 to 20 seconds until the flux begins to melt, becoming shiny. The copper will soon darken and the flux will sizzle and/or bubble, even smoke. This means the acid has begun to work. The surface will become dull and etched, creating a bondable surface.
STEP 5: Connect the pipes and twist.
Wearing your insulated gloves, push the connecting pieces together until fully sealed (or as far as they’ll go). Twist the copper pipes slightly to distribute flux evenly inside the joint. Wipe off excess flux with a clean rag.
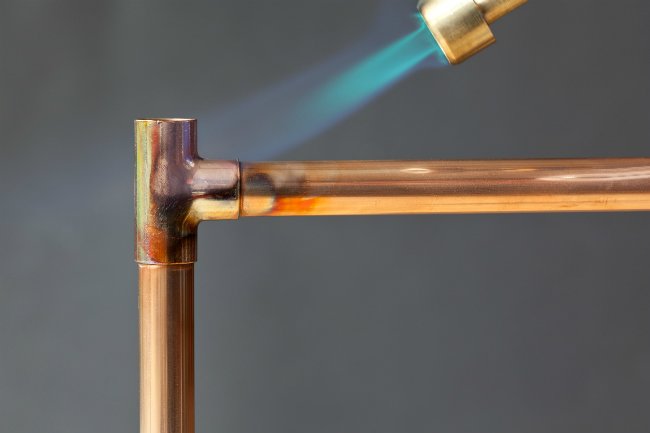
STEP 6: Heat the pipes at the point where they connect and create a seam.
Set your torch to a lower-power “rosebud” flame. A full-power torch flame resembles a cone with a narrow point—the point heats the area it touches more than it heats the rest of the copper pipe. A rosebud flame, however, wraps around the pipe, bringing the whole pipe up to sweating temperature at once. This allows for cleaner, more even sweating. Using the rosebud flame, begin heating the connecting pipes at the joint seam.
STEP 7: Touch solder to the pipe joint and let it melt around the seam.
Hold the lead-free solder opposite to the rosebud flame at a 90-degree angle to the joint seam. (Since leaded solder is still sold in stores, be sure to check that you supply is actually lead-free—a critical choice for pipes that route potable water.)
Now, touch the heated pipe with the solder. If the pipe is hot enough, the solder will melt—this is called “flowing the solder.” If the pipe isn’t hot enough, the solder won’t melt or flow, so keep it up with the torch until the solder melts upon touching the joint. Once the melting point is achieved, solder will trickle down, flowing around the seam, sealing the two pipes together, successfully sweating the joint.
STEP 8: Clean up.
Turn off the propane torch and set it down. Note: Never leave the torch on when it’s not in use, as it could easily fall over and become an extreme fire hazard.) Wipe off any excess solder with a clean rag.
Allow the pipe to cool for at least a full minute before applying any pressure. You’ve successfully sweated your first copper pipe—well done!