We may earn revenue from the products available on this page and participate in affiliate programs. Learn More ›
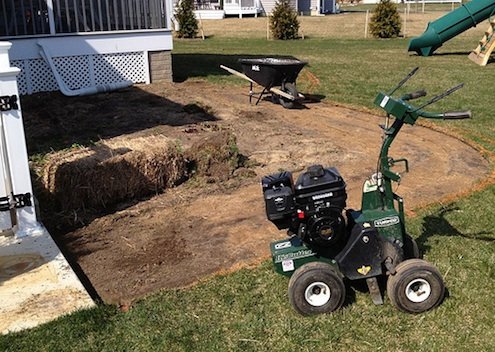
It’s been about 18 months since we moved into our house, but only recently have we begun to landscape beyond the basic builder’s package. A designer helped us formulate a plan that we intend to roll out in stages over the next several years. This spring, we initiated phase one: creating more strategically placed planting beds. That meant removing sod—a LOT of sod.
Sod is expensive to install and, surprisingly, expensive to remove. Even if you rent a sod cutting machine, the work is still labor-intensive and time-consuming. Not to mention that once you have the sod lifted, it must be hauled away and dumped somewhere—at a price, of course.
Related: Artificial Turf: 7 Reasons to Consider the New “Grass” Alternative
Our landscape designer suggested that we see if anyone nearby might want to re-use our sod. So I put the word out on our neighborhood Facebook page. Within 30 minutes, I had a taker: neighbors Pam and Ray, who had less than satisfactory success seeding their lawn upon moving into a home just blocks away.
I was beyond delighted. For one, the time and money we saved in not having to haul and dump the sod could instead go to cutting more planting beds. More than that, I absolutely hate to waste anything and was thrilled that someone could use the perfectly good grass.
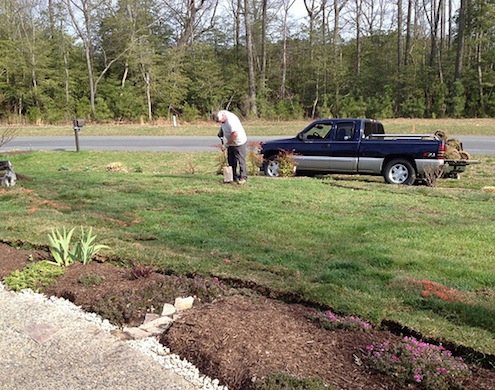
Pam and Ray were ecstatic, too, when they saw an enormous pile of sod rolled up at the edge of our yard. It took several trips in Ray’s pickup truck, but our “old” sod is now enjoying a “new” home.
While this was a somewhat unconventional application—laying sod over existing grass—the method used by Pam and Ray ultimately worked for them. Here’s their advice:
1. Rough up the current ground cover. The roots from the sod need to make contact with dirt, so use a rototiller or similar tool to expose the soil beneath.
2. Add some lime. Lime promotes lawn health by providing nutrients and improving soil structure. Because lime is absorbed slowly, add it prior to the sod.
3. Fill in the gaps. After fitting the sod pieces closely together, cutting and trimming as needed, fill in the joints with a mixture of soil and grass seed.
4. Compact and water. Compact the sod using a roller—or by driving over the installation with a pickup truck! Water for 20 minutes in the early morning (before the sun gets too high) and 20 minutes in the evening (after the sun has set).
A month later, the sod we would have sent to some refuse center is living on and looking great. Both we and our neighbors couldn’t be happier about that.
For more on lawns, consider:
Top 5 Tips for a Greener Lawn
Bob Vila Radio: Lawn Care Hell
Keep Off the Grass: 5 Traditional Lawn Alternatives