We may earn revenue from the products available on this page and participate in affiliate programs. Learn More ›
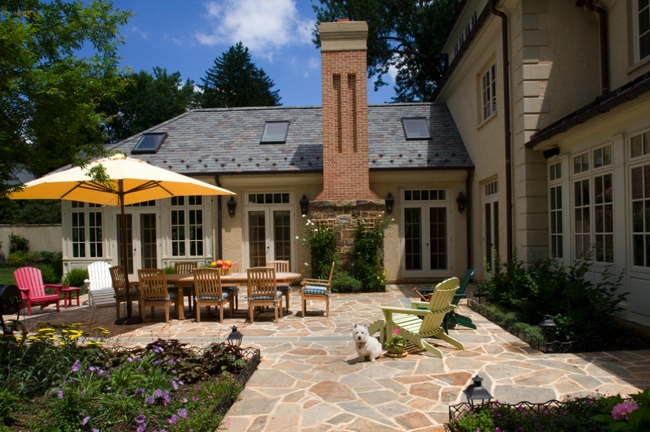
Patio. The word itself calls to mind an image of splendid sun-drenched days spent sipping chilled drinks under the welcome shade of an umbrella. From simple concrete slabs to colorful tile laid in intricate patterns, patios dramatically enhance outdoor living space.
Homeowners can handle the installation for all but the grandest of patios, sometimes even within the span of a single weekend. Of course, the key to getting professional results is planning. Here’s what you need to know before you begin on a patio building project.
Planning Your Patio
The first step is to assess your needs and determine how your family will use the patio. Do you plan on entertaining? To facilitate serving and clean-up, locate the patio within striking distance of your kitchen. Meanwhile, consider opting for a stain-resistant patio material upon which furniture easily slides.
LOCATION
If you’d like to sunbathe on your patio, site the installation the section of your yard with the best exposure. If your patio fantasies involve snoozing peacefully on a gently swaying hammock, then choose a shady spot, perhaps one near a side of the house from which an awning may be extended.
Once you’ve chosen a location and reviewed applicable zoning and set-back requirements, use stakes and string (or landscaper’s spray paint) to outline the perimeter you have in mind. Live with the area marked off for a few days; be sure you’ve chosen wisely.
DESIGN
Ideally, the patio should look and feel like a natural extension of your home, or if placed away from the house, it should fit almost seamlessly into the landscape. Watch the way the sun falls over the area, and monitor the amount of debris that builds up from trees and bushes.
DRAINAGE
Water flow is another consideration. Even though you’ll grade your patio in such a way as to prevent standing water, it’s best to avoid planning your patio for a low spot on the property. Excessive moisture not only disturbs the ground beneath a patio installation, but also contributes to weed growth and mildew.
FURTHER CONSIDERATIONS
Don’t forget to give some thought to the plumbing, septic, and electrical lines in your yard. Many homeowners have been forced to dig up their patios so that underground repairs could made to utilities.
Patio Materials
Budget and taste are likely to guide your decision-making when it comes to patio materials, but if you expect to be walking barefoot on the surface, texture and heat retention are also factors worth weighing. Depending on where you live, a material’s relative tolerance of freeze-thaw cycles might be important, too.
POURED CONCRETE
The least expensive but most labor-intensive option is pouring your own concrete patio. Go with a simple gray slab or add color for a unique look. Though it requires professional installation, so-called stamped concrete mimics the look of flagstone, brick, and other pricey materials for a fraction of the cost. Avoid concrete next to swimming pools; the material is slippery when wet. Also, note that concrete patios are susceptible to cracking in climates with extremes or on properties where the ground occasionally shifts.
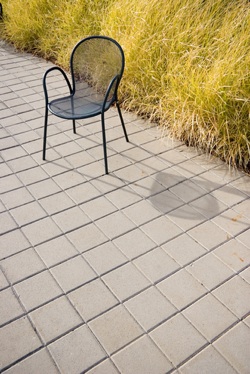
PAVERS
Homeowners can choose from the variety of pavers on the market. Popular options include brick, flagstone, clay, concrete and composite. Less expensive are concrete pavers, which come in different colors, textures, and styles. In general, pavers are slip-resistant and easy to install, but because they absorb stains, proper maintenance means re-sealing the surface every two years.
COMPOSITE PAVERS
A relatively new entrant to the patio world, composite pavers are made almost exclusively from recycled materials (e.g., old tires). A half-dozen colors are available, and the slip-resistant pavers are comfortable underfoot. Plus, alignment is a breeze, since the pavers snap onto a pre-laid grid. But that convenience comes at a per-square-foot cost rivaling that of high-end brick.
Related: 7 Popular Patio Building Materials to Consider
BRICK
Installed correctly, brick pavers can last over 100 years, and who doesn’t appreciate their charming old-world aesthetic? Different patterns are possible, from herringbone to basket weave, and bricks of different colors may be installed side by side for an eye-catching effect. Of critical importance is buying brick that is rated not only for use outdoors, but also for the specific temperature range of the climate where you live. Mostly resistant to stains and kind to bare feet, brick patios run the gamut form $2 to $13 per square foot.
NATURAL STONE
Included in this group are bluestone, slate, travertine, limestone and sandstone pavers, any of which may be purchased as irregular slabs or in uniform square or rectangular shapes. Each has different heat-retention and slip factors. Select carefully based on your planned usage of the patio. With the exception of specialty tile, natural stone is the most expensive patio material in common use today.
TILE
Many different types of tile may be used outdoors. Unglazed clay tiles are popular (terra cotta among them), but there are plenty of glazed options as well (remember the latter is likely to be somewhat slippery even when dry). The price tag on tile ranges from perfectly reasonable to jaw-droppingly high. Installation requires the tiles to be laid over a concrete slab; if you don’t already have that foundation in place, you’ll need to factor the cost of one into your budget.
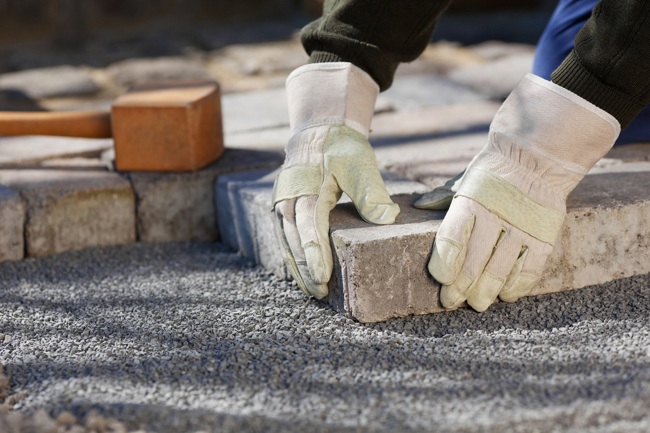
Installing a Patio Yourself
A paver patio is the easiest type to install. The following instructions offer a detailed picture of the steps involved.
STEP 1: Prepare the site.
Having established the location and size of your planned patio, set a stake into each corner of the perimeter. Tie string between the stakes, using a line level to make sure the string remains at a fixed height off the ground. Dig out the area between the stakes, allowing six inches for sand and gravel, plus the additional depth needed to accommodate the height of your pavers. For water runoff, the finished patio should be slightly higher than ground level. Within the excavated area, use your string and a story pole to establish a 1/8″-per-foot slope that runs away from the house. Tamp down the exposed earth.
STEP 2: Establish the edge.
Insert edging—as simple as aluminum or plastic or as involved as braced two-by-fours—around the patio site.
STEP 3: Add the fill.
Lay down a layer of heavy-duty landscaping fabric for additional support and to inhibit the growth of weeds from beneath the patio. Next, fill the hole you’ve dug with four inches of gravel; tamp down. Follow the gravel with two inches of tamped-down sand. Make sure the sand is even and conforms to the designated slope. Screed the sand with scrap wood or a long pole.
STEP 4: Pave the surface.
Now that you’ve created the proper base, it’s finally time to lay down the pavers. Place the pavers on top of the sand, setting them by means of a rubber mallet.
STEP 5: Fill again.
Fill the space between the pavers with more sand, sweep off the excess, and you’re done. For a more permanent fill between the pavers, consider using a polymeric joint sand. Yet another option is to leave larger gaps between your paving stones, planting a ground cover like moss, creeping thyme, or clover in the spaces. The resulting look integrates your efforts with those of Mother Nature.