
We may earn revenue from the products available on this page and participate in affiliate programs. Learn More ›
Simply put, electrical work is dangerous. If you’re contemplating a project that requires any complexity or sophistication, we wholeheartedly recommend hiring a licensed electrician. There are, however, some simple electrical repairs and updates that are appropriate for budget-minded do-it-yourselfers ready to proceed with careful attention to detail. By following these tips, you can replace an old or damaged outlet, or even swap one out for a USB wall outlet. It’s a simple job, and so long as you take the proper precautions and carefully read through the steps for how to wire an outlet before you get started, it’s safe.
One caveat, though: Before you take on any electrical work in your home, it’s a good idea to check local building codes to make sure your project falls within the scope of work a homeowner is allowed to do.
Before You Begin
There are certain jobs that fall within the wheelhouse of an experienced DIYer, and then there are others that are better left to professionals. How can you tell the difference? Some common scenarios are outlined below to give a sense of what a handy homeowner should be able to tackle (depending on local restrictions, of course) and what should be left to an electrician.
RELATED: How Much Does It Cost to Rewire a House?
Adding an Outlet
If you want to add an electrical outlet but doing so requires running a new wire between the new outlet location and the home’s electrical panel, you should call in a pro. You’ll need a licensed master electrician, not least because building codes often stipulate that a permit is necessary for new electrical work, and in many parts of the country, only a pro can obtain the required permissions. In other areas, a homeowner can pull his own permits and begin wiring multiple outlets after passing a government-administered test.
Wiring an Outlet From Another Outlet
In many instances it’s possible to wire an outlet from another outlet. In fact, if there’s an existing outlet on the opposite side of the wall from where you’d like to add one, the job can be pretty simple. In this situation, you can usually cut a new opening, install an electrical box, and add a new outlet without having to snake wires through studs. Just be sure to use a stud finder to locate the studs on either side of the existing outlet and make sure to situate the new outlet within the same stud bay.
If you’re looking for more outlets in one location, it’s also possible to replace an existing duplex outlet, which takes just two plugs, for a quad receptacle, which takes four. This can be helpful in a workshop or even kitchens and bathrooms where two outlets just won’t cut it.
In either case, it’s important that there’s enough capacity on the circuit to accommodate the additional draw. For 15-amp circuits, the maximum is usually eight outlets or lights. Any more receptacles than that might draw too much current for the breaker.
Converting a Two-Prong Outlet to a Three-Prong Outlet
Old-fashioned two-prong outlet connections aren’t grounded, which makes them dangerous in the event of an electrical fault. Without an electrician, it’s safe to convert a two-prong to a three-prong outlet only if the electrical box housing the outlet is metal and the cable feeding the box is armored. If these conditions are met, the box provides ground-fault protection (even though the outlet does not). How can you tell, without opening the wall, if the electrical box meets the criteria? Simple: Use a voltage tester. Insert one prong into the outlet’s shorter slot (the “hot slot”), then touch the other prong to the screw securing the faceplate. If the tester lights up, the electrical box is grounded; you can go ahead and convert the two-prong to a three-prong. If your electrical box isn’t grounded, you can still convert to a three-prong, but the replacement must be a ground-fault circuit interrupter, or GFCI (the type of outlet with a red button on its front).
RELATED: Solved! What Electrical Wire Colors Really Mean
How to Replace an Outlet
Over time, electrical outlets can start to look dingy or dirty, or the plastic can crack and make the outlet dangerous to use. To keep power flowing where you need it, it’s important to learn how to replace an electrical outlet safely and efficiently. Luckily, as far as electrical projects go, replacing an outlet is as straightforward as it gets.
SUPPLIES
– 4-in-1 screwdriver
– Voltage tester
– Needle-nose pliers
– Lineman pliers
– Wire strippers
STEP 1: Cut power at the electrical panel.
Before you go any further, it’s imperative that you cut power to the outlet you are replacing. Go to your home’s electrical panel and toggle off the switch associated with the circuit that sends electricity to the outlet in question. After you shut off the power to the outlet, use a voltage tester to double-check that it’s really off. Insert the tester’s probes into the top two slots on the outlet. If the tester lights up, you toggled the wrong switch on the electrical panel and you’ll have to try again. Continue your trial and error until you are certain the outlet is no longer receiving electricity.
Don’t have a voltage tester? You can use a lamp instead, so long as you know the lamp works. Plug the lamp into the outlet, and if it doesn’t turn on, it’s safe to proceed. This method is inherently riskier, so use it only as a last resort.
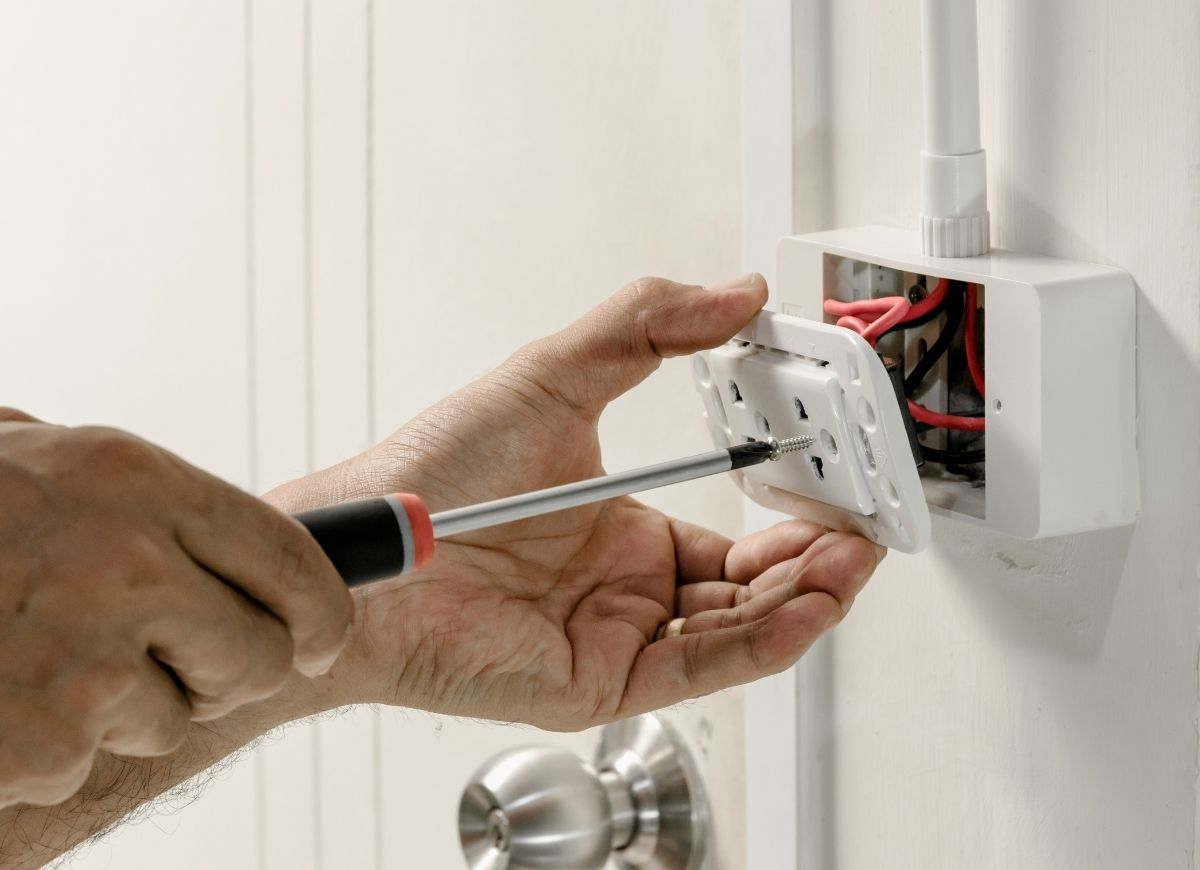
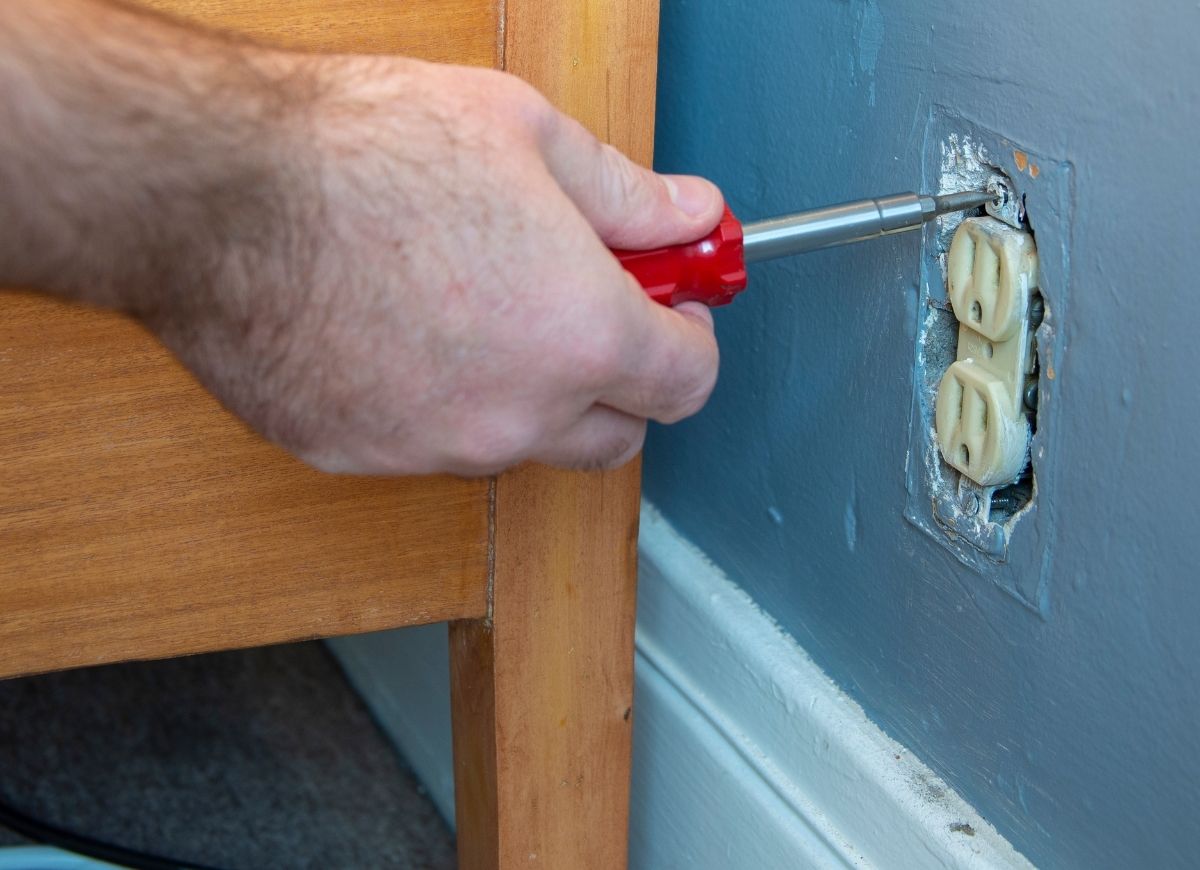
STEP 2: Remove the outlet’s faceplate.
Unscrew the outlet’s faceplate. In most faceplates, there’s a single screw in the middle. Remove that screw, and the plate should come off easily. Next, unscrew the mounting screws that secure the outlet to the electrical box. Finally, gently pull the outlet away from the receptacle.
STEP 3: Loosen the wires.
You can now see three wires extending from the wall to the outlet. If the wires are attached to screws on the outlet, simply loosen those screws in order to free the wires. If the wires are snaked into holes in the back of the outlet, press the release slot and pull the wires, assuming they don’t come out on their own. Put aside the old outlet.
STEP 4: Connect the neutral wire to your replacement outlet.
You’re now ready to wire in the replacement. First, connect the neutral wire (white) to the silver screw on the side of the outlet. Make sure to orient the hooked end of the wire so that its curve goes clockwise, the same direction in which the screw turns as you tighten it.
STEP 5: Connect the ground wire to the replacement outlet.
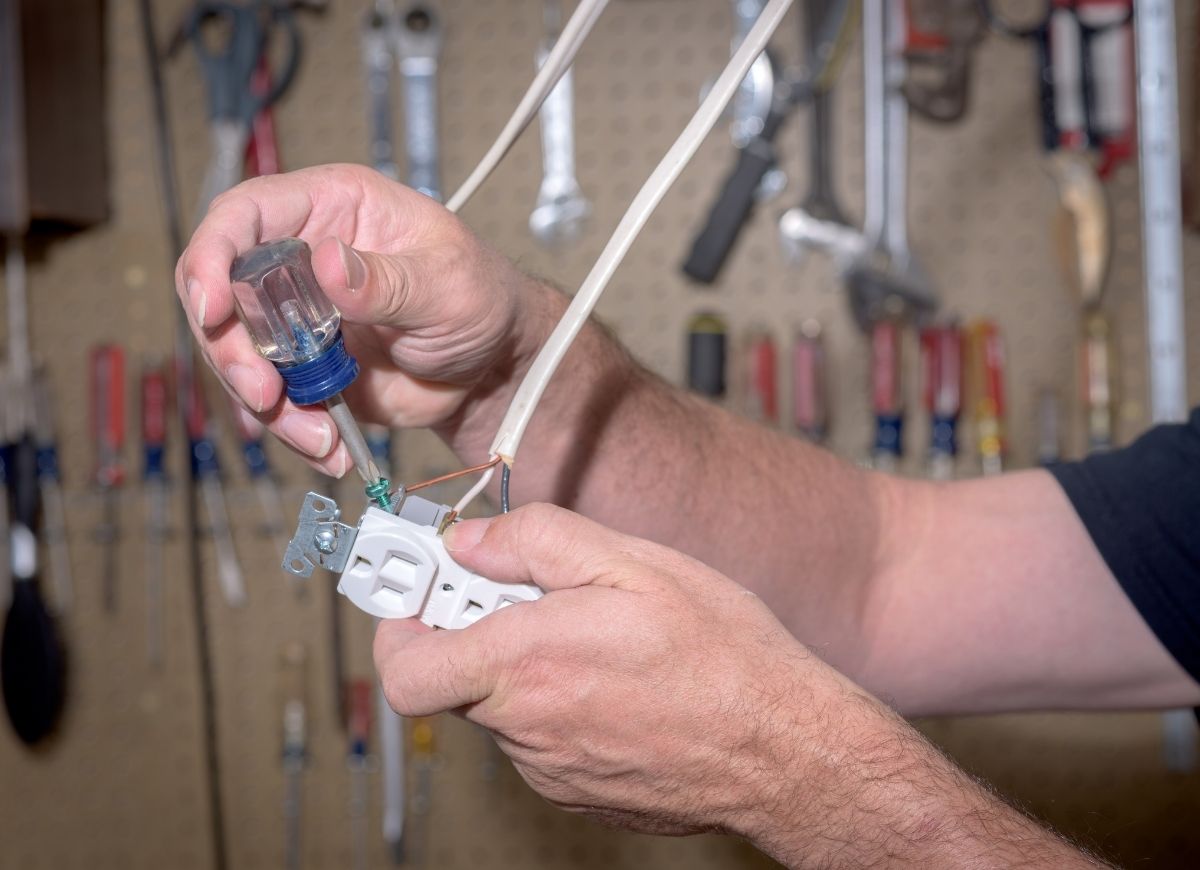
Connect the ground wire to the green screw, using the technique described above.
STEP 6: Connect the live wire to the replacement outlet.
Connect the hot wire (black) to the gold screw, which is the last remaining on the outlet casing.
STEP 7: Replace the wires in the electrical box and attach the faceplate.
Carefully maneuver the wires back into the electrical box, then screw the outlet to the box via the mounting screws at top and bottom. Finally, position the faceplate over the outlet and screw it back on.
STEP 8: Power on!
Go back to the electrical panel and restore power to the outlet you’ve finished replacing. Be sure to check for a successful outlet installation by testing the device with a voltage tester.
How to Wire an Outlet From Another Outlet
Sometimes you find that you absolutely need another outlet. Maybe you need to accommodate a new appliance or entertainment device, or you’re setting up a workshop. You can frequently solve this problem by wiring a new outlet from an existing outlet that’s on the other side of the wall from where you want to put the new outlet. This project is a bit more involved, but it’s doable for a safety-minded DIYer.
SUPPLIES
– 4-in-1 screwdriver
– Voltage tester
– Needle-nose pliers
– Lineman pliers
– Wire strippers
– Drywall saw
– Electrical cable
– Outlet
– Remodeling box (also known as an old-work box)
– Wire connectors
STEP 1: Shut off the power.
Be sure to shut the power to the existing outlet off before doing anything else. Check the outlet for power with the voltage tester, and then head to the electrical panel to shut off the corresponding breaker. Head back to the outlet and test again to ensure that the power is off. Once you confirm that the power is off, it’s a good idea to place a piece of black electrical tape across the breaker to prevent anyone from carelessly flipping it back on.
STEP 2: Feed a new cable through the wall.
Place the electrical box face-first against the drywall where you plan to install it. Trace along the box’s edges with a pencil, and cut along the marks with a drywall saw.
Head back to the existing outlet. If it’s been some time since you shut the breaker, test the outlet again to ensure it’s still off. Next, remove the faceplate and remove the screws holding the outlet in the box. Carefully pull the outlet out and let it hang to one side, providing access to the back of the box.
Push the new wire through an opening in the back of the box, feeding enough wire into the wall to reach the new outlet opening plus 1 foot. Feeding the wire through the opening can be challenging, so be patient and use pliers to pull the tab open if necessary. On this same side, cut the new wire approximately 10 inches from the box. Carefully strip back the plastic sheathing, leaving approximately 1 inch of sheathing in the box.
Note: Be sure you’re using an “old work,” “rework,” or “remodeling” electrical box for the new outlet. These boxes have tabs that squeeze the box against the back of the drywall to hold the box in place.
STEP 3: Rewire the existing electrical outlet.
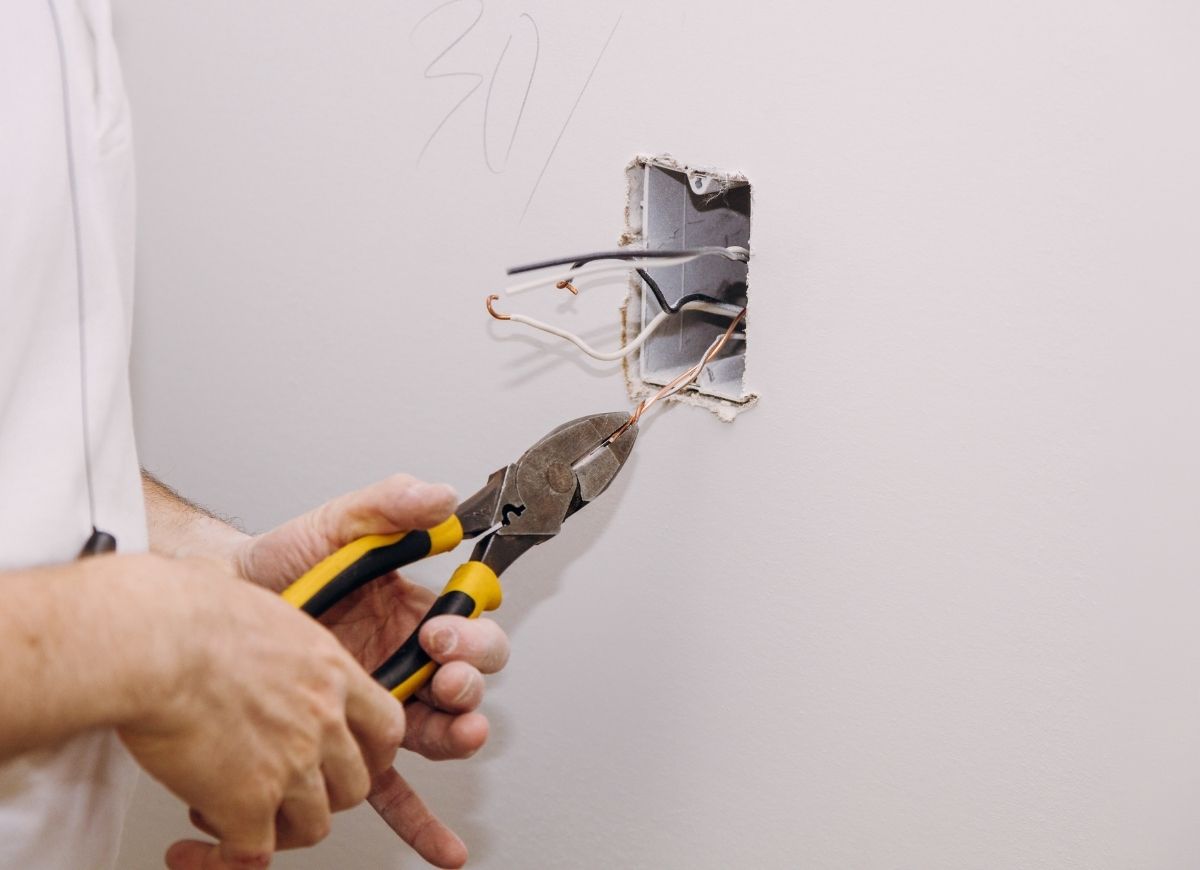
Use the screwdriver to loosen the screws holding the existing wires onto the outlet and straighten the hooks with needle-nose pliers. Use wire strippers to remove approximately ⅝ inch of sheathing from the hot (black) wire and neutral (white) wire.
Cut a 6- to 7-inch length from the spool of electrical cable. Remove the white, black, and ground wires from within the sheathing, and strip the ends back approximately ⅝ inch. This wire is called a pigtail.
Use the lineman pliers to twist the ends of the existing wire, the new wire, and one end of the pigtail into a clockwise twist. Do this in three sets: all black wires, all white wires, and all ground wires. Cap each twist with a wire connector.
Use the needle-nose pliers to bend the wires at the other end of the pigtail into a J-shape and hook them onto the outlet. White goes to silver, black goes to gold, and ground goes to green. Be sure that the hooks are running clockwise before tightening the screws.
STEP 4: Snake the outlet wiring through the wall to the new location.
Head to the other side of the wall to the space you’ve cut out for the new outlet. If the new wire isn’t easy to find, use a wire coat hanger bent into a hook to fish it out from the wall. Pull it through the new opening, and feed the end into the new remodeling box. Fit the box into the opening and turn the screws attached to the tabs clockwise until the box is secure.
You should have about 10 inches of new wire coming through the box. Strip the plastic sheathing back to expose the hot, neutral, and ground wires, leaving approximately 1 inch of sheathed cable inside the box.
STEP 5: Wire the new electrical outlet.
Use the wire stripper to strip the sheathing from the ends of the hot, neutral, and ground wires, exposing approximately ⅝ inch of bare wire. Use the needle-nose pliers to bend the ends of the wires into hooks, and slip them over the screws on the new outlet. Remember to follow typical receptacle wiring techniques: Connect the white wire to the silver screw, the black wire to the gold screw, and the copper wire to the ground screw.
Finally, bend the wires so they will fold nicely as you attach the outlet to the box. Tighten the screws at the top and bottom of the outlet until it is snug in the box. Put the faceplate on the outlet and tighten the screw. Flip the breaker back on and test the outlet.
RELATED: How to Splice Wires for Home Electrical Projects
Final Thoughts
Learning how to wire an electrical outlet isn’t overwhelmingly difficult, and it’s a skill that some DIYers will use time and time again. With a little bit of background and proper safety techniques, adding an outlet for a TV or a new tool or appliance can be a breeze. Just remember to work safely, test and retest electrical outlets before you start, and follow the instructions above for a reliable and safe electrical outlet installation.
FAQs About Electrical Outlet Wiring
This may have seemed like a lot of information about how to install an outlet, but some folks may need even more. Here are a few of the most common questions about this job.
Q. What do the different wire colors mean?
There are many types of wires, and to explain them all would require an electrical engineering textbook. The most common residential wiring, however, contains three wires: black, white, and copper. The black wire is the “hot” wire that carries power to the device. The white wire, known as the “neutral,” carries the current from the device back to the electrical panel. The ground wire gives dangerous levels of electricity a safe place to go in the event of a short circuit or other type of electrical fault,
Q. Can you wire a light switch to an outlet?
You absolutely can wire a light switch to an outlet, and there are several ways to do so. The switch can either be installed between the source of the power (typically the panel) and the outlet, or on a loop after the outlet.
To install it in-line, simply run the wire through an electrical box and connect the hot wire to the switch so it can interrupt the flow of power, and then continue the hot wire out to the outlet and wire as normal.
To install the switch after the device, connect the neutral wire in the box as usual, then run a length of wire from the outlet to the switch. Connect one end of the wire to the existing hot wire in the box using wire connectors. Next, connect the black wire from this length to one side of the switch, and connect the white wire to the other side. Finally, head back to the outlet and connect the white wire to the gold screw and wrap black electrical tape around the wire to indicate that it is now the hot lead coming from a switch.
Q. How do you ground an outlet without a ground wire?
The easiest way to fix an outlet that does not have a proper ground wire is to replace it with a GFCI outlet. These devices detect ground faults and interrupt the circuit right away. Install a GFCI in place of the first power outlet in the run to offer grounding protection.
Of course, contact a local electrical inspector to ensure this meets local codes.