
We may earn revenue from the products available on this page and participate in affiliate programs. Learn More ›
Drywall is tough, but it’s not indestructible. Over time, gypsum-board walls can sustain ugly cracks or holes. Fortunately, drywall is easy to repair easy, but there is an art to it. Here’s how to patch a hole in drywall so it’s indiscernible to landlords, homebuyers, or visitors.
DO use the right type of joint compound.
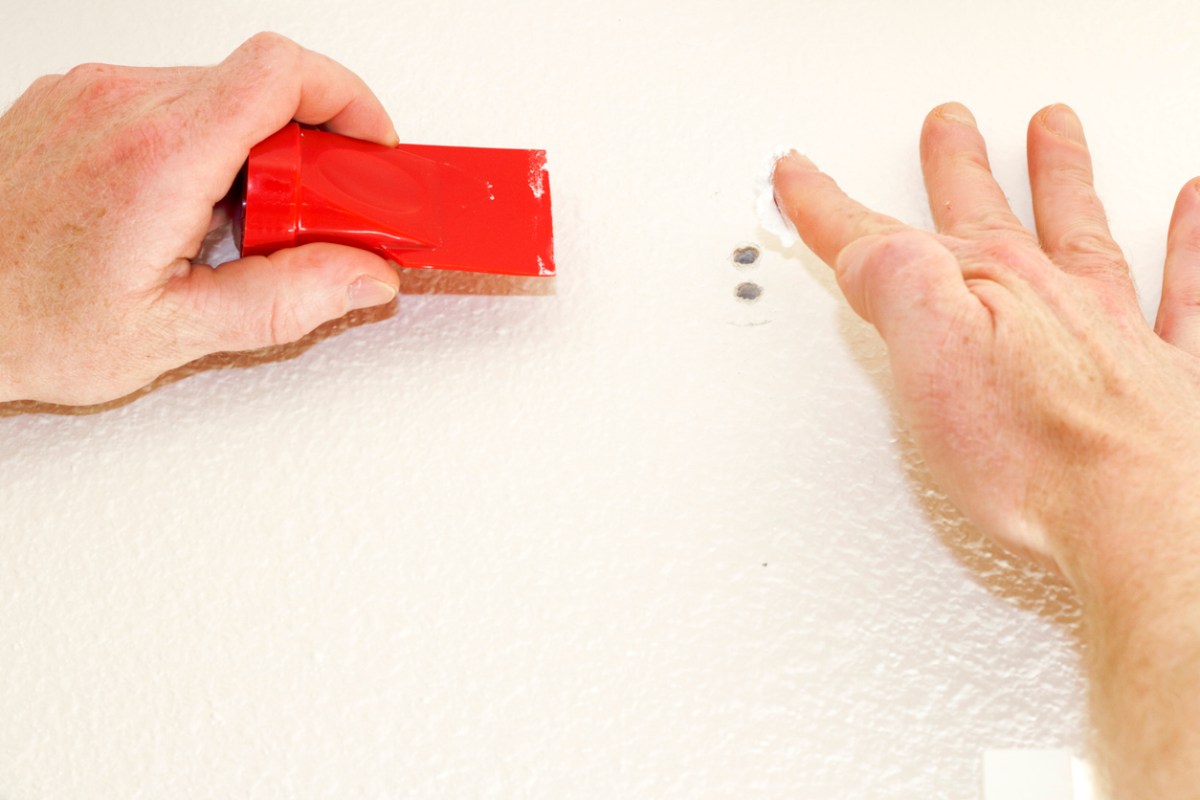
When repairing minor scratches or dents smaller than ½ inch across, fill them with a thin layer of joint compound (also known as drywall mud). Apply using a 3- to 4-inch putty knife made for repairing drywall—rather than, say, the kind of narrow utility knife you’d use for wood putty—smoothing the filler till it’s flush with the wall. Cracks or holes larger than ½ inch require reinforcing mesh prior to spackling. If you apply joint compound directly to large gouges, the damage will reappear as the house settles and the joint compound dries and crumbles.
DON’T waste time patching drywall.
Avail yourself of pre-made products designed to simplify repair tasks. Patch drywall using kits with reinforced center panels for larger holes and self-adhesive tape for smaller holes. A drywall compound and primer combo, such as 3M Patch Plus Primer, leaves a surface that’s ready to paint.
DO remember that neatness counts.
Use a box cutter or other sharp blade to remove random strands of drywall tape or frayed edges of wallboard paper around holes or cracks before applying joint compound. Otherwise your finished work will show bumps and other blemishes.
DON’T cut hidden electrical cords.
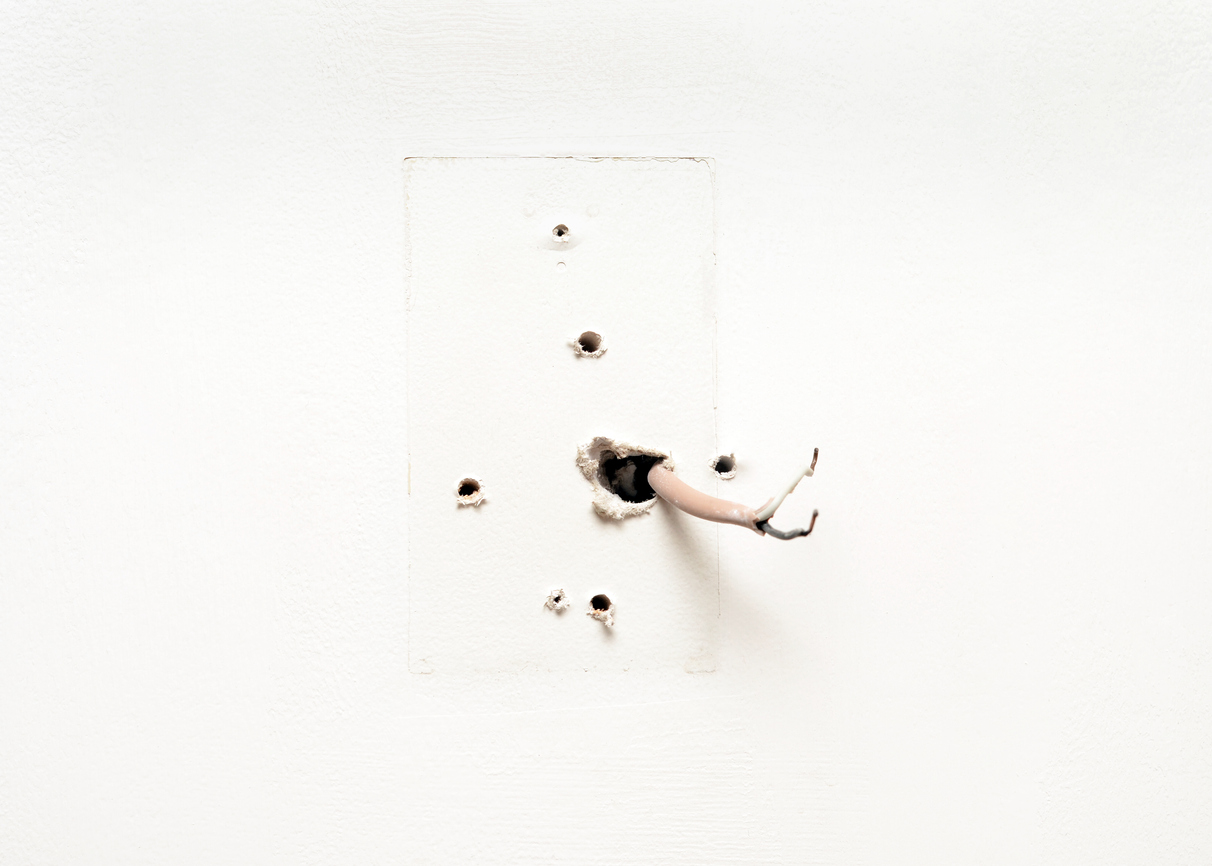
Be safe and don’t cut into a wall to repair a hole until you verify that electrical cords and plumbing lines aren’t running through the space behind it. If the hole is just a few inches wide, shine a flashlight into it to see what’s there. If you must enlarge the hole, carefully cut horizontally with a drywall saw—but avoid going deeper than an inch. It’s safe to assume that hot wires will be present near an electrical outlet, but don’t bet your life—or life savings—that homebuilders or renovators followed all electrical and plumbing codes. Wires and pipes are often found where they don’t belong.
DO keep it light.
Less is generally more when it comes to joint compound. A thin coat is easier to sand, and you’ll be less likely to remove too much while sanding and expose the patch. Also, for joint compound to appear flush with the wall near the damage site, “feather” the mud as you apply it. Hold the knife at a 70-degree angle, pressing harder on the outer edges of the mud as you move away from the center.
DON’T skimp on sanding after patching holes in drywall.
If you cut corners on sanding drywall the repair site will be noticeable, so take your time. Once the repaired area is dry, take to it with some fine-grit (100 or 120) sandpaper. After the first round of sanding, add a second layer of mud, spreading it about 2 inches beyond the boundaries of the first layer. Once dry, re-sand your repair.
DO use protection.
The fine particulate of drywall compound could injure your lungs if inhaled. So always wear a dust mask when sanding drywall compound. Disposable gloves are also a good idea to protect your hands from the dehydrating effects of gypsum dust.
DO use drywall patches for larger holes.
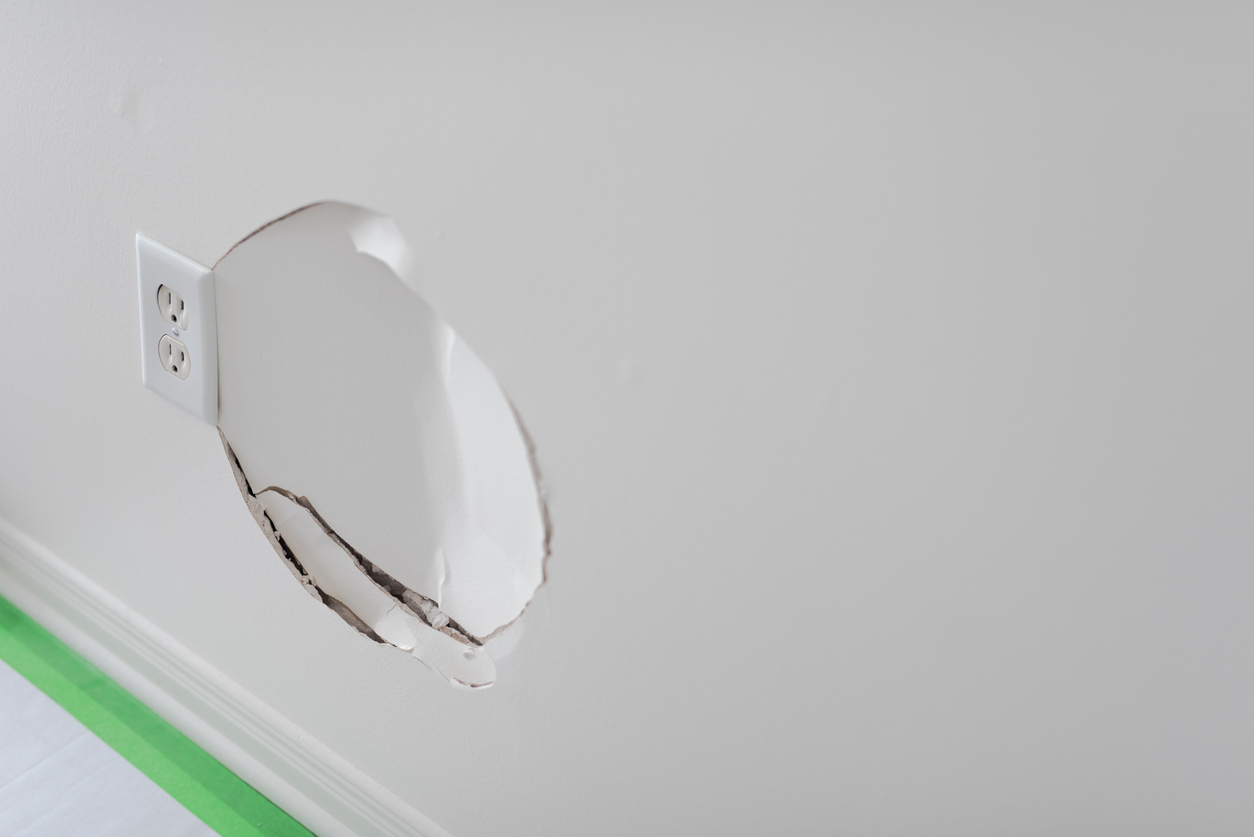
If you’re fixing damage that’s larger than a small nail hole, you’ll need to use a mesh drywall patch to complete the repair. Resist the urge to attempt to fill the hole with spackle as it will crumble after it dries. Most drywall repair kits come with everything you need for wall repair, including the mesh, spackle, putty knife, and sandpaper. Begin by placing the patch over the hole, then spread joint compound over the patch and smooth around the edges. Once dry, sand until smooth.
DON’T overlook popped nail heads.
As a home settles, its framing can twist. This twist motion can push the nails holding the drywall to the wall studs outward, creating a visible bulge known as nail pops. While you can tap that nail head back in with a hammer, it will eventually work its way back out again. For a more permanent fix, tap the nail in, then drive two drywall screws in about an inch above and an inch below the nail head. The screws will hold the drywall to the wall stud, preventing it from shifting and pushing the nail back out. Once the screws are in place, use drywall spackle to cover up the holes.
DO replace drywall corner bead to repair damaged drywall corner joints.
In addition to nail pops, a settling house can also cause the corner drywall bead to buckle, crack, and crumble. If the wall corner was made with paper-faced corner bead, simply cut out the damaged area using a utility knife. Use tin snips to cut a new piece of paper-faced bead to replace the damaged piece. Apply a new coat of mud over the damaged corner using a trowel, then press the new piece of corner bead onto the area. Mud the sides, allow to dry, then sand smooth and refinish with paint.
DON’T underestimate the cost of professional drywall repair.
While there’s nothing wrong with calling a drywall repair professional, it’s important to understand how much more it will cost than doing the job yourself. A professional will charge at least $75 to repair small holes up to 4 inches in diameter, according to Fixr. Expect to pay between $200 and $550 to repair multiple holes and cracks in a single room. Fixing drywall is a DIY project that can save you a considerable amount of money. In fact, a drywall patch kit that includes all the necessary materials for repairing a small hole, like this repair kit from 3M, only costs about $10.
DO use furring strips when applying a large drywall patch.
Fixing a hole in drywall that is more than 6 inches wide requires you to use furring strips to provide adequate support to ensure the repair holds up. Begin by cutting a piece of furring strip that’s 4 inches longer than the hole. Drive a drywall screw halfway into the center of the strip. Holding the strip by the screw head, place it inside the hole. Position the furring strip so that the drywall overlaps it on either side. While holding the furring strip in place, drive several screws through the drywall into the furring strip so that it’s secured in place. Next, attach the new piece of drywall to the furring strip using drywall screws.
DON’T forget to use drywall tape to prevent messy seams.

Many DIYers cut corners by failing to use drywall tape when mudding seams. This is a mistake. Drywall tape helps hold the joint compound in place, preventing it from sagging as it dries or cracking and crumbling out of the seam over time. There are several styles of drywall tape you can use. While most pros use paper tape because they can apply it quickly and it offers the smoothest finish, it can be difficult to work with. While it doesn’t offer the same finish, self-adhesive tape is much easier to use. If you’re repairing drywall in bathrooms, basements and other areas exposed to high humidity, use moisture-resistant tape.
DO locate wall studs before you begin.
If you’re taking on a larger repair that involves cutting out a section of drywall or adding furring strips, it’s a good idea to locate the wall studs before you begin. Utilities, including your home’s electrical wiring and plumbing, run along the studs in the wall of the home. Identify the stud locations before cutting or applying fasteners to a section of drywall to avoid coming into contact with wires or pipes. If you’re repairing nail pops, identifying the stud is easy. Simply use a level, line it up vertically along the nail pop and draw a line with a pencil to identify the stud’s location. If there are no visible nail heads in the wall, use a stud finder.
DON’T forget to inspect.
Think you’re done? Not so fast! Run your hands over the repair to ensure that it feels smooth. Then, with your temple against the wall, look for humps that might need more sanding.
Once you’re satisfied with the look and feel of your patch job, prime and paint the area. No one will ever know your secret!