

We may earn revenue from the products available on this page and participate in affiliate programs. Learn More ›
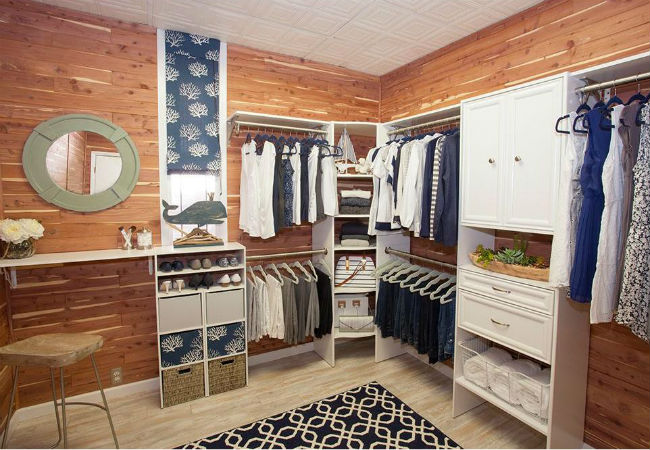
Prized for repelling sweater-munching moths, the woodsy aroma of cedar is finding new fans in eco-savvy homeowners looking for natural alternatives to toxic pesticides and smelly mothballs. If you’re looking to set up cedar closets at home, or the scent of cedar brings back fond childhood memories of your own grandma’s closet, keep reading. We’ll let you know what cedar can (and can’t) do for you and provide the need-to-know installation tips for do-it-yourselfers.
Aromatic Assets
You may know that cedar is often found in high-end exterior deck and fence construction, where it’s valued for its ability to resist damage from moisture and termites. Installed indoors, it’s insect repellent, to boot! The strongly scented oils in aromatic Red Cedar (Juniperus virginiana) slowly evaporate from the wood, emitting a scent that sends insects scurrying in the opposite direction. When aromatic cedar is used to line an enclosed space, such as a closet or a cedar chest, the scent can fill and protect the entire space from unwanted pests.
A Couple of Considerations
Clothing stored in cedar closets can take on a mild cedar odor, which usually fades in a few hours of being removed from the closet. Over time, aromatic cedar loses its aroma, but it can be restored by sanding away the top layer of the wood. Depending on the original strength of the scent in the wood (which varies), this may have to be done every three to seven years to refresh the wood’s insect-repelling aroma.
While most find the scent of cedar pleasing, some don’t—make sure you enjoy the aroma before installing cedar lining in a closet. Although relatively rare, some people are actually sensitive to the oils emitted by red cedar and may suffer skin irritation from direct contact. A Japanese study even found a correlation between aromatic red cedar and an increased risk of asthma in workers who were in frequent contact with the wood. If you’re concerned, speak with your doctor before proceeding with plans to install cedar closets in your home.
Material Matters
Cedar closet planks, such as these available from Home Depot, cover 15 sq. ft. of wall space for about $30. The planks come with tongue-and-groove assembly, which means the sides of the board interlock to hide the nails used to attach the planks. To line the interior of a standard 4-ft. by 8-ft. closet with an 8-ft. ceiling, you’d need approximately 12 boxes of cedar closet planks (remember to subtract the door from your figures)—that’s about $360. Add to that the cost of additional baseboard, corner, and interior closet door trim—which could run another $25 to $30—and the total cost of the project runs to just under $400. Closet planks are milled from highly aromatic red cedar and are the most reliable way to ensure good bug-repelling aroma.
A less expensive alternative is to line the closet with ¼-inch-thick aromatic cedar plywood, which runs about $33 for a 4X8 sheet. You can line the same 4-ft. by 8-ft. closet with cedar plywood for less than $200. With the additional cost of trim, the total project runs approximately $230. When buying cedar plywood, make sure it’s labeled as “aromatic.” Some types of cedar, such as white cedar, have little to no noticeable scent. Cedar plywood will have a milder scent than solid cedar closet planks and the look is more rustic, as the sheets must be face-nailed during installation.
DIY Tips for the Best Results
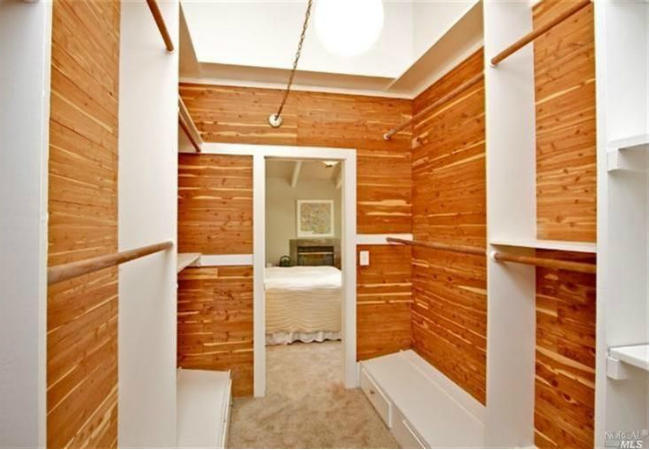
Installing a cedar closet lining is an especially DIY-friendly project since the cedar planks or plywood panels attach to the inside of the existing closet and no advanced framing or carpentry skills are necessary. You will, however, need to be able to measure and cut the panels or planks with accuracy and be comfortable using a hammer and nails or a pneumatic pin nailer (for installing tongue and groove planks). The following tips may help during the installation process:
- The best way to install cedar planks is horizontally, so you can attach them to the vertical wall studs that lie beneath the drywall. No need to remove the drywall, the planks install right over it.
- Pop chalk lines on the drywall, over each stud, to serve as a guide for inserting the nails. A stud finder can help you locate the studs.
- A pneumatic pin nailer, fitted with 5D nails, is quicker and more efficient than using a hammer and nails when installing tongue and groove planks, but feel free to use a hammer if you like. You can rent a pin nailer from a construction rental store for about $25 per day.
- If you’re installing 4X8 cedar panels, push the panels tightly against the ceiling before nailing them (with standard paneling nails) to the wall studs. This way you’ll have a nice tight seam at the ceiling and any gap at the bottom can be covered with base trim.
- Sand the cedar after installation to refresh its surface and bring out its insect-repelling aroma.
- Do not seal the cedar! Applying any type of sealant or top coat will block the aroma, which defeats the purpose of installing cedar closets in the first place.