
We may earn revenue from the products available on this page and participate in affiliate programs. Learn More ›
Most of us spend the majority of our kitchen cleaning time focusing on the big three—sink, counters, and floors. It’s easy to forget that the cabinets require regular attention too, especially the doors. That’s where tiny droplets of cooking grease, food splatters, and steam tend to settle. This mess then attracts and holds dust, leading to dingy, dull, or streaked surfaces.
While a bit tedious, cleaning kitchen cabinets isn’t a difficult task, nor does it require the use of odiferous or potentially toxic chemicals. Whether your cabinets are painted or finished wood, they’ll perk right up with a bit of elbow grease and few common ingredients—just take care not to damage their finish with an overzealous approach. Here’s how to do the job right.
DO use a gentle cleaning solution.
Leave the abrasive cleaners and scrub brushes to your sink; harsh scrubbing can damage kitchen cabinets’ finish or paint. Instead, prepare your own gentle cleaner by mixing one part mild dishwashing soap with two parts hot water, or the same ratio of distilled white vinegar to hot water. (When cleaning greasy kitchen cabinets, warmer water helps soften the grunge so you’ll be able to wipe it away more easily.) Pour your cleaning mixture into a spray bottle, and you’re ready to go.
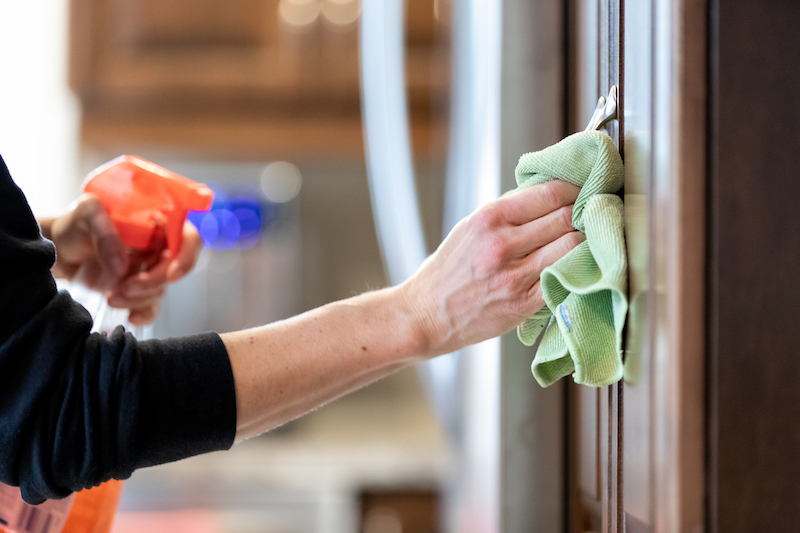
DON’T get your cabinets too wet.
Spray the cleaning mixture onto a microfiber cloth or soft rag until it’s damp but not soaking wet. Too much moisture can damage your cabinets’ paint or finish. Wipe each cabinet door from top to bottom, paying extra attention to any trim or molding where dust and grime tend to accumulate. Don’t forget to wipe cabinet hardware, and the insides of the cabinet doors. Spritz more cleaning solution onto your cloth as needed, and squeeze excess solution into the sink if necessary.
DO tackle crevices and cabinet hardware with an old toothbrush.
Some kitchen cabinets have ornate trim or deep grooves that a rag just can’t access. If this describes your cabinets, dip an old toothbrush into your cleaning solution and use it to gently scrub those hard-to-reach spots. Don’t forget the crevices around the cabinet handles or knobs, and the edges of the cabinet doors, which can be tricky to reach with a rag.
RELATED: How to Remove Grease From Kitchen Cabinets
DON’T let water seep into the hinges.
Although your cleaning solution is safe for finished or painted wood, as well as laminate, it’s not intended for your cabinets’ hinges. You don’t want your efforts spent cleaning kitchen cabinets to leave you with rusted hardware. Instead, use a dry microfiber cloth to wipe away dust and grime from the metal. If there’s a particularly greasy or grungy spot, spray just a drop or two of cleaning solution onto your cloth, scrub the dirty spot, and then wipe the metal dry.
DO wipe away the cleaner with a final rinse and a quick dry.
Once you’ve cleaned your cabinets, go over them once more with a clean cloth lightly dampened with warm water. This removes any lingering cleaning solution or grime. As with your cleaner, it’s best to work from the top of the cabinets to the bottoms to avoid drips.
Letting cabinets air dry after rinsing them can damage or bubble the finish. Instead, use a soft cloth to dry all damp surfaces and buff them to a shine.
RELATED: These Cabinet Customizations Are Totally Worth It, According to Pro Organizers
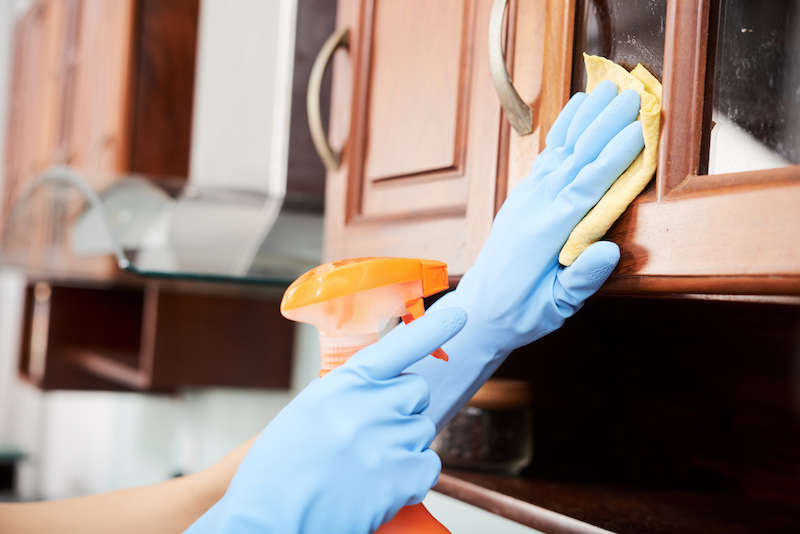
DON’T forget to clean the glass.
If your cabinets have glass insets, spray a clean cloth with your vinegar mixture or a commercial glass cleaner (see and wipe the glass thoroughly on both sides. It’s generally fairly easy to remove dried food splatters, grease, and other kitchen grunge from glass, but you might need to tackle the spot twice to completely eliminate it. Don’t use anything abrasive on the glass, and wipe the panels dry once you’ve finished cleaning them.
DO tackle tough cabinet stains with baking soda.
If stains, dried grunge, or grease remain on your cabinets even after you’ve finished your kitchen cabinet cleaning, you’ll need to add an extra step. In a small bowl, mix one part baking soda with two parts water. Use a clean, dry cloth to dab the paste onto the dirty spots. Let the paste sit for a few minutes, and then wipe it away with a damp cloth, gently rubbing until the grunge is gone. Wipe the spot again with a water-dampened cloth, and then dry with your microfiber cloth or soft rag.
RELATED: How Much Does it Cost to Refinish Cabinets?

DON’T skip periodic deep cleaning.
At least twice per year, take your kitchen cabinet cleaning up a few notches: Empty your cabinets entirely, and then wipe down the shelves, inside of drawers, and cabinet interiors along with the outer surfaces of the cabinets, using the same cleaning supplies and procedures outlined above. Before returning items to the cabinets, consider whether they are worth keeping. Toss or donate anything you no longer need or use, and get rid of heavily chipped dishes, cracked mugs, plastic storage containers with missing lids, and the other useless odds and ends that tend to accumulate in the deepest recesses of kitchen cabinets.