We may earn revenue from the products available on this page and participate in affiliate programs. Learn More ›
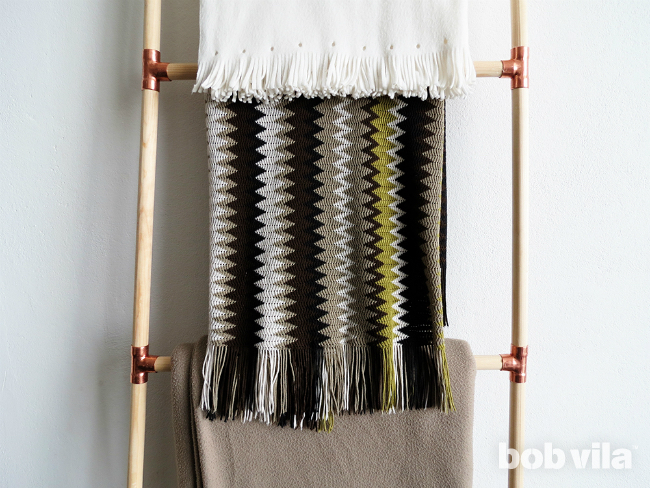
Between seasons of use, bulky blankets often take up valuable real estate in drawers, underbed bins, or the linen closet. What’s a space-challenged homeowner to do? Once again, vertical storage to the rescue! Both stylish and versatile, a simple ladder-style rack may be the solution you’ve been looking for. Leaning artfully against a wall, this rack holds one blanket per dowel, with each draping slightly over the one beneath. Set up your blanket storage conveniently beside your couch, and you and your guests will never find yourselves too chilly again. The best part: This hardworking storage unit takes hardly any work! Read on to learn how to assemble your own in minutes.
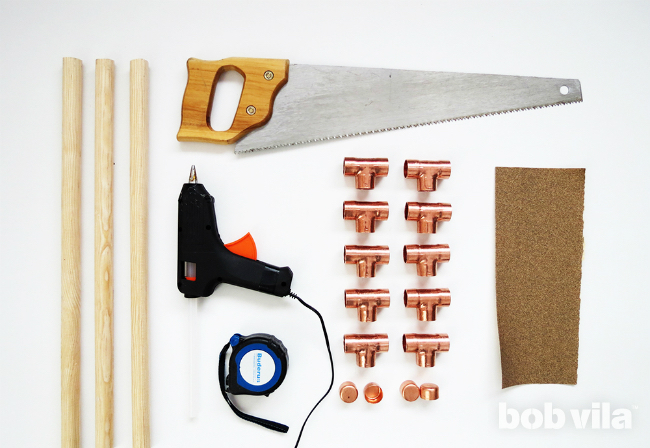
MATERIALS AND TOOLS
– 7⁄8-inch wooden dowels, 8 feet long (3)
– Copper T-junction pipe fittings (10)
– Copper caps (4)
– Handsaw
– Tape measure
– Sandpaper
– Mineral oil or varnish
– Hot-glue gun or silicone glue
STEP 1
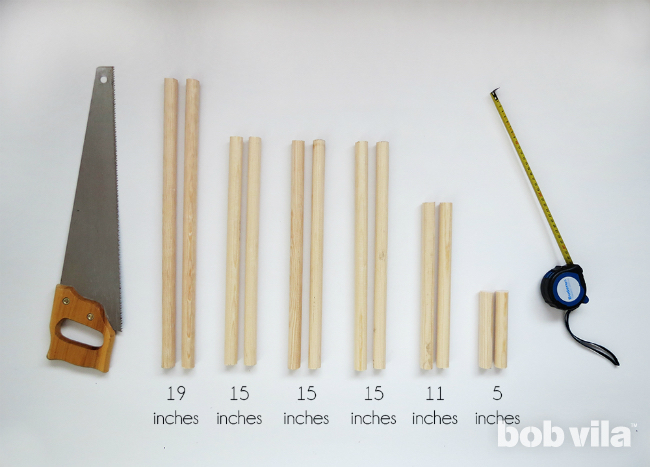
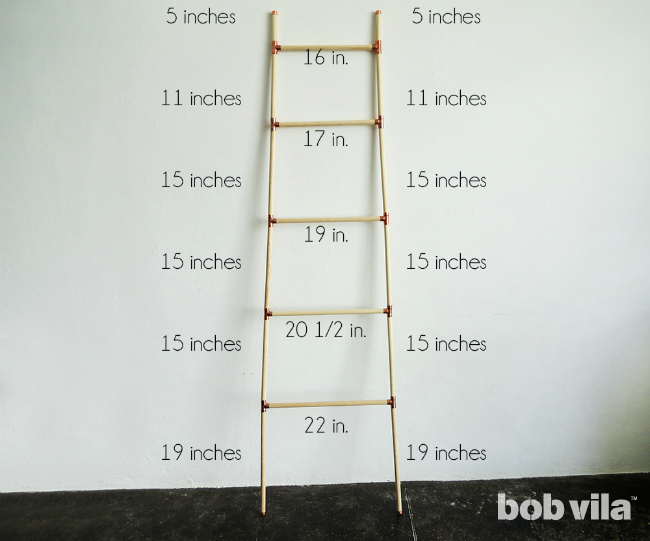
For the vertical members of the ladder, cut the 8-foot dowels into lengths as follows (12 pieces total): two pieces at 19 inches, six pieces at 15 inches, two pieces at 11 inches, and two pieces at 5 inches.
STEP 2
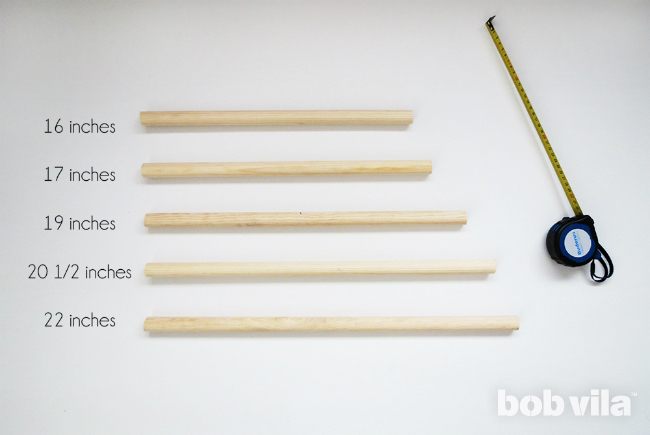
Next, you’ll cut pieces for the rungs. In this modern design, the ladder will be narrower at the top than the bottom, so each rung will be a slightly different length: 16 inches at the top, then 17 inches, 19 inches, 20-1⁄2 inches, and finally, at the bottom, 22 inches. Make the cuts for these horizontal pieces from your remaining dowels.
STEP 3
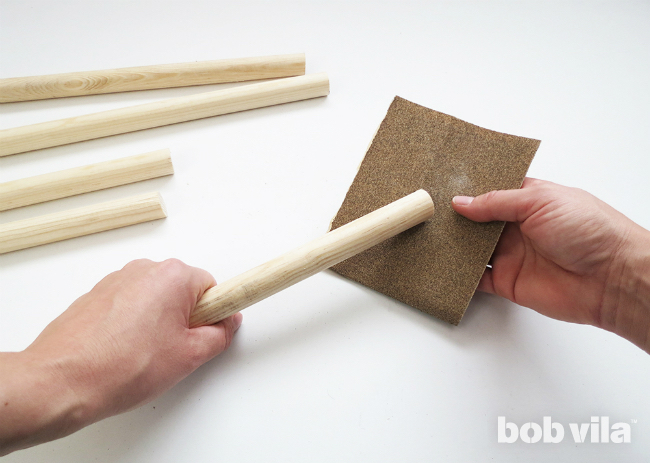
Once all dowel lengths have been cut, sand them completely. We also recommend brushing on a layer of mineral oil or varnish to hydrate and protect the wood.
STEP 4
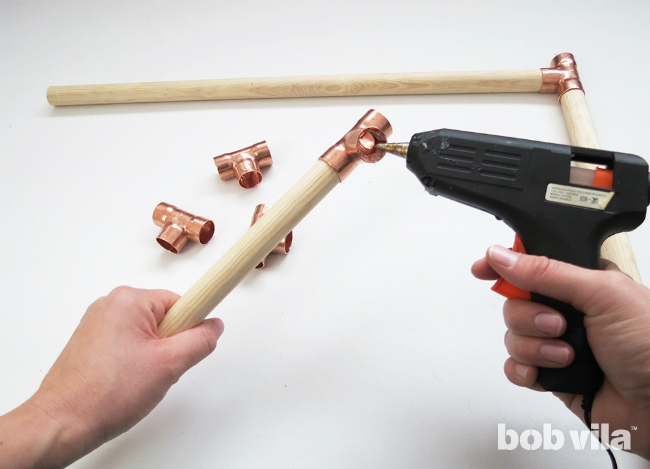
Next, you’ll assemble the legs of the ladder, using the batch of dowels you cut in Step 1 and the copper T-junction pipe fittings. Glue the inside of the pipe fittings first (either with hot glue or silicone glue), then insert the appropriate wooden dowel. For each leg of the ladder, assemble the pieces in this order, from top to bottom: a 5-inch dowel + T-junction, an 11-inch dowel + T-junction, three 15-inch dowels with a T-junction at the end of each dowel, and then a 19-inch dowel. Follow this process for both legs of the ladder.
Lay the two completed legs flat on the ground, then affix the horizontal rungs between them—here, working from the bottom up. Remember: The 19-inch lengths are the bottom of the ladder, so glue the 22-inch dowel between them at the bottommost T-junction. Work your way up the ladder by gluing the next shorter dowel into the next pair of T-junctions, finishing with the smallest, 16-inch, dowel at the top.
STEP 5
Be sure that all parts are firmly connected, or else the ladder will not be sturdy enough. Wait for the glue to dry completely before standing the ladder against the wall.
STEP 6
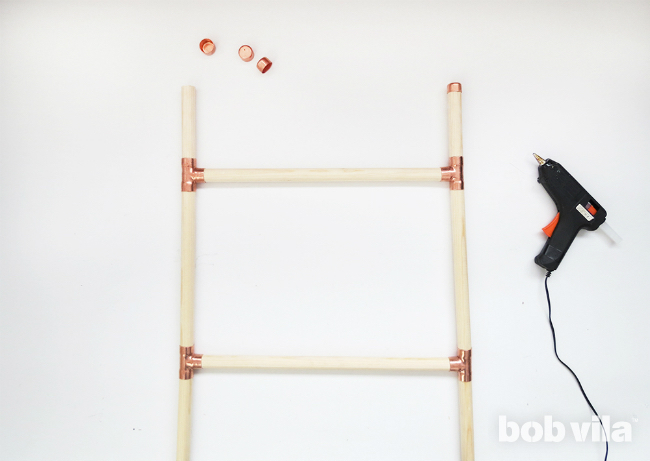
Finish by gluing copper caps to the top and bottom of each leg. Now you’re free to lean the ladder against the wall of your choice and immediately hang up your favorite, coziest, most decorative blankets.
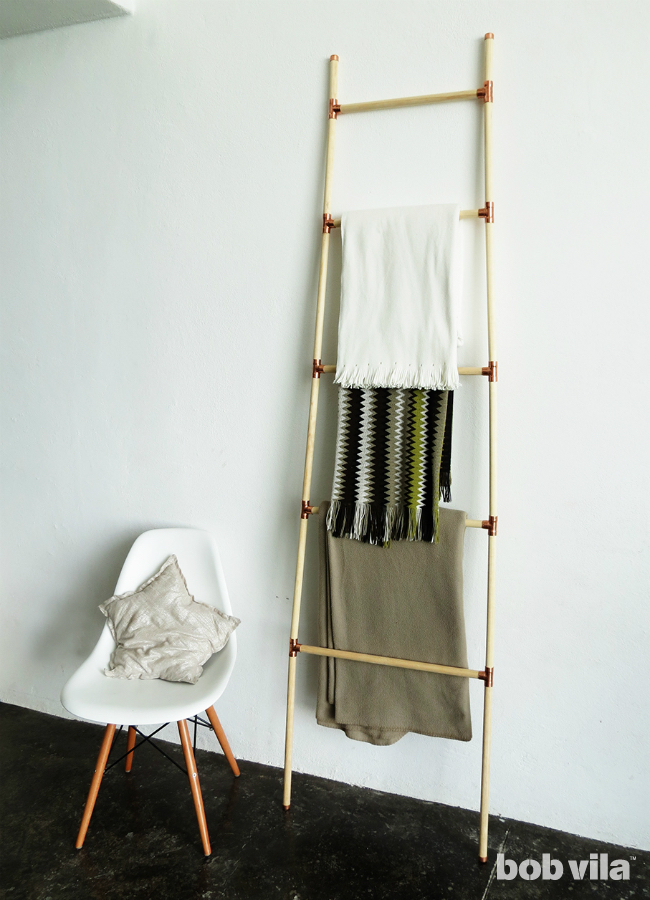
But the functionality of this design doesn’t stop there: You can choose to lean your ladder next to the bathroom sink to hold towels, or in your closet to display accessories. Move it to the kitchen, and you have a no-nails-required storage solution for cooking utensils.

Ama is a DIY addict and the creative mind behind Ohoh Blog. She likes home decor, lighting, and furniture projects that may involve painting, sewing, drilling…no matter the technique! Whatever she has on hand is inspiration to create, and fodder for her serious addiction to upcycling.