We may earn revenue from the products available on this page and participate in affiliate programs. Learn More ›
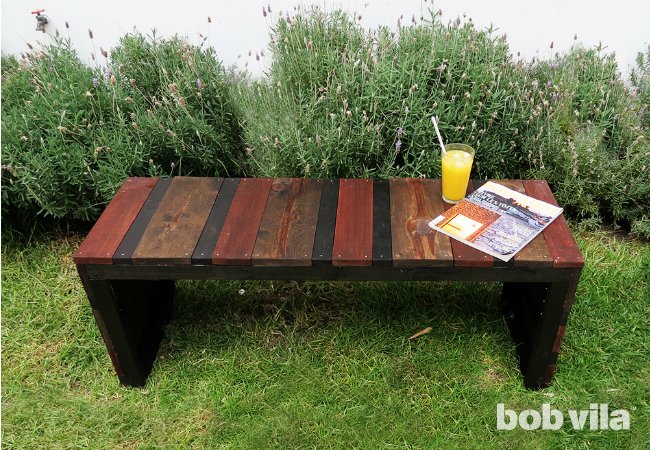
As summer approaches, the growing number of sunny hours each day means that we have more time to spend out in the yard. Outdoor attractions abound: coffee on the porch at sunrise, afternoons filled with family barbecues and backyard games, and long evenings around the fire pit roasting s’mores. But to enjoy any of these pastimes, you’ll need ample outdoor seating. Rather than buying a few flimsy chairs from the nearest big-box store, consider crafting additional seats on your own. All it takes is some lumber and basic woodworking knowledge—don’t worry, we’ll guide you through—and you’ll get bragging rights for seasons to come whenever someone compliments your sturdy bench.
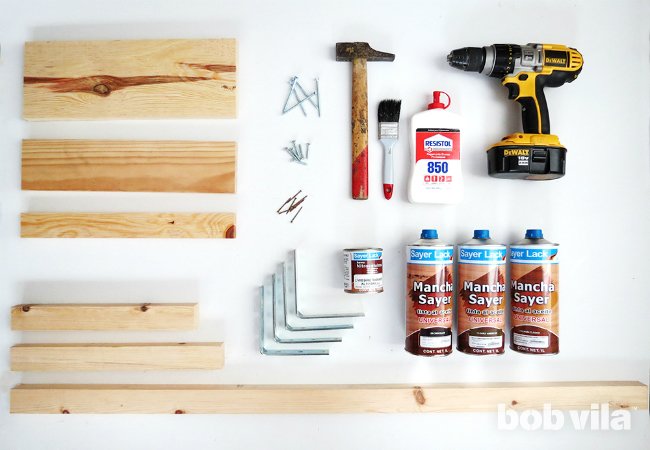
TOOLS AND MATERIALS
– 20 feet of 2″ x 2″ lumber (purchased in 10-foot pieces)
– 16 feet of 1″ x 2″ lumber (purchased in 8-foot pieces)
– 16 feet of 1″ x 3 7⁄8″ lumber (purchased in 8-foot pieces)
– 8 feet of 1″ x 6″ lumber (purchased as an 8-foot piece)
– Handsaw
– Wood glue
– 24 2 1/2-inch screws
– 24 1-inch screws
– 4 5″ x 5″ metal brackets
– Drill
– 1 1/2-inch nails
– Hammer
– Sandpaper
– Three colors of wood stain
– Brush
– Varnish
STEP 1
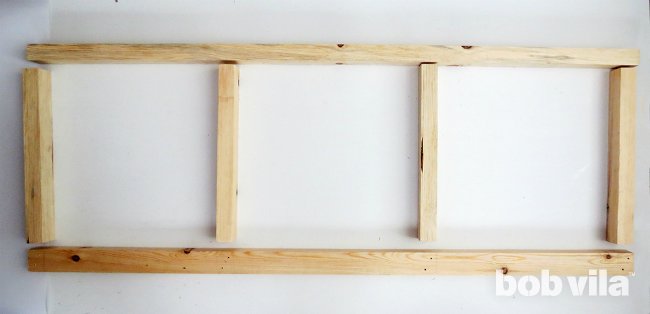
Round up your lumber, then start by cutting the two 10-foot pieces of 2″ x 2″ lumber into shorter lengths that you will use to build the bench’s structure. Optimize your cuts by sawing each 10-foot length into six pieces: one 39-inch length, two 15-inch lengths, and three 11-inch lengths.
STEP 2

To make the bench seat, lay the two 39-inch pieces out horizontally and put the four 11-inch lengths into place perpendicularly—one inside either end and two evenly spaced out in the middle. There should be approximately 10 2/3 inches between each crosspiece.
Starting with the bottom right corner, apply wood glue to the ends you’re bringing together. Then, use two 2 1/2-inch screws to connect the pieces at each meeting point. Tip: To make the screwing easier, use a drill with a thin bit.
STEP 3
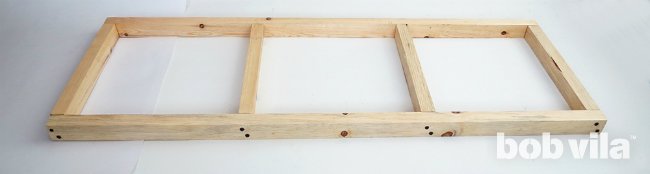
Continue to glue and then screw in the four 11-inch pieces along the bottom 39-inch length, following the directions in Step 3. Repeat to attach them to the opposite length. As you screw each piece into place, check that you’re keeping the structure relatively straight.
STEP 4
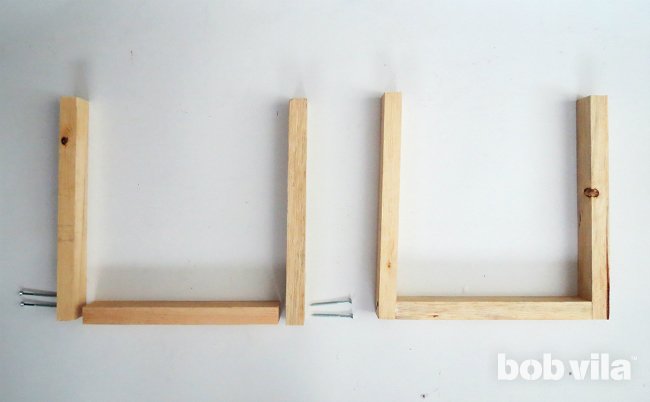
Set this piece—the bench seat frame—aside while you work on the frames for the two bench legs. For each, you’ll need two 15-inch lengths of wood and one 11-inch piece to connect them at the bottom. Assemble the pieces with glue and two screws at each joint (as you did in Step 3) to form two U-shaped frames.
STEP 5
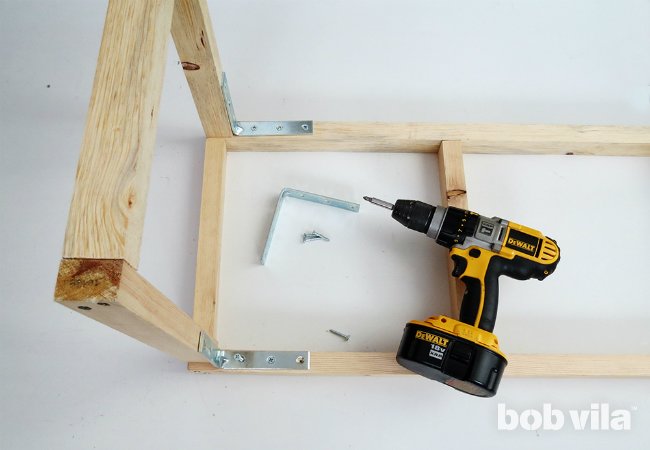
Now, attach the legs to the bench seat frame using the four brackets. Place each leg so that the open side of the U shape connects to an end of the seat frame. Place a bracket at each corner where the 39-inch side of the bench seat meets the 15-inch leg frame, and use 1-inch screws to attach.
STEP 6
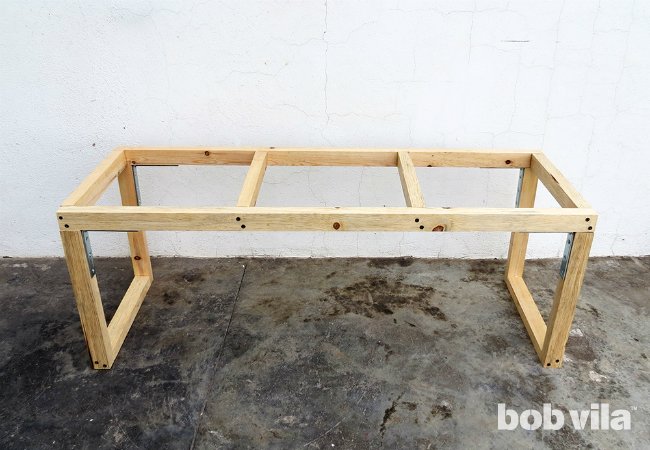
Congratulations! The bench structure is finished. Flip it over so it’s standing, and admire your handiwork for a few minutes before starting on the cover. To create the rustic design shown above, cut the all the rest of your lumber into 15-inch-long slats, which will yield 12 pieces of 1″ x 2″, 12 pieces of 1″ x 3 7⁄8″, and six pieces of 1″ x 6″.
STEP 7
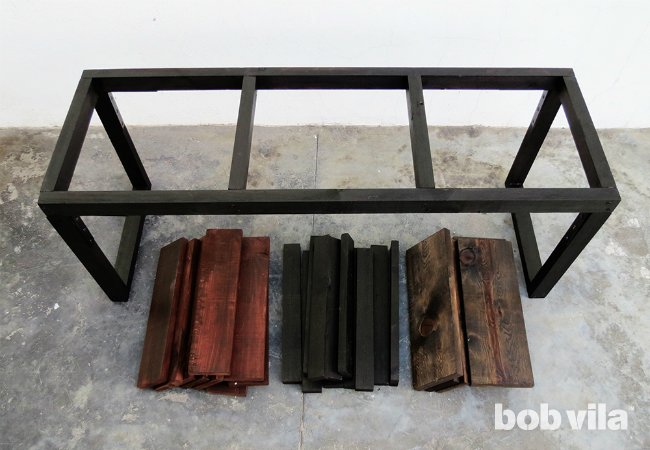
Sand the entire bench structure and all the wooden slats, then stain them. Choose three complementary colors of wood stain to provide a more modern finish—you can pick any shades you like. We stained the structure and the 1″ x 2″ slats in Chocolate, the 1″ x 3 7⁄8″ slats in Mahogany, and the 1″ x 6″ slats in Early American.
STEP 8
With three widths of slats in varying colors, you have plenty of options for creating a pattern. You can (and should) try out different sequences before nailing the slats in place.
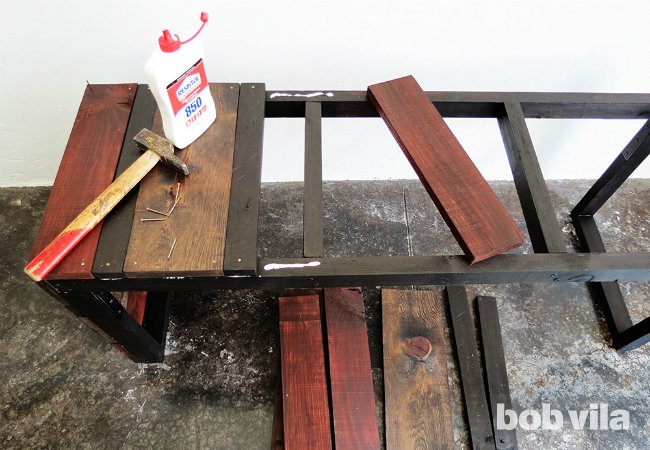
When you find your favorite combination, glue and then nail the slats along the bench structure. (Tip: One nail at each end should be enough to secure the 2-inch-wide slats; for the rest, put a nail at each corner.) Start on the left side, work your way across the seat, and finish with the right side. Depending on your pattern of choice, you’ll probably have a few slats left over.
STEP 9
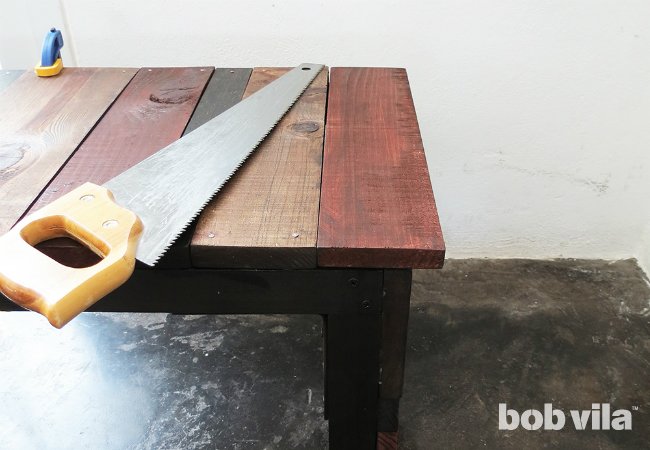
The widths of the slats will most likely not add up exactly to the 39-inch length of the structure—and that’s OK! If that happens, just cut the last slat to fit, and restain the sawed-off end. No one will be the wiser.
STEP 10
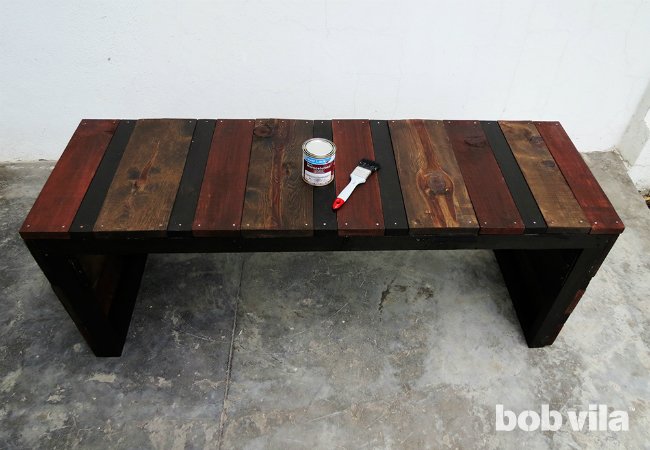
Finally, varnish the bench. Because it’s a piece of furniture intended for the outdoors, give it at least two coats for lasting protection from the elements. Follow the directions on the can of varnish closely, especially when it comes to dry time: You don’t want to sit on your handcrafted beauty before time is up, lest you leave a seat print behind—or worse, get varnish on your clothes!
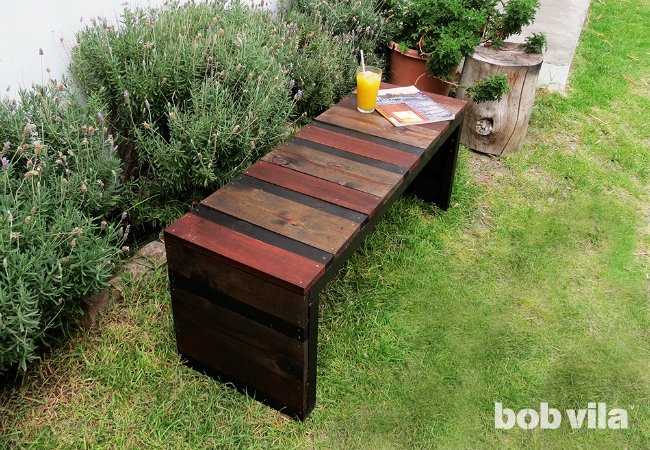
When dry time is up, we highly recommend moving your bench to the sunniest patch on your property to test it out. Bring a refreshment and some summer reading with you—you’ll surely want to stay there a while.
Ama is a DIY addict and the creative mind behind Ohoh Blog. She likes home decor, lighting, and furniture projects that may involve painting, sewing, drilling…no matter the technique! Whatever she has on hand is inspiration to create and fodder for her serious addiction to upcycling.