We may earn revenue from the products available on this page and participate in affiliate programs. Learn More ›
Having an organized and functional kitchen can sometimes feel unattainable especially if you’re working with limited space. Sure, you’ve tucked the cookware, countertop appliances, plates, and serving utensils into every available cabinet and drawer, things can get out of control pretty fast—but what to do with all of the food?
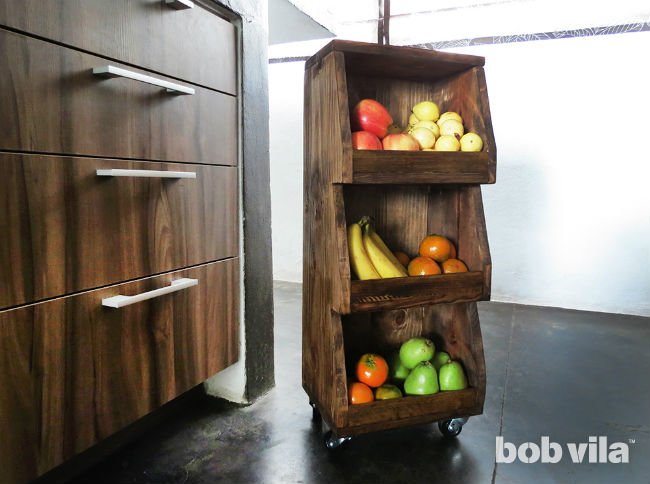
Fruits and vegetables from the farmer’s market look lovely in a bowl when there’s space on the counter, but often wind up in the way during the actual cooking process. A rolling storage cart, on the other hand, makes a convenient alternative. It takes little space, provides plenty of storage, and moves out of the way with ease. Plus, there’s so much more potential here than just produce. Build this DIY rolling cart according to the directions outlined here, and you’ll have a mini pantry on wheels.
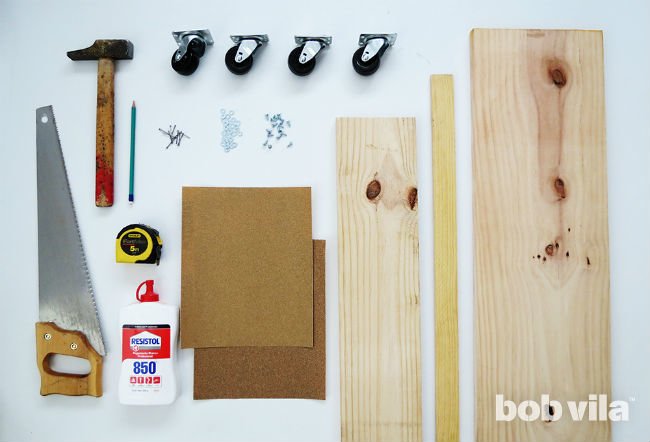
MATERIALS AND TOOLS
– 1×10 (16 feet)
– Ruler
– Pencil
– Saw
– 1×6 (8 feet)
– Wood glue
– Woodworking clamps (2)
– 2-inch nails
– Hammer
– 2″-wide flat trim
– Palm or orbital sander
– Sandpaper (60- and 120-grit)
– Food-safe wood stain
– Food-safe varnish
– Drill
– Rubber wheels (4)
– ½-inch screws and washers
STEP 1
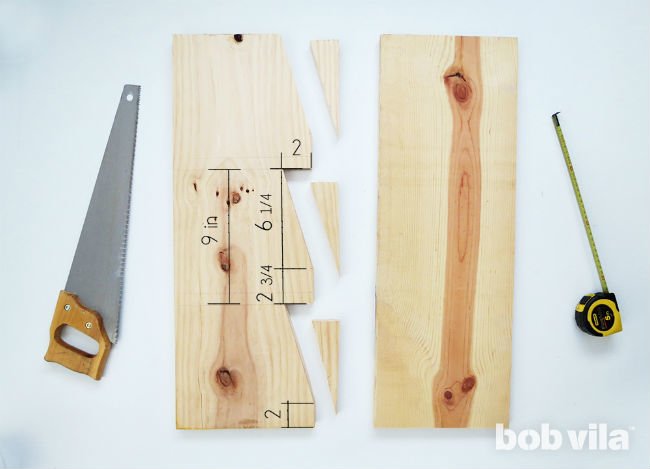
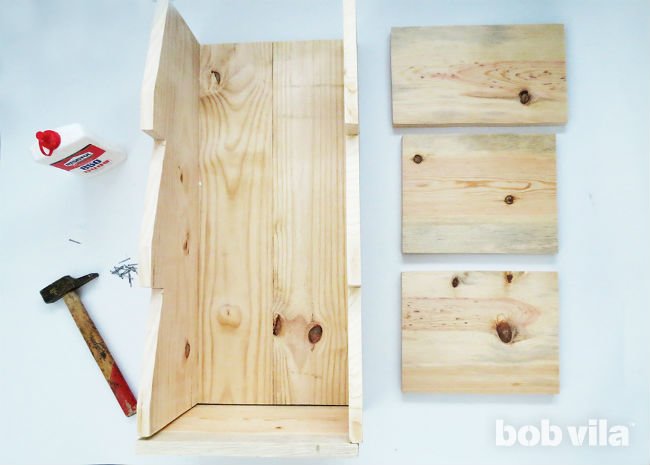
Cut two pieces of 26-¼”-long planks from your 1×10 lumber to make the sides of the rolling cart. (You saw these cuts yourself, or have this done at the home improvement store where you purchased the wood.)
Since this rolling cart will be divided into three bin-like compartments to separate and store fruits and vegetables, draw horizontal lines across the plank 9 inches and 18 inches from the top to help you determine where you’ll attach the shelves.
Next, draw three more lines across the wood: one will be 2 inches from the bottom and the others 2-¾ inches above each pencil line (at 9 and 18 inches). These horizontal rectangles you’ve drawn on your piece of wood represent where you’ll fit each shelf.
Finally, measure 2 inches from the right and draw one perpendicular line down the right side. This will help you start to draw triangles, which you’ll cut along to make angled openings at each level. Follow along with the diagram above as you make these connections:
• Starting at the top, connect the vertical penciled line at the very top of the board (2 inches from the right) to the first horizontal line beneath it (9 inches down) and the right edge of the board. You’ll have created a right-angle triangle with a 2-inch side, a 6-¼-side, and a hypotenuse that measures just about 6-9/16 inches.
• Start at the second horizontal line from the top intersects with the vertical line, draw a line that connects this intersection with the right edge of the plank at the next line below. Again, you’ll have a right-angle triangle with a 2-inch side and a 6-¼-side.
• Finally, draw a line from the next horizontal line (which is two from the bottom) meets the vertical line to the right edge at the bottom-most horizontal line. Here, too, you’ll have a triangle with a 2-inch side and a 6-¼-side. If you’re checking your work, the bottom point of the bottom triangle will be only two inches from the bottom of this plank.
Now, with a handsaw or a jigsaw cut out the three triangles.
Repeat on the second 26-¼”-long 1×10. Pro tip: To get precisely the same cuts and avoid taking all of those measurements again, go ahead and trace the first piece and all of its angular cuts onto the second.
STEP 2
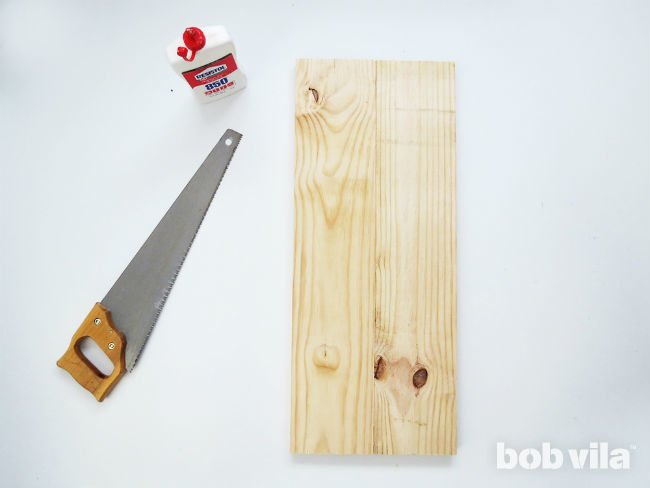
Cut your 1×6 into two pieces, each 26-¼ inches long. Then, line them up side by side so that they make a surface 11 inches across; this will be the back of the rolling cart. Apply wood glue to where the two planks meet and hold them together with clamps while the glue dries.
STEP 3
From your remaining 1×10, cut the following pieces:
• A cart bottom that is 12-½ by 9-½ inches
• Two shelves that are 11 by 8-¾ inches each
• A top that is 12-½ by 7-½ inches
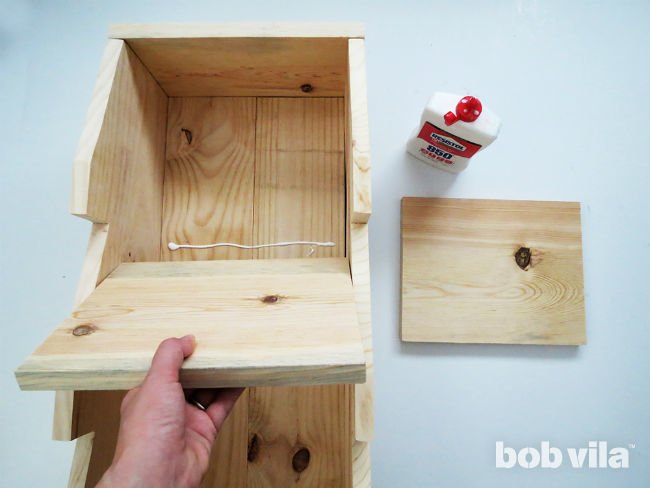
First, glue the uncut long edge of each side to the outside edges of the 11″-wide back that you just made for the cart. Hammer six nails through one cart side into the edge of the back; repeat with the second cart side.
Then, glue and nail the cart bottom so that it completely covers the bottom edges of the sides and the back. (Its 12-½-inch side will meet the back of the cart.) Three 2-inch nails through the bottom of the cart into each of the cart sides and cart back should do the trick.
STEP 4
Draw a line in wood glue along the back of the cart where you’ll insert each shelf. For this design, we inserted the shelves so that their sides lined up with the horizontal bottom of each triangle cut-out.
Line the first shelf’s 8-¾-inch sides with wood glue and slide it into the cart so that its 11-inch sides face the back and out—it should be a snug fit. Press firmly into the glue. Then, hammer four nails across the back of the cart (through the 1x6s into the shelf) and three nails through each side into the sides of the shelf. Repeat to install the second shelf.
STEP 5
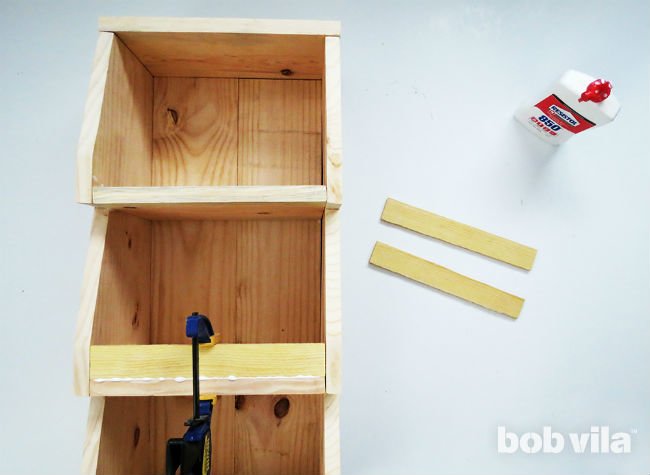
Essentially, you now have a set of stacked cubbies on wheels. To ensure nothing slides around and out while you wheel your rolling cart through the kitchen, make a short lip for each shelf.
Cut the 2″-wide wood trim into three 11″-long pieces.
Next, apply wood glue to each short end and the bottom of your first cut, then slide it into place between the two sides of the rolling cart and on top of a shelf. Repeat for the remaining two shelves, and hold each with a clamp while the glue dries.
STEP 6
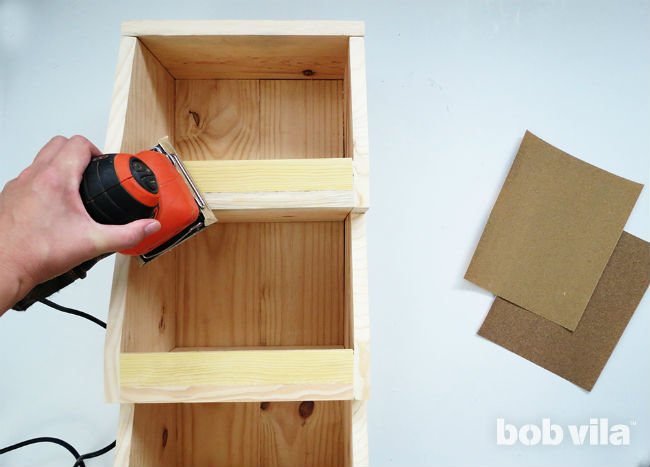
Sand the entire storage cart—inside and out—to give it a smooth finish. Start with a 60-grit paper, then make a second pass using 120-grit paper.
STEP 7
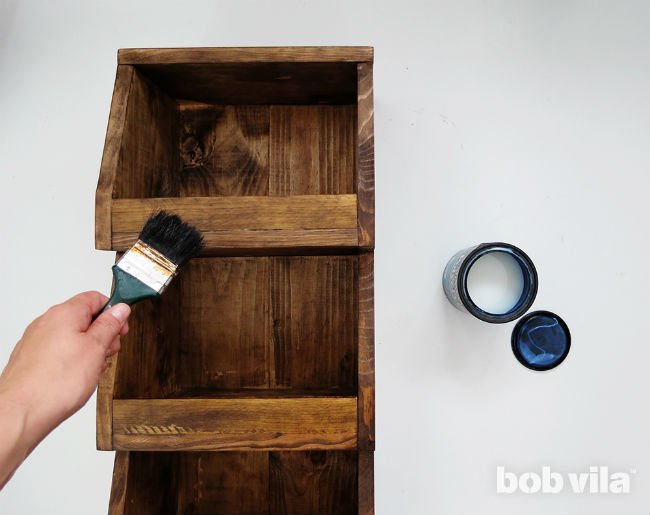
Stain or paint your rolling kitchen cart to match the colors in your kitchen and make it look at home next to your cabinets or island workspace. As you will use it for food storage, be careful to use a nontoxic finish. Top with a coat of varnish to protect the wood and make future cleanup of smushed fruit and flaking onion layers as easy as a wipe-down.
Let dry completely before you proceed.
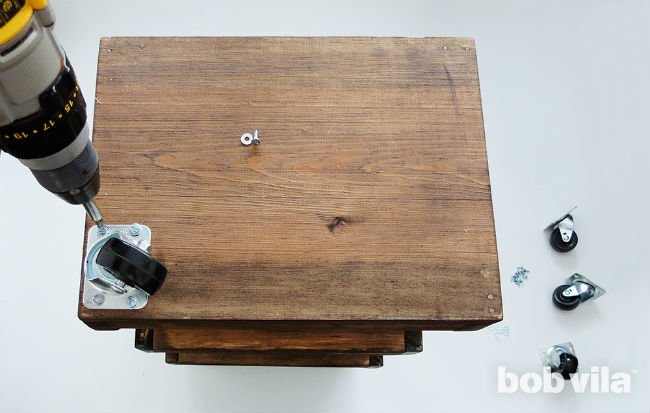
STEP 8
Turn the kitchen cart upside down and screw four caster wheels onto the bottom, one in each corner. Use ½-inch screws and add washers for additional sturdiness.
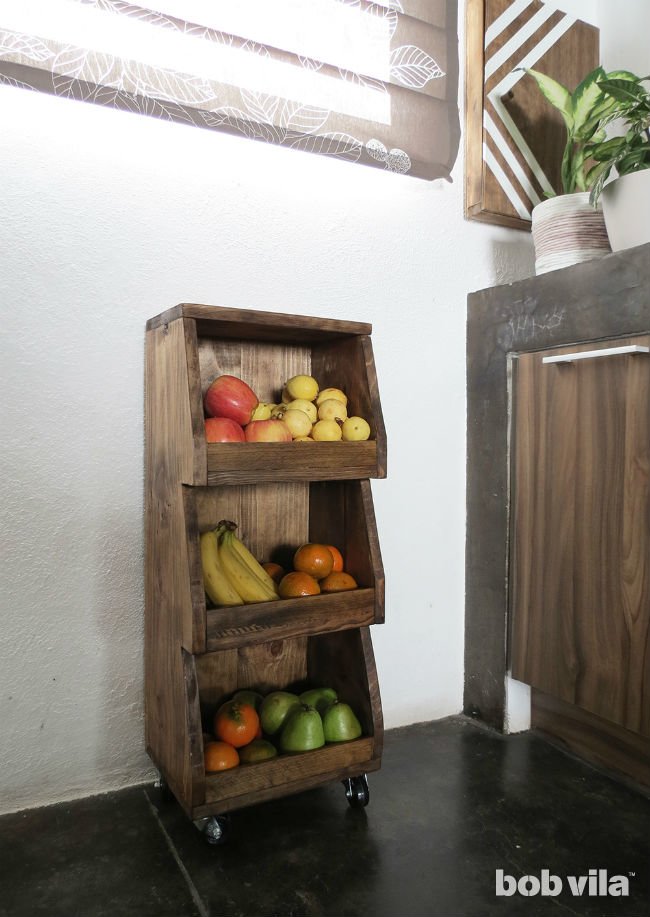
Turn the rolling cart right-side-up, and finish by filling it with goods! Apples, bananas, onions, potatoes—perhaps even some canned goods, if you have the room—fit easily onto each shelf without you ever having to worry about them spilling out. Then, roll it off underneath a table or to the end of your row of cabinets until you need to reach them.
Ama is a DIY addict and the creative mind behind Ohoh Blog. She likes home decor, lighting, and furniture projects that may involve painting, sewing, drilling… no matter the technique! Whatever she has on hand is the inspiration to create and fodder for her serious addiction to upcycling.