
We may earn revenue from the products available on this page and participate in affiliate programs. Learn More ›
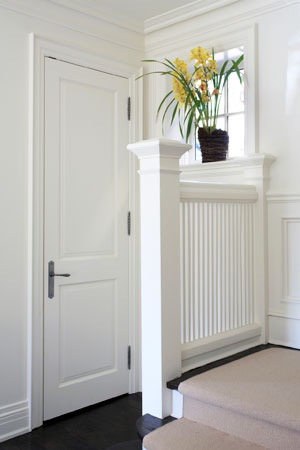
The trim around a door frame—also known as doorway casing—is installed first and foremost to conceal unsightly construction gaps left between the frame and the drywall. But while it minimizes seams in your home’s construction, the clean visual border around the door can also enhance the architectural beauty of any home. Whether you want to install new doorway molding or update your existing one, start with this guide to doorway casing.
Detailed Doorways
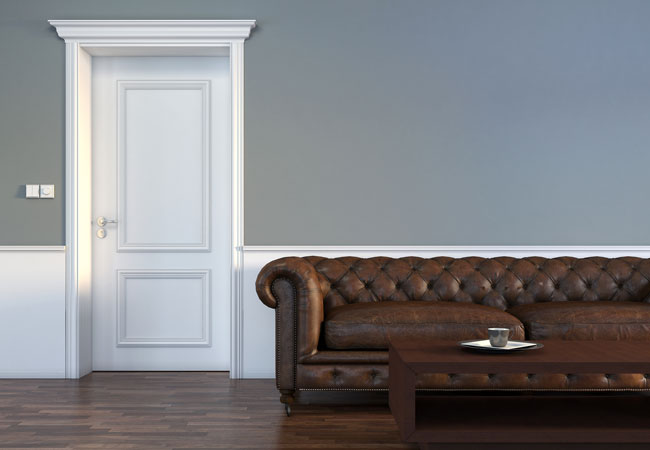
In new construction, one the most common types of doorway casing consists of three separate pieces: two long pieces for the sides of the door and one shorter piece (called “head casing”) for the top of the door. You’ll notice that the casing boards slope slightly, typically thicker on one edge than the other. The thinner edge will be installed toward the inside of the door frame to reduce bulk in the doorway, while the thicker outside edge matches the depth of the base trim to create a cohesive threshold.
When setting out to design doorway casing, homeowners will find a wide variety of options, from simple trim with a completely flat surface to more elaborate (and often wider) options with intricate moldings and protrusions. Two major considerations when finding a favorite style are joint choice and sizing.
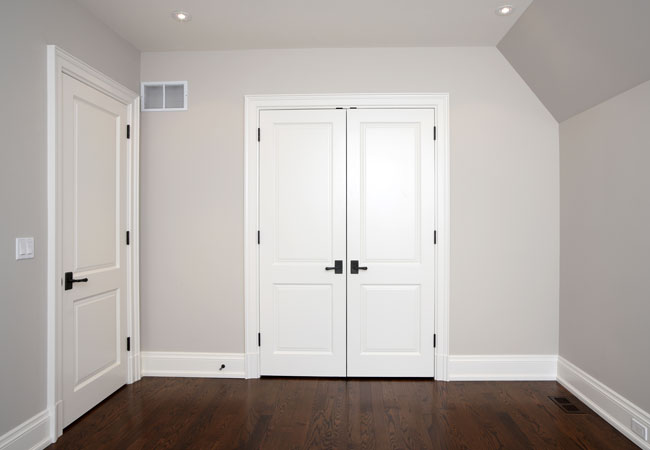
- Many builders install doorway casings with mitered joints, which allow matching trim pieces to connect at equal angles in the top corners. Others—especially those designing for homes with high ceilings—opt for styles butted joints, which are characterized by a wide head casing that rests on the flat tops of the two side casing boards. This butted style of casing lends itself to custom above-door designs wherein the head casing is often decorative and detailed. Whether you choose mitered or butted casing, you can choose to dress up the three main pieces of trim by integrating two decorative blocks (called rosettes) in the top corners.
- Doorway casing trim comes in several different widths. While 2-¼”-wide trim is the most common, you can often find widths up to 3-½ inches at a home store. Anything wider must typically be custom ordered. The standard 2-¼-inch width works well in most newer constructions where doors are located near the edges of the room and carpenters won’t have enough room to install anything wider.

Door Casing Materials
What you use to build doorway casing is just as important to your style (and your budget) as the joint design and trim width. For homeowners and homebuilders, the choice comes down to these types of casing.
- Paint-grade wood casing, perhaps the most popular molding option, consists of bare wood that homeowners can paint. Sometimes the wood even comes primed—one less step when it comes time to install! The material runs anywhere from $1 per lineal foot (LFT) to $2.50 per LFT, depending on the width and design of the casing. Paint-grade wood casing labeled as “finger jointed” means that smaller pieces of wood were joined together to make a longer casing length. Painting the casing will effectively hide the joints, but staining will not. If you intend to apply wood stain, keep reading for another more appropriate option.
- Hardwood casing is more expensive than paint-grade casing, but it’s the best option for areas with exposure to moisture (it will not warp) or if you plan to stain the molding. The hardwood won’t streak when exposed to stain or include any joints that visibly disrupt the design. Simple oak casing starts around $1 per LFT but can run as much as $6 per LFT, especially if you opt for a wider design with ornate details. Expect to spend even more for exotic hardwood casing, which must often be custom ordered.
- Multi-density fiberboard (MDF) casing, formed from sawdust and resin, is a durable material that looks similar to paint-grade wood casing. Here, too, most varieties are primed to ease the painting process. You can pick up a simple MDF casing for under $1 per LFT, but costs run upwards of $3 per LFT for intricate designs or stainable varieties, which feature a thin wood veneer on the surface that can be stained to match other trim work. Keep in mind that MDF swells when exposed to water, so consider avoiding the material in moisture-prone areas (such as the bathroom).
Installing Door Casing
Looking to save some money on labor to invest more in the materials themselves? Lucky for you, any homeowner can install standard door casing with some simple instructions. The DIY carpentry task takes about 15 minutes per each side of the door, once you become familiar with the tools and technique.
MATERIALS AND TOOLS
– Power miter saw
– 18-gauge finish nailer
– 1” and 2” finish nails
– Carpenter’s wood glue
If you’re installing casing around one or two doors, consider renting an 18-gauge finish nailer and a power miter saw from a construction rental store (for a combined cost of about $60 per day). But if you plan to complete more extensive trim work, or if you’re an active handyman, you may opt to purchase the items instead. A decent consumer-grade power miter saw costs between $150 to $200 (view example on Amazon), while a finish nailer costs an additional $100 to $150 (view example on Amazon).
Before installing any type of casing, you’ll need to determine where, exactly, to place it along the doorframe. Measure and draw a line about ¼-inch from the inner part of the door frame; the line should be the same distance from the frame on the sides and the top of the door. This “reveal line” will serve as a guide for installing the inside edge of the casing. The quarter-inch of extra space is necessary to give the door hinges room to operate.
Cutting and installing the casing will vary depending on your finished design.
- If you’re working with mitered casing, simply hold the head casing piece in place, then make a small pencil mark on it where the top reveal line crosses the side reveal lines. Using a miter saw, cut a 45-degree angle at the site of the marking. Install the head casing to the wall with an 18-gauge finish nailer, making sure the longer edge is on top. Use 1”-long finish nails to attach the inside portion to the door frame, and 2”-long finish nails to attach the thicker outside edge to the structural framing that lies beneath the wallboard.
- Now measure the side casing pieces against the installed head casing. Hold the pieces of side trim in place, and make a pencil mark where the inside corner of the head casing meets the inside of the side casing board. With your miter saw, cut a 45-degree angle that will fit flush with the angle of the head casing. Attach the edges of the side and head pieces together with carpenter’s wood glue, and nail the side pieces in place (with the same technique you used to nail the head casing). Wipe off excess glue with a damp cloth when finished.
- When installing butted casing, there’s no need to cut angles into the pieces. Simply position the head casing so it’s level with the reveal line on the top of the door frame, then secure with nails. Make straight cuts to the tops of the side casing boards so they fit snugly underneath the head casing, and secure those with nails as well.
- If installing decorative corner blocks (or rosettes), attach them to the wall first with the nail gun. Then cut the head casing and side casing to fit snugly between the blocks, and secure them to the wall with the nails.
Homeowners can create more elaborate door frames by adding multiple pieces of trim above the original casing board. The general rule of thumb with built-up head casing is to add progressively wider trim as you go upward on the wall. Virtually any trim can be layered to create the look you want; consider using chair rail, bed molding, or concave cove molding. Professional finish carpenters often use crown molding at the very top of a built-up head casing for a uniquely ornate look.