

We may earn revenue from the products available on this page and participate in affiliate programs. Learn More ›
Most homes have one or more exterior steps, but mobility-challenged individuals may find it difficult or impossible to navigate steps. One way to make it easier is with a wheelchair ramp that leads straight to and from the door.
Ahead, learn the basics of rules, safety, and materials, and find out how to build a wheelchair ramp. In most situations, having a wheelchair ramp built by a professional is the best option. But it can be a DIY project for those who have a working knowledge of basic construction practices.
Important Factors to Take into Consideration Before Building a Wheelchair Ramp
Building a wheelchair ramp will permit those in wheelchairs and power chairs to enter and exit more easily, but building a ramp comes with strict guidelines. For example, the ramp should not be too steep, or it could be dangerous and difficult to navigate. Before building a ramp at a home, factor in the following considerations.
Rules and Safety Guidelines
Check in with both the Americans with Disabilities Act (ADA) and local authorities as your first step. You’ll probably need to obtain a permit from the local building authority to install a ramp. It may also be necessary for you to comply with ADA standards. Not all states or communities enforce ADA standards for residential ramps, but following its guidelines will ensure that your ramp is safe for wheelchair users. While the ADA states that ramps must be a minimum of 36 inches wide, check local building codes, too, because some states enforce wider ramp widths. Also, note that any ramp that rises more than 6 inches from the ground must also have 36-inch-high handrails for safety.
Space and Landing Requirements
The ADA requires that a ramp rise in height not more than 1 inch per every 12 inches of run, written as a 1:12 slope. For example, if you need a ramp to reach a 30-inch high porch, you’ll need a minimum of 30 lineal feet for the ramp. As an aside, ramps for pedestrians, often included in aging-in-place designs, should be constructed on a 1:18 slope.
Those lacking adequate lineal space can design a ramp with turns or switchbacks. But at every turn, the ADA requires a minimum 60-inch-by-60-inch level landing as a wheelchair rest. The ADA also requires a minimum 60-inch-by-60-inch landing at the bottom and the top of the ramp. A ramp cannot begin to slope right outside the door; a level landing on the porch is necessary.
No ramp should rise above 30 inches without a level landing. For example, if your porch is 48 inches high, you’ll need 48 feet of lineal ramp and a 60-inch-by-60-inch landing somewhere along the ramp before it rises 30 inches. On a straight ramp, this could be accomplished by building a landing off to one side; on a switchback ramp, the landing could be at the turn. If you aren’t mandated to follow ADA rules, you may be able to sidestep this particular guideline if the wheelchair user has a power chair. But mandated or not, for someone operating a wheelchair by hand, a resting spot is essential.
Choosing the Right Ramp Materials
Wood is the material most commonly used in residential ramp construction, but it’s not the only option.
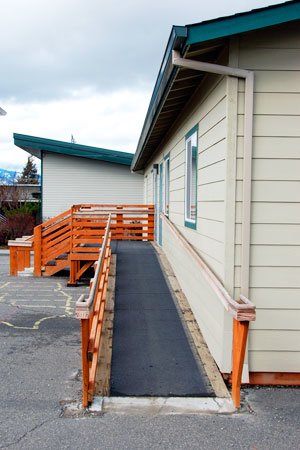
- Wood: With basic carpentry knowledge, you can DIY a wood ramp. Treated wood is popular for wheelchair ramps, but composite decking for the floor may reduce warping and increase longevity. All wood surfaces should be sealed, and it’s wise to put non-skid strips on the floor planks to avoid slippery-when-wet conditions. You can also put indoor/outdoor carpet on the ramp floor. For extra durability, consider installing metal handrails; wood handrails tend to splinter after a few seasons.
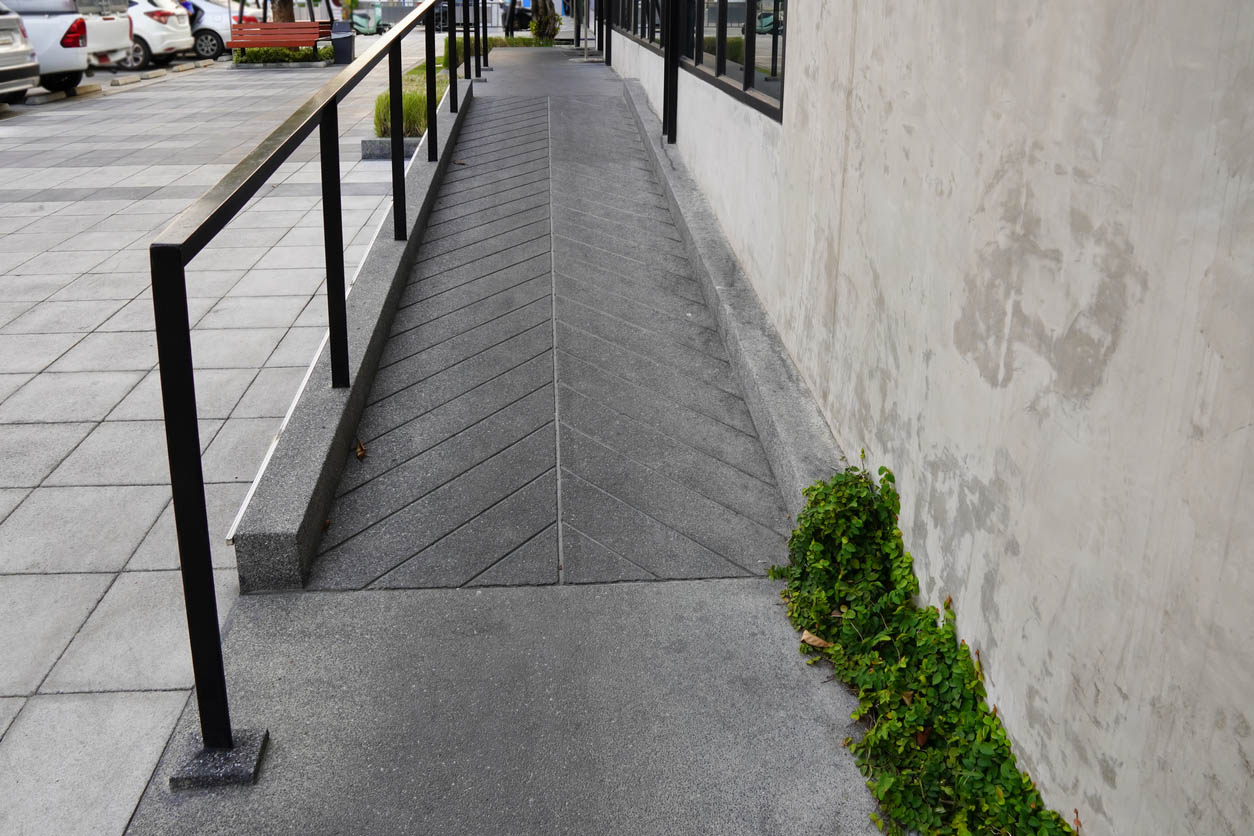
- Concrete: Framing and pouring concrete is a technical undertaking, and wet concrete isn’t forgiving of mistakes, so concrete ramps are best constructed by a pro. Concrete ramps require footings and stem walls and are typically filled with compacted sand before they are poured. Reasons to go with concrete include permanence and durability; you can even embed heat strips to prevent ice buildup in winter. Concrete is also a good choice for a ramp rise of only a few inches. If pedestrians will be using a ramp, go with a gentler, 1:18 slope, which makes walking more comfortable.
- Earth-berm: For aesthetic appeal, an earth-berm ramp can be worked into your landscape to look like a meandering sidewalk that slowly rises to the porch. This type of ramp is aesthetically pleasing but it requires building the berm out of soil and using a mechanical compactor to compress the soil before the sidewalk can be poured on top. This is usually done in 6-8 inch levels called “lifts” in order to compact the soil adequately.
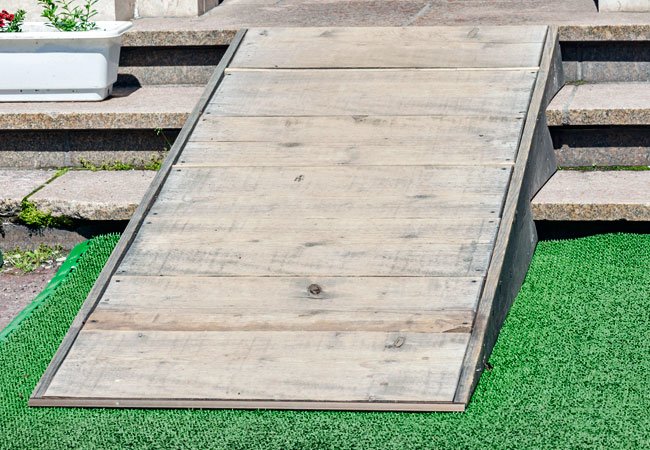
- Premade ramps: For a quick fix—or if you have difficulty obtaining a permit to build a wood or concrete ramp—a premade wheelchair ramp could be a solution. Premade ramps are typically removable, so they’re considered “private property” rather than “real estate” and therefore not subject to building codes. Generally fabricated from aluminum or galvanized metal and designed to fit over existing steps, they start at a few hundred dollars for bare-bones models but could run into the thousands for higher-quality and custom designs.
How to Build a DIY Wheelchair Ramp in 10 Steps
The following steps outline the basic process of building a handicap ramp that’s safe and secure. The actual shape and dimensions will vary based on the height of the porch landing, lot size, the slope of the yard, and local building codes. Opting for a DIY wheelchair ramp will save on costs, but it’s vital that the DIYer who undertakes this kind of project understands construction concepts.
STEP 1: Decide where you will install your ramp, as well as its shape and length.
In homes where the porch level is low (no more than a couple steps up), it may be possible to build a straight ramp from the porch outward, but higher porches call for creative ramp design.
Other than a straight ramp from a front porch outward, ramp configurations might include exiting a side door with the ramp running alongside the house and then around to the front walk in an L-shape, or even extending around two sides of the house in a U-shape. Alternately, a landing can be located at any door, and the ramp can slope down in a switchback pattern.
Sketch the ramp plan and take it with you to the local building authority. The plan will be analyzed to ensure it meets ADA specifications (if applicable) and will not infringe on any easements or violate property-line setbacks.
STEP 2: Call for locates.
Unless you’re constructing a temporary ramp that will sit on the surface of the ground, you’ll need to dig to install the concrete footings that will support the ramp’s vertical posts. all each of your local utility companies— electric, gas, phone, cable— and ask them to come out and mark the location of their buried lines. Or, you can call 811, the national DigSafe number, and the operators will contact all of the local utilities for you.
STEP 3: Stake it out.
Start by staking out the porch landing, which must be level and a minimum of 60 inches by 60 inches. Staking is relatively simple, but it must accurately refect the ramp’s measurements and must be square to the house. You’ll need wood stakes, string, a level, a hammer, and measuring tape.
A straightforward way to determine square (a 90-degree angle) is to use the 3/4/5 method. Drive a stake in the ground at the origination point up against the house and then measure out perpendicular from the house. Drive a second stake, and tie a string taut between them.
To determine square, measure parallel to the side of the house from the first stake and make a mark at 3 feet. Then measure from the same starting point along the string line and mark the string at 4 feet. If the string line is square, the distance from the mark on the string to the mark on the house will be exactly 5 feet. If it’s not 5 feet, move the stake until it is. This triangular technique can be used on all the corners of the ramp to determine square.
STEP 4: Mark the ground.
Once all the stakes are in place and strings indicate the footprint of the ramp, you can mark the ground for reference and then pull up the stakes. Spray paint is often used to mark the ground. Accuracy is essential here, and you’ll need to spray the marks on the ground directly under the strings.
You can use a plumb bob and hold it along the strings to ensure you spray the ground accurately, or you can hold a level vertically alongside the strings and use that as a reference for spraying the marks. Alternately, tie a second string at ground level between the stakes and use it as a reference—just spray the bottom strings from end to end, and you’ll have straight lines on the ground.
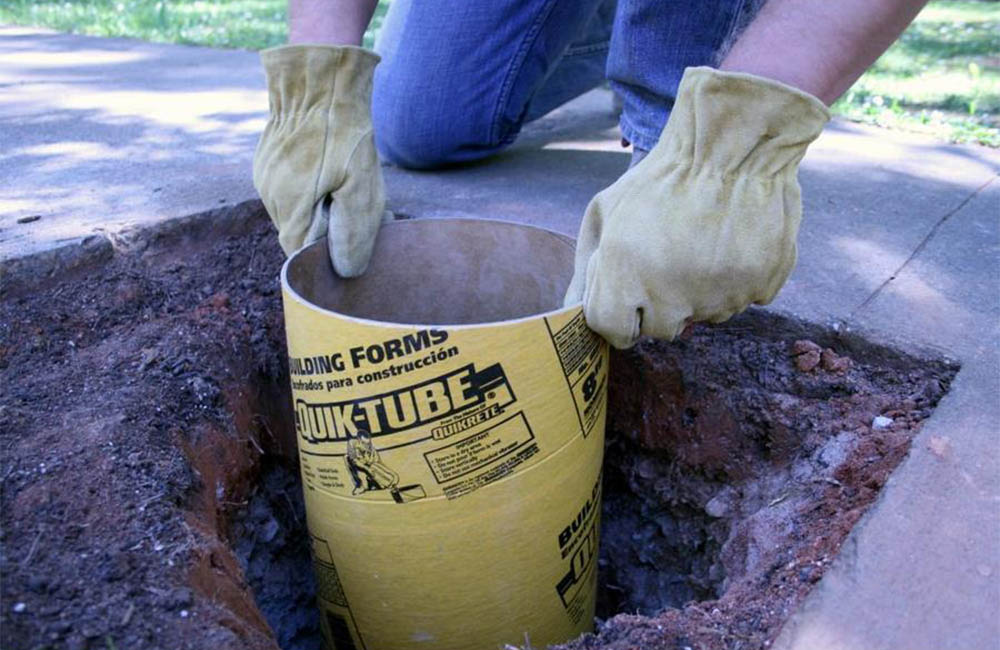
STEP 5: Pour the ramp’s footings.
Once the ground is marked, it’s time to pour the concrete footings that will hold the posts in place. For this step, you can either use concrete tube forms, such as this Quikrete Tube, or pour the concrete directly into the post holes.
For each footing, dig a hole 12 inches in diameter and below the frost line. Frost line varies from region to region, and when the local building authority approves the plan, they’ll tell you how deep the footings must be—on average, expect to dig the holes a minimum of 30 inches deep.
Pour concrete into the holes, or place concrete tube forms in the holes and fill them with concrete. While the concrete is still wet, level the top to form a flat surface at ground level.
STEP 6: Install anchors.
Once the concrete is poured, give it 24 hours to harden before setting the posts. To set the posts, re-measure the deck’s dimensions to determine where the center of each post will sit on each of the concrete footings. Use the 3/4/5 method again to determine the exact center and mark it.
Using a heavy-duty drill with a concrete bit, drill a hole and insert a post anchor into the hole. Post anchors vary in design, and some may require two or four holes instead of one. A one-bold anchor post, such as the MTB Anchor, is among the simplest type to install.
STEP 7: Attach the posts.
The vertical posts will support the rest of the ramp’s framing, and they must be vertically level, or plumb Insert the end of a post into an anchor, and use bolts to secure it in place at the bottom. It helps to have one worker hold the post straight while another inserts the bolts. Using a level is vital for this step. Use 2-by-4s as braces if necessary to maintain each post’s plumb. The braces can be removed later after the rim joists have been installed.
STEP 7: Connect the joists to the posts.
Once the posts are set, the joist system can be installed. Rim joists install first—these run along the outsides of the posts. Since the ramp floor will slope, the joists on the ramp portion must also slope.
To keep from creating a lip or ledge that’s difficult for a wheelchair to roll over, install the top of the rim joists lower than the intended top of the finished decking. Standard decking is 1.25 inches thick, so if you’re using traditional decking, you’d need to set the tops of the rim joists 1.25 inches lower. This way, when the decking is added, it will be flush with the home’s floor.
When the rim joists are in place, install the center joists. Local code may vary, but to be on the safe side, install the joists no more than 16 inches apart.
STEP 8: Install the ramp’s decking.
The decking boards install on top of, and perpendicular to, the joists. Use screws to attach the decking to the joists. This is one of the most straightforward steps in building the ramp. Check to make sure the decking boards are parallel to one another and leave a small space between each one to allow for expansion in case the boards become wet.
STEP 9: Install the ramp’s railing.
The handrail on a wheelchair ramp should be 36 inches above the decking. If one side of the ramp abuts the house, no railing is necessary on that side. The handrail should install along the inside of the vertical posts, and it should follow the same slope as the decking. A round or contoured handrail that’s about 1.25 inches in diameter will be the easiest to grasp securely and may be required by local code. Larger or square handrails can be difficult for senior citizens to safely grasp.
STEP 10: If needed, build and install the landing.
The area at the bottom of the ramp should be as level as possible, and local code may require that it follow the same top landing dimensions—60 inches by 60 inches. However, it may be permissible for the ramp to exit onto a standard sidewalk. If need be, form and pour a level concrete landing at this point.
FAQs About How to Build a Wheelchair Ramp
Q. How do you calculate the run of a ramp?
A grade of wheelchair ramp should be constructed at a minimum 1:12 ratio. This means that for every 12 feet in length, the ramp may not drop more than one foot. Designing a ramp with this grade will determine the necessary length of the ramp.
Q. Can I use plywood for a wheelchair ramp?
For an indoor ramp, plywood might work, but when building a wheelchair ramp outdoors, use pressure-treated lumber.
Q. How long should a ramp be for 3 steps?
It depends on the height of each step. For steps with a 7-inch rise, the distance from the ground to the top of the third step would be 21 inches high, so the length of the ramp would be a minimum of 21 feet.
Q. How do you find the height of a ramp?
The uppermost point on the floor of a wheelchair ramp should match the height of the upper landing. Just measure from the ground to the upper landing—or porch, or doorsill—depending on the home’s design.
Q. How much does it cost to build a wheelchair ramp?
Construction material prices vary, but in general, expect to pay $20 to $65 per lineal foot for the materials to DIY a ramp. A professionally constructed ramp averages $1,400 to $3,000, depending on material costs and the going rate of labor. For many, the cost of a ramp upgrade is money well spent if it makes life easier for a mobility-challenged family member.