We may earn revenue from the products available on this page and participate in affiliate programs. Learn More ›
If you live in a house that’s more than a few decades old, you likely have popcorn ceilings, which rose in popularity in the mid-1900s. Contractors liked the spray-on texture because it was cheap and easy to apply; homeowners at the time liked it because it dampened noise and hid any flaws made during application.
One downside to these ceilings, however, is that their pocks and bumps easily catch dust—and that dust emphasizes the texture’s edges like a shadow. Cleaning them at least once, if not more, a year brightens the surface overhead and helps many homeowners learn to live with their dated ceilings. (Not to mention, the act of dusting can offer relief to allergy sufferers.) To effectively navigate all of the nooks and crannies of the texture, follow the techniques outlined here for how to clean a popcorn ceiling.
Tools & Materials
Bobvila.com may earn a commission from purchases made through these links.
- Plastic tarps
- Protective mask
- Protective goggles
- Stepladder
- Vacuum with brush attachments
- Long-handled broom
- Paint roller
- Lint brush with sticky paper
- Sponge
- Spray bottle
- Circulating fan
Before You Begin
Before you tackle a deep cleaning of your vintage popcorn ceiling, be advised: Popcorn ceilings installed before the ’80s could contain asbestos, which is dangerous if inhaled. To prevent any possibility of lung-scarring illnesses and even lung cancer, make sure you follow guidelines for checking asbestos levels.
How to Clean a Popcorn Ceiling
STEP 1: Prepare the room.
Collect all tools and materials in an easily accessible place. Cover your furniture and flooring with large plastic tarps to prevent dust, cobwebs, or liquid cleanser from dirtying (or damaging) furnishings and flooring below as you work. Protect your lungs from dust by wearing a protective mask, and shield your eyes with goggles.
STEP 2: Remove all dust from the popcorn ceiling with either a vacuum, broom, or duct tape.
Choose whichever method for dust removal suits you best. For any of the following, you’ll first decide whether you want to work with two feet on the ground using an extendable tool to clean the ceiling or climb a stepladder to clean small segments up-close. If you use a stepladder, be careful not to over-extend your range, which can lead to instability and loss of balance; instead, clean within a specific range (several square feet) before climbing down, moving your ladder, and addressing the next patch.
- (1) Vacuum: Suck up surface dust and cobwebs using your vacuum’s attachments. Choose the widest brush attachment, one without hard plastic parts that could chip or damage your paint. If your vacuum has a long handle, you can stay on the ground and work. If you decide to climb a stepladder, climb up and down with your machine in tow carefully.
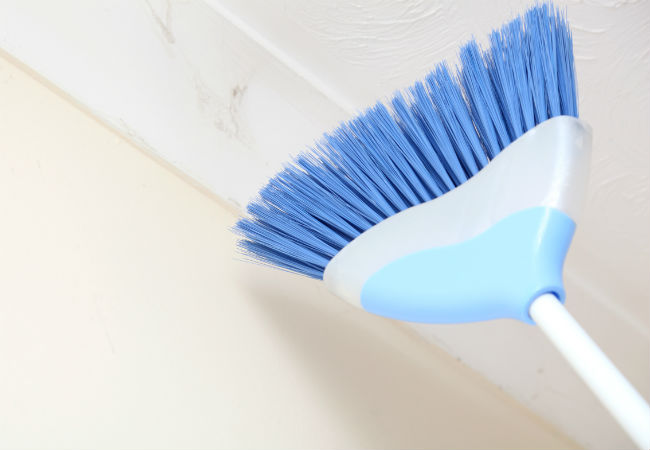
- (2) Broom: Turn a long-handled broom around so that its wide, soft-bristled brush faces the ceiling. Sweep the brush over the ceiling, allowing the dust to fall onto the tarps.
- (3) Duct tape: Attach duct tape to a paint roller, or use a sticky lint roller. Climb your step ladder and gently roller the ceiling. Most of the dust should stick to your implement. Replace duct tape or renew lint paper when dust no longer adheres.
STEP 3: Test a cleaner on a hidden part of the ceiling before attacking stains.
Before you attempt to fade or remove stains caused by water, smoke, or grease, test a small, inconspicuous area of the ceiling to ensure you’ve picked an effective cleaning solution that won’t damage the ceiling. The strength of the solution you choose will depend on the cause, age, and severity of the stains.
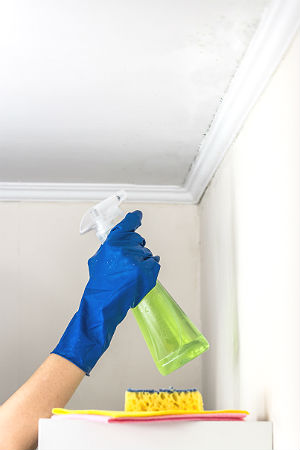
- Grease stains: In a kitchen, you’re likely to spot some discoloration due to the amount of cooking grease that gets airborne during meal prep. To remedy, mix a mild solution of warm water and liquid dish soap in a large spray bottle, something you can handle easily on your stepladder. Spray solution onto the stain, and lightly dab the area with a rag or sponge. Let dry for several hours.
- Water, mildew, and smoke stains: Mix water with bleach in a spray bottle and apply to the ceiling. Lightly mist the area to prevent additional water damage. Start with one part bleach to five parts water. Wait for several hours. If the stain isn’t lifting, add more bleach and lightly mist the area again. Let the test area dry overnight to determine if the solution is working.
STEP 4: Proceed with the cleaner of choice to deep-clean any particularly dingy areas on your popcorn ceiling.
Mist the rest of the ceiling area with the appropriate cleaner—either the liquid dish soap solution or the bleach solution—that has been determined as posing no damage to your ceiling. (You should still be wearing protective gear, including goggles and face mask, when working with these cleaners.) If you’re using a stepladder, remember to work only within a limited range, climbing down and moving your ladder regularly.
Let the ceiling dry overnight with any windows open and circulating fans on to keep room ventilated.
STEP 5: Repaint or remove popcorn ceiling if you’re not happy with how it looks when cleaned.
If some stains linger, albeit faded, consider repainting your popcorn ceiling. Now that you have removed surface dust, your ceiling is prepared for a new paint job! Or, if you remain unhappy with the appearance of your popcorn ceiling, it may be time to remove it altogether.