
We may earn revenue from the products available on this page and participate in affiliate programs. Learn More ›
Whether it’s blocking your view, is diseased or damaged, or is taking up space you’d rather use for something else, felling a tree is never a task to be undertaken lightly. This is one project that can have major consequences if not done properly, including damage to your home and surrounding property or serious injury to you or bystanders. Also, be aware that, in some areas, you’ll need a permit before cutting down a tree—even if it’s on your own property. Check local ordinances first, then consult these best (and worst) practices before getting started.
RELATED: 10 Trees that Spell Trouble for Your Yard
The Do’s and Don’ts of Cutting Down a Tree Safely
Unless the tree to be removed is small—less than 15 feet high—the safest option is likely to have a tree-removing company tackle the project. No matter who ends up cutting down the tree, the following do’s and don’ts will apply.
DO know your limits.
If you’ve never wielded a chainsaw, don’t have all the required safety gear, or face a very large tree, it’s best to leave the job to a professional. While felling a tree isn’t extremely complicated, it does require planning, focus, and caution, so don’t undertake the task on a day you aren’t feeling your best. And check the weather forecast: If it’s going to be raining or very windy, wait for milder conditions. If you opt to go the DIY route, it’s essential to recruit an assistant who can serve as a lookout during the cutting process.
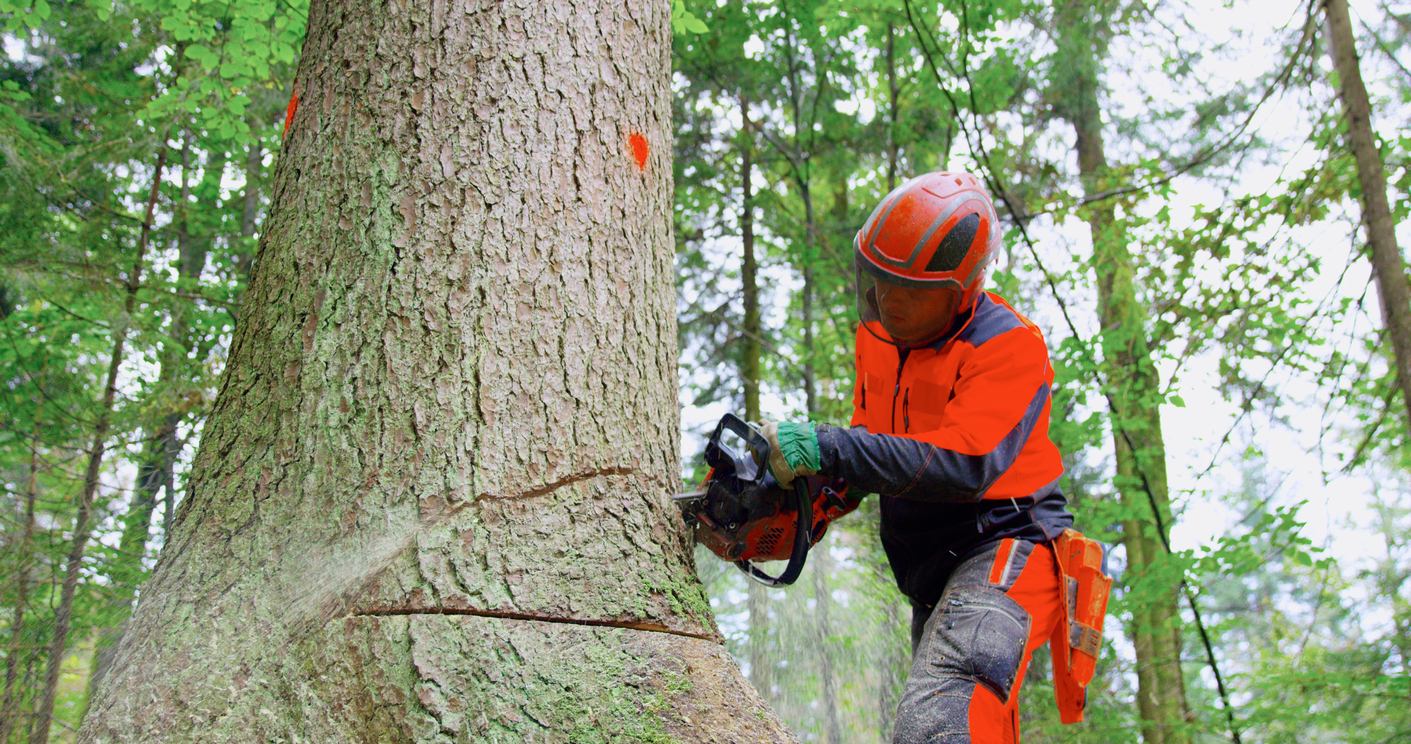
DON’T neglect safety gear.
Even if the tree you’re felling isn’t exceptionally large, say, you’re cutting down a Christmas tree, don’t take the risk of foregoing safety gear. While chances are you won’t have any problems, safety should always be the top priority. You should wear:
- Closed, sturdy shoes or boots
- Pants and a long-sleeved shirt (For the best protection, opt for chainsaw-safe clothing.)
- Logger or hard hat
- Goggles that fully cover your eyes
- Ear protection—plugs or earmuffs designed to reduce sound
- Work gloves
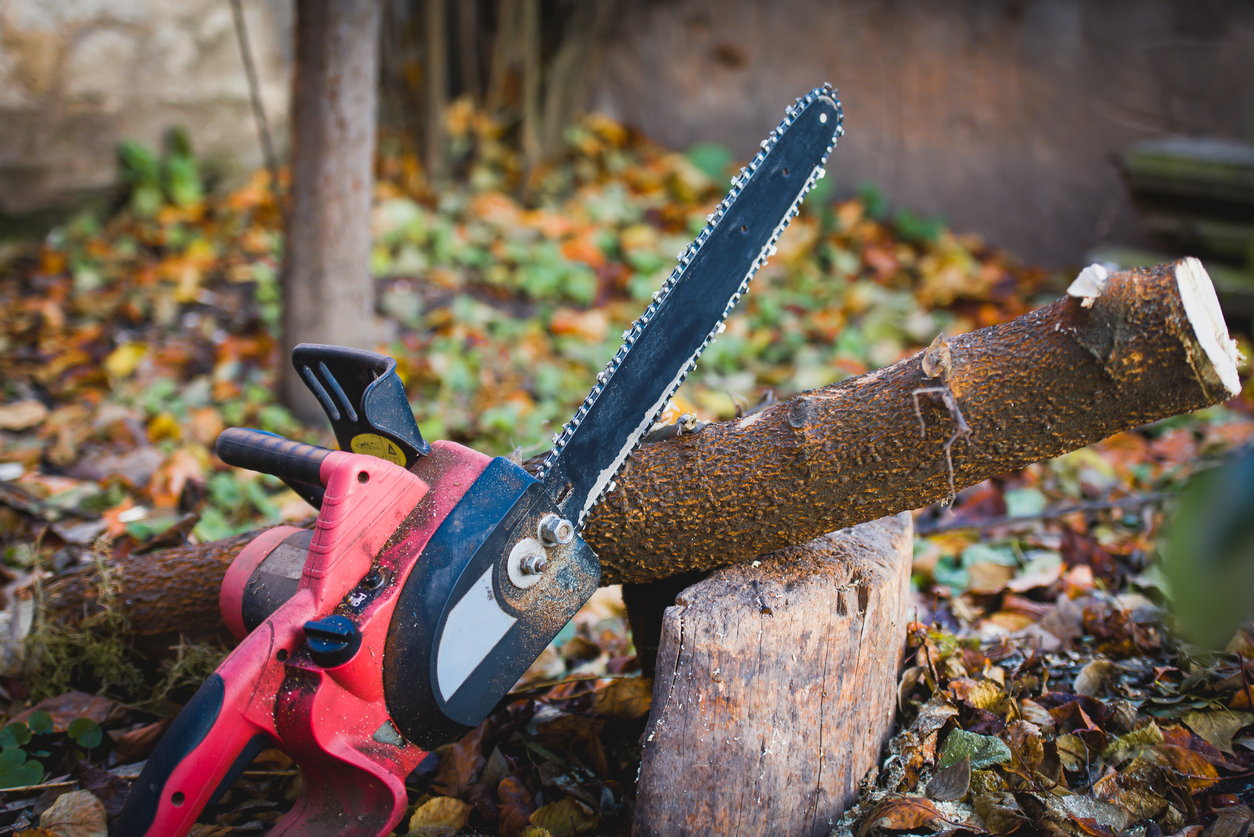
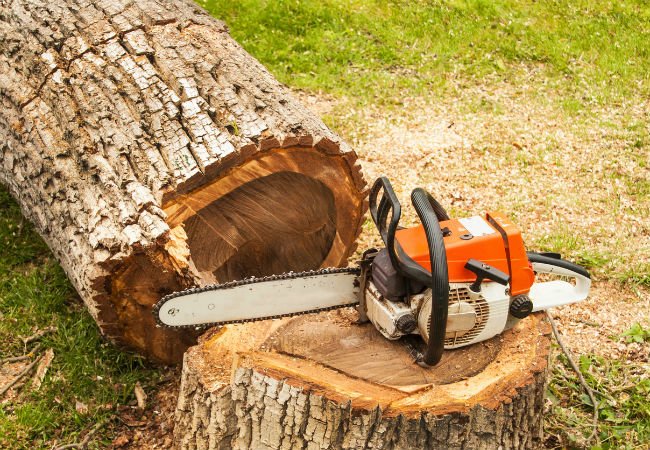
DO choose the right equipment.
While you can safely chop down a very small tree or sapling with an ax, for most trees beyond that size, a chainsaw is the best tool. In general, a 16-to-18-inch bar is best for small to medium trees, and a 20- to-24-inch bar for larger trees or for cutting up an already felled large tree for firewood. Keep in mind that larger chainsaws weigh more, which can lead to arm and shoulder fatigue. Average weight ranges from about 10 to 15 pounds, but some of the beefiest chainsaws weigh in excess of 20 pounds.
Before firing up your chainsaw, you should be completely familiar with its use, and do a quick check to be sure the tool is in proper working order and is filled with fuel and oil. If you are felling a tree with a trunk that’s 18 inches or more in diameter, you’ll also want a couple of felling wedges. These wooden wedges are used to prevent the tree from pinching onto your chainsaw or leaning back towards you instead of falling away from you during the final cut.
DON’T cut the tree blindly.
Before cutting down a tree, you’ll need to take the time to analyze both the tree you’re cutting down and its surrounding area. Is the tree close to your home or another structure such as a fence, garage, or parking area? Are any utility lines nearby? Is the tree dead or diseased, or does it have broken or dead branches? Does the tree lean in a direction opposite where you want it to fall? Is the tree surrounded by other trees? If the answer to any of these questions is yes, call in a professional. It’s not worth the risk to try to fell a tree if dangerous conditions exist.
RELATED: The Dos and Don’ts of Sharpening a Chainsaw
DO clear the trunk of any low-hanging branches.
Low-hanging branches can complicate the felling process if they’re not removed. They act as obstacles around the tree’s perimeter and can keep the person cutting down the tree from standing in the best spot to make the cut. Additionally, a large, low limb can cause the tree to roll or shift to one side when the tree hits the ground.
The safest solution is to take the time to cut away the low-hanging branches with the chainsaw before cutting down the tree. The caveat here is to remove only the branches that grow at or below the height of your shoulder. Operating a chainsaw in an overhead position is particularly dangerous and should be avoided.
DON’T cut down a tree without a lookout.
Felling a large tree is a task too big for a single person who is often too close to the tree to tell if it’s falling as planned. The best way to ensure a safe fall is to have a reliable assistant known as a lookout. The lookout should stand a few feet behind the person who’s felling the tree. To keep the lookout a safe distance away, he should have a long stick or pole.
Devise a plan about how your lookout will signal the person using the chainsaw if there’s trouble. One way you might communicate is this: If the lookout spots trouble—if, say, they see that a large branch overhead is starting to fall—the lookout might use the stick to tap the person cutting the tree on his or her shoulder. That tap signals that the task has suddenly become unsafe and tells the person who’s cutting to leave the chainsaw and move quickly away from the immediate area, using preplanned escape paths (see below).
DO aim the tree.
Once it starts to fall the tree is out of your control, so you must know which way you want it to tumble before you make the first cut. Keep in mind that the tree will tend to fall in the direction of any natural lean. This can be avoided, but it typically requires heavy equipment and is best left to the pros.
Sight-in the tree’s height and measure the yard to be sure there is enough space for the entire tree to safely hit the ground. Trees can be a lot taller and wider than they appear when looking up from underneath. Ideally, the landing spot should be reasonably level to prevent the tree from rolling or bouncing. You also want a fall path that’s clear of other trees; one falling tree can pull down several others on its way down, with potentially catastrophic results. Below, find out how to use a directional notch to aim the fall path of the tree.
DON’T forget your escape routes.
Once you’ve determined that the tree is safely within your capabilities to fell, and you’ve established a fall path and gathered your equipment, it’s time to clear the area. First, move any pets, people, or other objects out of the fall path. Now, plan and clear two escape routes on the non-fall side of the tree. You’ll use one of these to safely get away from the tree as it tumbles. Since a falling tree can be unpredictable, it’s good to have two escape routes in case the tree falls in a direction you weren’t expecting.
The escape routes should be at a roughly 45-degree angle to each other, at least 15 feet long, and aimed straight away from the falling tree. They should also be free of brush, rocks, or any other tripping hazards. Trim away any brush around the tree you’re about to cut down. While it may seem like a lot of work to establish escape paths, it’s the best way to mitigate the possibility of serious injury.
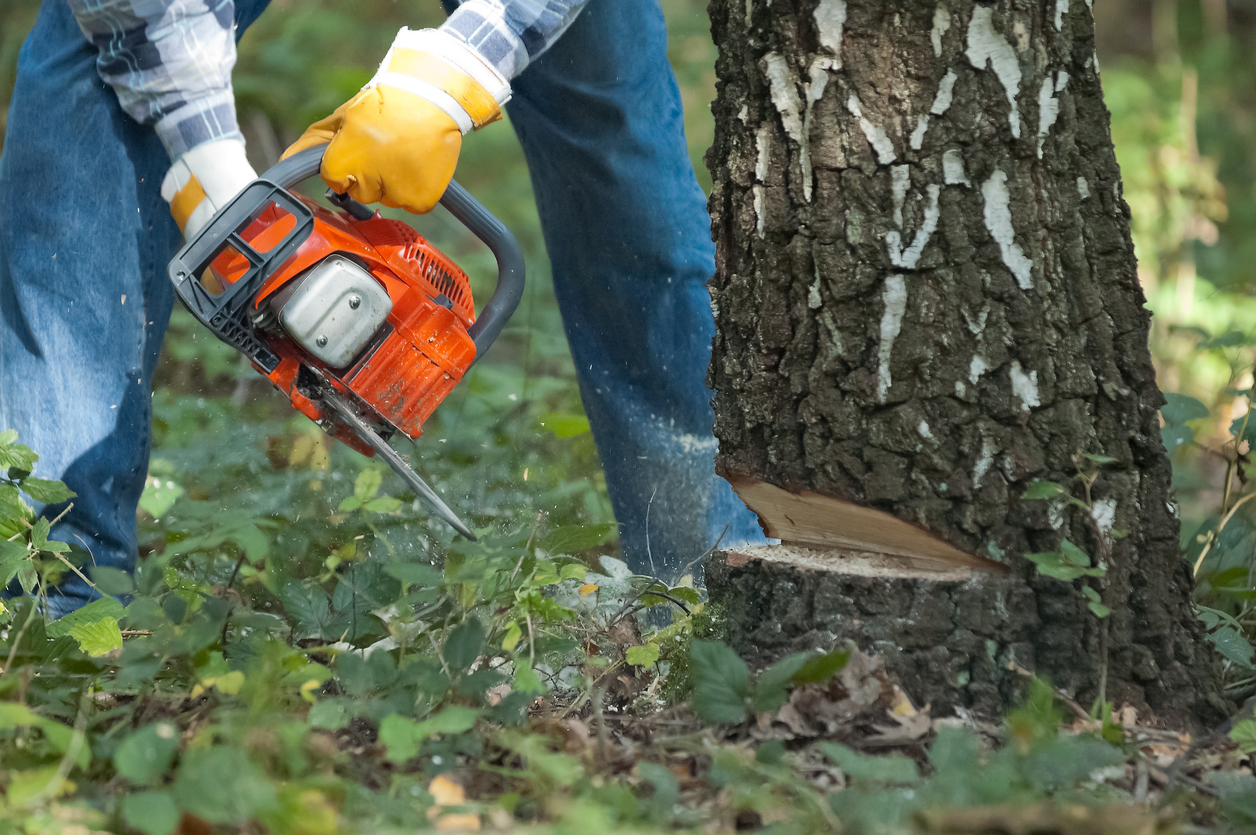
DO begin the felling with a notch.
Aiming your chainsaw straight through the middle of the trunk until it comes out the other side is likely to bring the tree down on you instead of away from you. Proper tree felling begins with a notch. Stand facing the tree so that where it will fall is on your right, and your escape routes are on your left. On the side of the tree facing the direction that the tree will fall, slice down into the trunk at a roughly 70-degree angle. Continue cutting on that angle until the chainsaw is around one-third of the way through the tree’s trunk. The bottom of this cut should be no more than two feet from the ground.
Now, cut horizontally into the tree at the bottom of your first cut. When the two cuts meet, you’ll have a notch cut into the trunk. This is explained in more detail below.
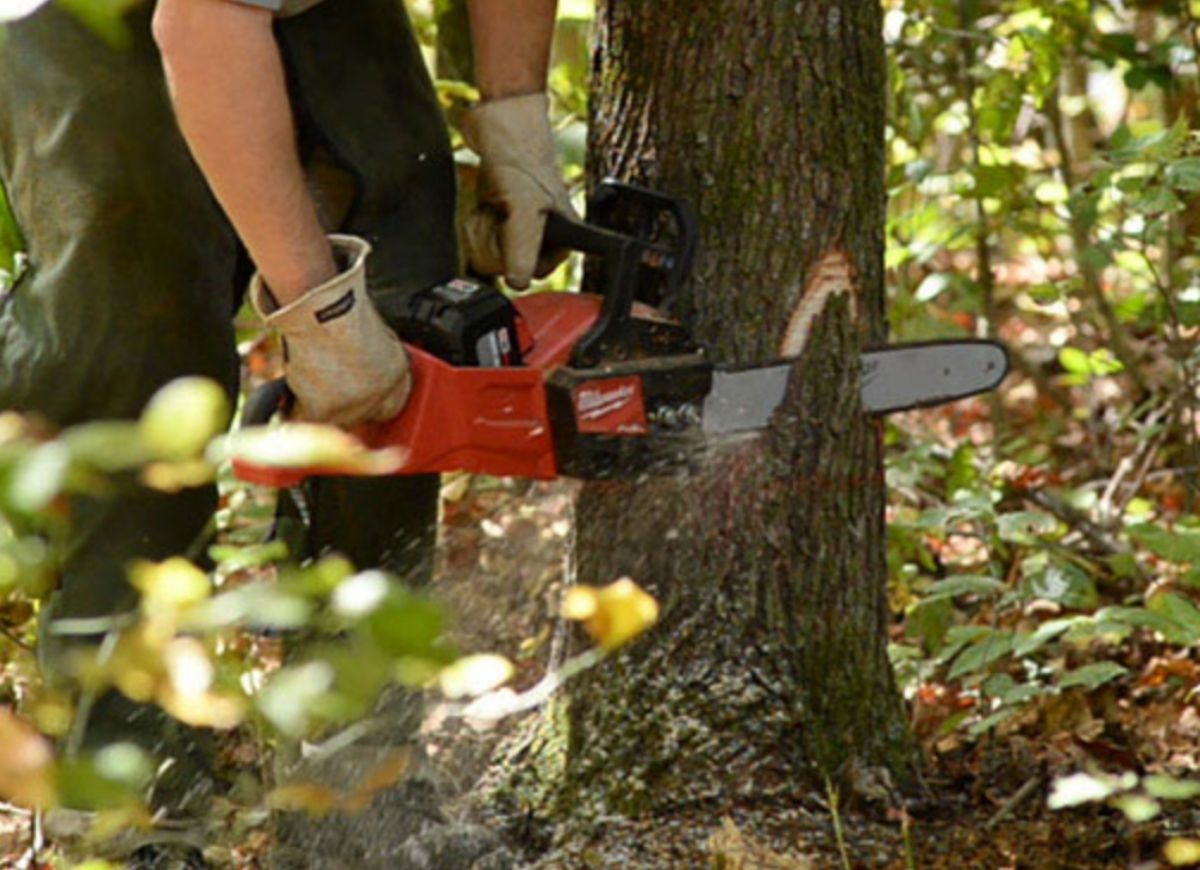
DON’T get careless.
The final cut is the felling cut, and this is where things often go wrong if you aren’t careful. Move to the opposite side of the tree from your notch. Saw into the tree at the same height as your notch, cutting just deep enough to insert your felling wedges. Do not remove your chainsaw from the cut: Leave it running, but lock the chain brake. Now use a mallet or hammer to pound in the felling wedges, positioning them behind your chainsaw blade. In some cases, you may not need the felling wedges if the tree begins to fall on its own.
Continue cutting into the tree on a horizontal line. The moment you feel the tree start to fall forward—right about when you’ve cut through all but 10 percent of the tree’s diameter—pull out your chainsaw, set the chain brake, and retreat down one of your escape routes until you’re at least 15 feet away from the falling tree. Do not turn your back on the tree as it falls; it should be within your sight the entire time.
The Anatomy of a Directional Notch
What is a directional notch?
A directional notch is made on the side of the tree facing the direction you want the tree to fall, and it consists of two separate cuts that remove a triangular portion of the tree trunk. One cut is horizontal to the ground, while the other is cut at a downward angle above the flat cut and meets the first cut. When cut properly, the two cuts meet about one-third the way into the tree trunk.
A directional notch forms a weak point in the bottom of the trunk that determines which way the tree will fall when the final cut (the felling cut) is made. When done correctly, the tree will fall in line with the notch.
Why should I use a directional notch?
Without a directional notch to direct which way the tree will fall, guessing where it will land is a crapshoot. Using a directional notch is a time-honored way of cutting down a tree and getting it to land in a safe spot.
How to Cut a Directional Notch
Before beginning the cut, take all safety precautions we’ve outlined above and then follow these steps to cut a directional notch. For tree-felling newbies, it can help to wrap a chalk line horizontally around the lower part of the tree where you plan to cut in order to keep the cuts on track.
- Determine the best direction for the tree to fall and make a mark on the trunk facing that direction.
- Make the first notch cut starting a foot or so above the chalk line and cut downward at a 70-degree angle until reaching the chalk line. Aim for the first cut to end up about one-third way into the trunk.
- Make the second cut of the notch along the horizontal chalk line until it meets the bottom edge of the first cut.
- Remove the wedge by using a mallet or prying the wedge out. Now, you’re ready to make the felling cut.
How to Make the Felling Cut
Clear the area all around the tree and work out a plan of taps between you and your lookout, who should be standing a few feet behind you in order to assess the situation as it progresses.
- On the opposite side of the tree from the directional notch, begin cutting along the horizontal line indicated by the chalk line.
- As you near the notch, the tree will become unstable and may rock or lean slightly. This is normal.
- Keep the chainsaw blade horizontal and continue cutting. As the tree begins to fall, stop cutting, back up in the direction of a previously determined escape route, and keep your eyes on the tree until it lands.
Congratulations! If you’ve followed these guidelines, your tree should be safely on the ground, and you can begin reimagining your soon-to-be blank slate of a landscape. You may even have some wood that’s worth splitting for the fireplace.
FAQs About Felling a Tree
Dead, diseased, or overgrown trees have to be removed, and while the tree-cutting process isn’t complex, it is dangerous if you’re not sure what you’re doing. Even an experienced DIY will likely have some questions concerning the project.
Q. Can I cut down trees on my own land?
That all depends on the local ordinances in your community or county. In some cases, landowners are permitted to cut down trees. In others, a professional tree-cutting service must perform the work. Call your local building authority to ask about your community’s regulations.
Q. Who is responsible for dangerous trees?
The landowner of the property where the tree sits is responsible for any damage caused by the tree to the neighboring property. However, if the tree branches extend over a neighbor’s property, the neighbor can often legally cut off those branches. Again, double-check local ordinances for exact wording.
Q. How do you cut down a severely leaning tree?
It’s typically easiest to fell the tree in the direction of the lean—unless it’s leaning toward a home or other structure. In that case, the tree should be felled in the direction opposite of the lean. That may require the use of a crane, and it involves making cuts and inserting wedges to reverse the lean, and that’s usually best left to the pros.
Q. How much does it cost to cut down a large tree?
Having a tree professionally cut down ranges from about $400 to $1,200, with $750 being the average. The final cost depends on the size of the tree and whether anything is in the way of the fall, such as a roof or power lines.