
We may earn revenue from the products available on this page and participate in affiliate programs. Learn More ›
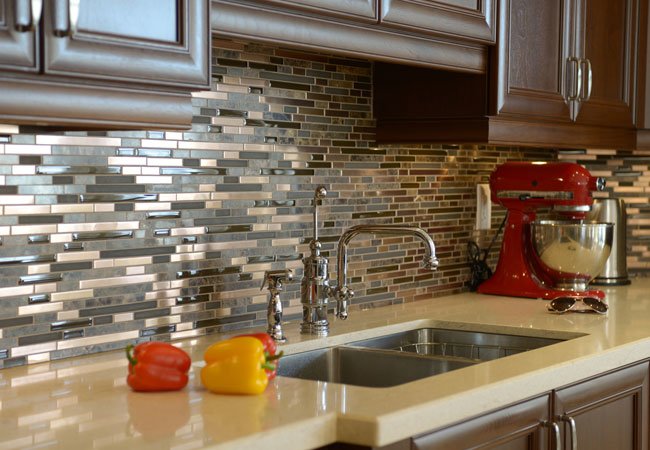
Glass tile is enjoying its day in the sun as more and more homeowners choose to incorporate it in their home renovation projects. Being easy to clean, with a glossy, durable surface, glass tile makes for an attractive option for backsplashes, shower walls, and bathroom accents. The real draw is that unlike ceramic, glass tile gives you a clear or jewel-toned radiance that reflects light and often creates a beautiful shimmering effect.
Installation is DIY-friendly; the project typically requires little in the way of grunt work. But actually cutting glass tile can be tricky, because the material tends to shatter easily. The best technique for how to cut glass tile? That depends on the size of the project, and on the specific tile that you’re installing. To cover all possible scenarios, we’ve laid out how to cut glass tile using four different tools:
- a wet saw,
- a manual scoring wheel,
- a bar cutter,
- and wheeled mosaic nippers.
Note: For best results, create a dry layout of your tile pattern before installation. Doing so allows you to perfect the placement of tiles before permanently attaching them to the wall. Remember to position cut tiles in areas where the sliced edges will be least apparent, such as along the top portion of a backsplash where the tile touches the underside of the cabinets.
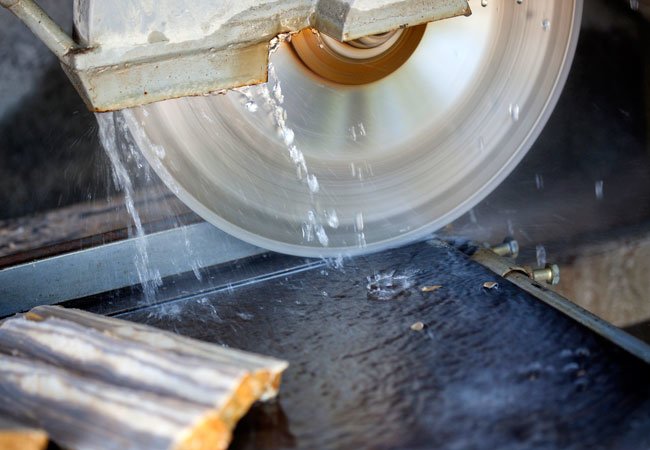
METHOD 1: Cutting Glass Tile with a Wet Saw
A wet saw is especially helpful if you’re tiling a large area that requires many straight cuts, such as a shower. Using a wet saw is a time-effective method for achieving clean edges while reducing the risk of damaging the glass tiles. The saw releases a steady stream of water as the blade cuts through the tile, which decreases friction and cools the cut edge, resulting in a smoother cut with minimal breakage.
These powerful saws range in price from around $100 for an inexpensive model to more than $1,000 for a high-end contractor-grade tool. If you don’t want to shell out big bucks for a saw you’ll use only once or twice, you can inquire at a construction tool rental store, or even your local big-box home center, about renting one. A quality wet saw that costs $500 to buy can often be rented for around $50 per day.
MATERIALS AND TOOLS
– Washable marker
– Rubber gloves
– Wet saw
– Cloth
STEP 1: Mark your cut with a washable marker.
Measure the tile to be cut, and use a washable marker to draw a cutting guideline on its surface. Later on, after you’re done cutting the glass t ile, you should be able to easily wipe away any remaining marker line with a clean, damp rag.
STEP 2: Start the wet saw.
Pull on rubber gloves (leather or fabric gloves will quickly become saturated with water) and then turn on the wet saw. Let it run for around 15 seconds, allowing the water to flow freely over the saw blade.
STEP 3: Feed the tile through the wet saw slowly and carefully.
Align the glass tile with the cutting guide on the wet saw, and carefully cut along the guideline you drew. Feed the tile through the saw slowly, moving away from you with light but steady pressure until you’ve cut through. Power down the saw after the cuts have been made, and wipe away remaining traces of marker with a damp cloth.
METHOD 2: Manually Score and Cut Glass Tiles
Before the invention of tile saws, artisans manually scored and cut thick glass to create stained-glass windows and glass mosaics. Cutting glass tiles manually takes longer than using a wet saw and is more likely to result in uneven breaks, yet professional tile setters still use this method today, particularly when cutting small tiles.
Manual glass scoring wheels are inexpensive, with prices starting at around $15 (view on Amazon). You’ll also need a pair of grozing pliers (view on Amazon) or running pliers (view on Amazon). Both are inexpensive, glass-specific tools. Once you have the appropriate tools, practice scoring and snapping a few sample glass tiles before diving into the project to make sure you understand how much pressure you’ll need to use.
MATERIALS AND TOOLS
– Washable marker
– Manual glass scoring wheel
– Straight edge
– Grozing pliers
– Running pliers
– Rubbing stone for glass
– Cloth
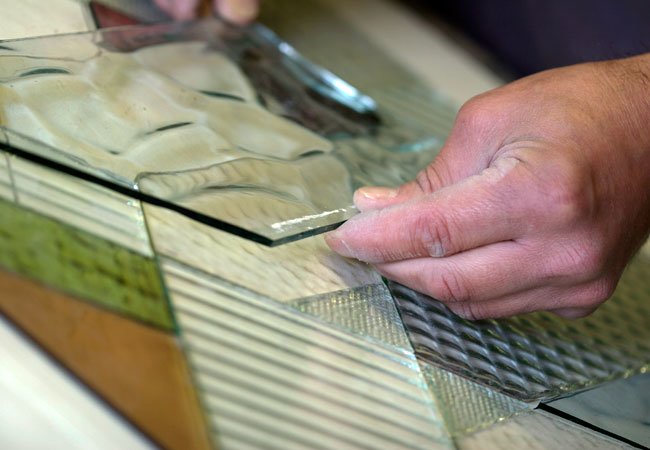
STEP 1: Mark your cut with a washable marker and score one side.
Place the glass tile on a flat surface, face up, and draw your cut line. Then, take a straightedge and align it over your cut line. Position the scoring wheel at the far end of the tile, then pull it toward you along the straightedge to ensure an even cut. Press firmly enough that you hear a distinct crackling sound as the scoring wheel rolls along the glass. The scoring wheel will create a weak line on the surface of the glass.
STEP 2: Cut the glass tile with grozing or running pliers.
With the tile still facing upward, place grozing pliers on the section of glass you want to break off (positioned parallel to the scored cut) and snap downward.
Alternatively, you can break the tile along the scored line with running pliers, which feature a slightly curved head that gently compresses the tile at the scored line. To use running pliers, place the center of the pliers directly on one end of the scored line, with the jaws of the pliers positioned perpendicular to the line, and press down. The movement will apply even pressure to the glass on both sides of the scored line, allowing the glass to split along the length of the line for a clean cut.
STEP 3: Smooth the edges before installation.
Smooth the cut edge of the glass tile, if necessary, with a rubbing stone before installing. A rubbing stone, which retails for around $7, is similar to a knife-sharpening stone, but with slightly larger grit for polishing away sharp edges of glass.
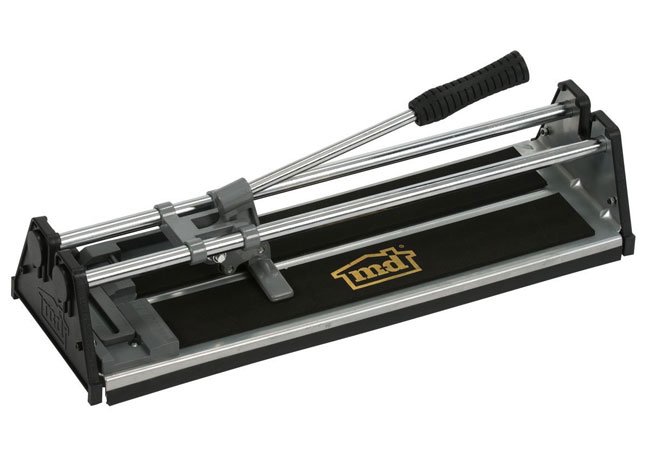
METHOD 3: Cutting Glass Tile with a Bar Cutter
Using a bar cutter to cut glass tiles is more efficient than using a scoring wheel and pliers, because the machine can both score and cut the tile. (Some bar cutters only score the tile, while others include a pressure foot that snaps the tile along the scored line.) Inexpensive bar cutters like start around $25 (view an example on Amazon) and go up from there. More expensive models often come with measurement tools for cutting precise angles.
MATERIALS AND TOOLS
– Washable marker
– Bar cutter for glass
– Running pliers
– Grozing pliers
– Rubbing stone for glass
– Cloth
STEP 1: Mark your cut with a washable marker.
Measure the glass tile and mark the desired cut lines, then position the tile on the cutting pad of the bar cutter. Carefully align the marked line with the cutting guide on the bar cutter.
STEP 2: Use the bar cutter to score the tile.
Score the glass tile by pulling the scoring handle (or knob) along the tile away from you.
STEP 3: Snap the tile on the scored line.
If your tool is equipped with a pressure foot, use it to snap the tile along the scored line. Otherwise, you can manually snap the tile with running pliers or grozing pliers, as described above.
STEP 4: Smooth the edges before installation.
If necessary, use a rubbing stone to remove any shards, and wipe away the marker with a damp cloth.
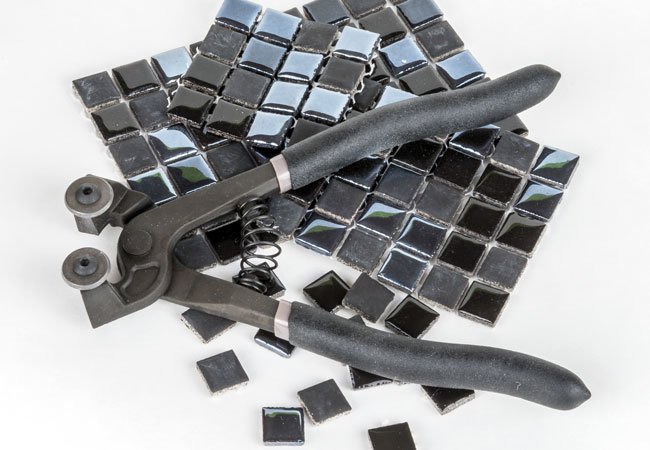
METHOD 4: Nipping Glass Tiles with Wheeled Mosaic Nippers
Mosaic nippers are most often used to cut small, irregularly shaped pieces of glass tile to be used in artistic designs. While with any of the methods outlined here it’s helpful to practice on a few spare tiles before leaping ahead, practice is particularly important here. Nipping is not as precise as scoring or cutting with a wet saw. Wheeled nippers are similar to regular pliers, but instead of a flat head, this $15 tool (view on Amazon) features sharp upper and lower carbide wheels that cut through the glass.
MATERIALS AND TOOLS
– Washable marker
– Wheeled mosaic nippers
– Goggles
– Cloth
STEP 1: Mark your cut with a washable marker.
Draw guidelines in marker on your glass tile.
STEP 2: Wear protective gear, including goggles.
Wear protective eyewear and don’t nip tiles while other people are nearby, as these cuts will send nipped glass shooting across the room. Hold the nippers in your hand (the same way you would hold ordinary pliers), keeping them close to your work surface, and position the edge of the wheels along the line you wish to cut.
STEP 3: Cut the glass tile.
Squeeze the nipper’s handles forcefully to cut through the tile.

What to Do When Cutting Curves in Glass Tile
If you’re laying glass tile around a pipe or other curved object, straight lines just won’t do. You can, however, achieve a smooth curve by using a scoring tool, wet saw, grozing pliers, and a rubbing stone in combination, and blending some of the methods detailed above.
STEP 1: Mark your cut with a washable marker and score.
Draw the curved line on the glass tile in washable marker, then carefully pull the handheld glass scoring tool toward you along the marked guideline. Since you’ll likely be doing this freehand, without the equivalent of a straightedge to guide the tool, work slowly and precisely.
STEP 2: Make straight cuts perpendicular to the scored line.
With a wet saw, make multiple straight cuts (approximately ⅜ inch apart), starting from the edge of the portion of the tile that you’re planning to discard, to the scored line, working perpendicular to the scored line. These cuts will result in narrow spokes of glass. As you near the edges of your curve, your straight cuts will shorten.
STEP 3: Snap off these glass spokes around the curved cut.
Snap off the skinny rows of glass one at a time using grozing pliers until you’re left with just the curved glass tile.
STEP 4: Smooth the edges before installation.
Smooth and polish the cut with a rubbing stone. Once you’ve wiped away the glass shavings and marker with a damp cloth, the tile is ready to be installed on your sleek new surface.