
We may earn revenue from the products available on this page and participate in affiliate programs. Learn More ›
No matter how quietly you traipse through your home late at night, a squeaky floor will always trip you up and announce your presence. The creaky spots develop over time as the wooden subfloor dries out and shrinks or buckles, ultimately lifting away from supports. Then, even a slow or cautious step causes enough movement in this new gap between subfloor and joist—either the subfloor sinks, its boards rub one another at the seams, or the wood rubs against a nail—to create the irritating noise.
Fortunately, these squeaks don’t have to keep you up late at night. Just head to the basement or crawlspace beneath the squeaky floor, flashlight in hand, and send a friend upstairs to take slow, deliberate steps across the entire floor until you can shine a light on source of the squeak. (You’re looking for the area of subfloor that moves when you hear the sound, often around a joist or at subfloor seams.) Then, proceed with one of the three solutions here to fix nearly any size of gap.
FOR NARROW GAPS: Fill With Construction Adhesion
Even a slight gap between the subfloor and joists—as narrow as ¼-inch or less—can be enough to cause a big annoyance. Fortunately, these easily be sealed with construction adhesive. Likewise, this flexible filler can effectively close up gaps longer than 2 feet and/or vary in depth.
MATERIALS AND TOOLS
– Flashlight
– Pencil or marker
– Painter’s tape (optional)
– Respirator with organic vapor cartridge
– Construction adhesive
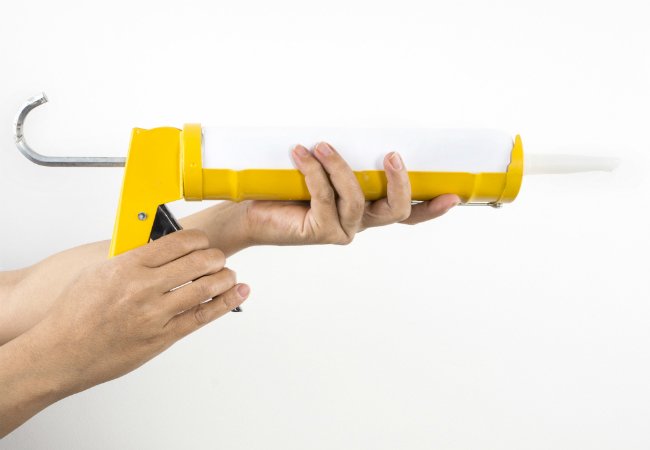
– Caulk and adhesive gun
STEP 1
Have someone walk over the troublesome patches above while you’re monitoring the floorboards from below. Once you hear the creak, look for a gap in that approximate area and mark the spot in pencil, marker, or a tear of painter’s tape.
STEP 2
Pull on a respirator mask and, if possible, open basement windows to air out the space while you work. While construction adhesive is highly useful, it can also very noxious when inhaled in closed quarters. Then, load a cartridge of construction adhesive into a caulk and adhesive gun to begin your subfloor repair.
STEP 3
Rather than run the adhesive along the edge of the joists in a bead, concentrate on forcing it deep into the gap. To do so, position the spout of the adhesive tube against the gap, and slowly press the trigger on the caulk gun to push adhesive from the cartridge into the crack. You want to move just slow enough that the tube fills the gap completely and begins to bulge out along the joists. When this bead begins to form, continue moving along the gap to fill the next section, until you have covered the length of the creak zone.
STEP 4
Repeat this adhesive-forcing method on both sides of the joists to ensure the gap is completely filled. While you’re at it, inspect nearby joists, too, just to ensure the whole area has been reinforced.
STEP 5
Again, do not walk across the floor above the adhesive for at least one day. The construction adhesive takes 24 hours to fully cure and harden; after that, you should have solid footing.

FOR HALF-INCH GAPS: Slide in Shims
When the gaps are less than ½-inch deep and roughly a foot or so long, fitting shims—thin wedges of wood available at various lengths in your local hardware store—between the joists and the floorboards could stop the movement and squash a squeak.
MATERIALS AND TOOLS
– Flashlight
– Pencil or marker
– Painter’s tape (optional)
– Ruler
– Table saw
– Wood shims
– Wood glue
STEP 1
After you locate the creak with the help of your friend upstairs, mark its location with your marker, pencil, or a bit of painter’s tape so as not to lose sight of it while you grab your shims.
STEP 2
Spread wood glue along one flat side of the shim, and slide it into position glue-side up. Take care not to force it, or else you could inadvertently widen the gap and worsen the problem. If it’s not quite snug, you may need more than one shim to push in.
STEP 3
Let the shims dry beneath those floor board undisturbed for 24 hours. Have your upstairs partner station a chair, plant, basket, or other temporary roadblock exactly over the boards that squeaked to redirect folks in your home around the repaired spot. In a day, the source of the squeak should be fixed.

FOR LARGE GAPS: Brace Joists with a 2×4
While the most involved of the three methods here, bracing an existing joist with a 2×4 is the most effective solution for subfloor that squeaks due to poor support—be it damaged joists, long gaps wider than ¼-inch between the joists and subfloor, or areas where the edge of the subfloor doesn’t sit squarely on the joist below.
MATERIALS AND TOOLS
– Flashlight
– Measuring tape
– Table saw
– 2×4 lumber
– Pencil or marker
– Respirator mask with organic vapor cartridge
– Construction adhesive
– Electric drill with a 3/16” bit and screwdriver head for 2-½-inch wood screws
– 2-½-inch wood screws
STEP 1
As your friend upstairs walks the path on the squeaky floor that makes noise, measure the length of the subfloor in need of extra support. Then, cut your 2×4 to be at least 2 feet longer than the area that creaks.
STEP 2
Mark one of the 2×4’s narrow edges with a pencil or marker with the word “subfloor” to indicate which side will face up and be glued to the subfloor above.
Now, look to your framework and identify which side of the joist shows a larger separation from the subfloor it supports. Here, you’ll fit and fasten the 2×4 in the corner where they should meet. The top edge will press against the subfloor above while one of the 4-inch sides butts up along the joist; write “joist” on the 4-inch side that will meet it.
STEP 3
On the opposite 4-inch side of the 2×4, make a mark every 12 inches, each about 1-½ inches down from the top. Pre-drill holes using a 3/16” bit at each of mark, angling the drill up toward the designated top of the board (where it will meet with the subfloor).
STEP 4
Now, open any windows to prepare for the noxious solvents of the construction adhesive you’ll put to task, and don a respirator mask. Apply two substantial zig-zagging beads of adhesive to the 2×4: one along the 4-inch joist side and another along the 2-inch subfloor side.
STEP 5
Position the 2×4 into the corner where the subfloor and joist should meet, allowing 1 foot of lumber to hang past either end of the gap responsible for your squeaky floor. Make sure it’s as flush with the subfloor as it can get.
STEP 6
Swap in the electric drill’s screwdriver bit. Then, insert a 2-½-inch wood screw in the first pre-drilled hole at an angle. As you start to drill the screw into the 2×4, you should see adhesive oozing out of the joints between the joists, subfloor, and 2×4. Repeat until you’ve filled all pre-drilled holes.
STEP 7
Allow the adhesive on your reinforced joists 24 hours to fully dry, after which your floor should be squeak-free for years to come.