
We may earn revenue from the products available on this page and participate in affiliate programs. Learn More ›
Adding lead pigment to paint started way back in the Colonial era, as it made paint extremely durable. By the mid-1900s, however, health officials became aware of the hazards of lead exposure, including brain and organ damage. Lead paints began to be removed from the market, and were completely banned in 1978—yet lead-based paint can still be found on door and window trim, and on painted stairways, in many homes built prior to that time. If you own an old home and think lead may be present in the paint, you can actually test for lead paint to confirm your suspicions.
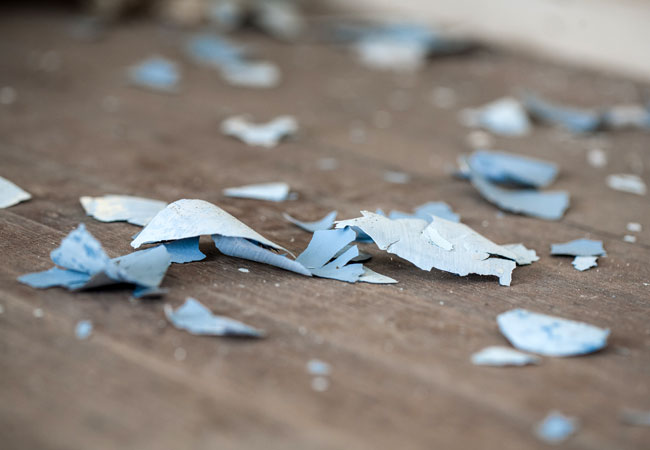
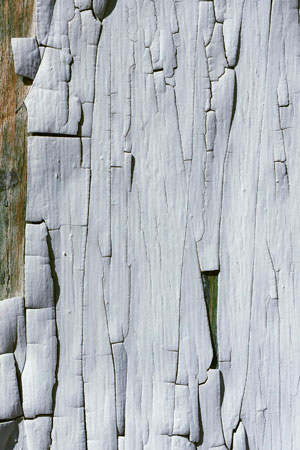
The mere presence of lead paint in your home doesn’t necessarily indicate a health risk. If the paint is still in good shape, it can be encapsulated and repainted to protect residents from exposure. The danger from lead paint increases when it’s peeling or otherwise deteriorating, which can lead to the inhalation of lead dust or the swallowing of lead-based paint chips.
If, rather than paint over it, you are planning to remove paint that has tested positive for lead, contact your local building department. Municipalities have strict rules about how the demolition of lead-containing building materials should be handled (and how the debris should be disposed of).
It is always wise to hire an EPA-certified contractor even if you are only removing a relatively small amount of lead paint. In other words: lead paint removal is not a suitable project for average do-it-yourself homeowners. Proper, safe execution of this job requires not only specialized training, but specialized tools and materials as well.
For example, after the job is done, it is essential to clean up the work area with a HEPA vacuum designed for lead dust removal—not your home vacuum with a HEPA filter. HEPA vacuums designed for lead dust removal resemble shop-type canister vacuums; you can purchase one (starting at around $300) or rent from a construction rental store for $35 to $45 per day. (Note: Some local community health centers loan out HEPA vacuums at no charge, or for a small fee, as part of a lead remediation program.)
Remember that when professional, EPA-certified contractors are called in to remove lead paint, they arrive in hazmat suits and masks. It’s unquestionably dangerous work, not to be undertaken lightly—or undertaken at all—by amateurs. Still, some choose to do so anyway, despite the regulations and risks, by carefully and deliberately following a process like the one outlined below, based on EPA recommendations.
Tools & Materials
Bobvila.com may earn a commission from purchases made through these links.
- 5-gallon bucket
- Spray bottle
- Hand scraper
- Sanding sponge
- Sponge
- HEPA Vacuum
- Lead-rated respirator mask
- Work gloves
- Protective goggles
STEP 1
Remove furniture, area rugs, and all other items from the room you’ll be working on. Spread 6 mm plastic sheeting over the entire floor, using duct tape to secure it at the edges to the bottom of the walls or to the baseboards. It prevents lead paint chips and dust from contaminating carpeting or sifting through the gaps in hardwood and laminate flooring.
STEP 2
Turn off your HVAC system and use clear plastic or duct tape to cover heating vents and registers. This will keep lead dust from entering your home’s ventilation system. Close any windows in the room to prevent drafts, which can distribute lead dust.
STEP 3
Fill a large plastic bucket halfway with warm water and put it in the room—along with a sponge or rags—where you’ll be removing lead paint. Then seal off adjacent rooms by covering doorways with 6 mil plastic sheeting and clear plastic tape.
STEP 4
Just as important as sealing off your work area is protecting yourself. It is critical to wear a lead-rated respirator mask (not a dust mask). This respirator mask must be fitted with an approved HEPA (High-Efficiency Particulate Air) filter. You’ll also need to don protective goggles and rubber gloves and be sure to wear old clothing that you can dispose of when you’re done.
STEP 5
Spray areas of chipped or peeling paint thoroughly with a spray bottle filled with water. The key to removing lead paint is to “work wet,” which reduces the risk of inhaling lead dust. Keep your work area relatively small, approximately two to three feet or so, to ensure that the area you’re working on remains wet at all times.
STEP 6
Scrape away loosened bits of paint with a hand scraper. It’s not necessary to remove all the lead paint, just the paint that is peeling or deteriorating. The paint that is still firmly attached can be painted over without scraping.
STEP 7
Spray the area you’re working on with water again, and then sand with sanding sponges if necessary to smooth down rough areas caused by scraping. The same rule applies here: Keep the area wet while you’re working. Wet sanding takes a little longer than dry sanding but it won’t create toxic lead dust.
STEP 8
Wipe and clean the area with a dampened sponge as you go. This will help remove residual lead dust and debris safely. Change the water in the bucket frequently to keep it clean.
STEP 9
Clean up your work area when you’re done scraping and sanding by vacuuming thoroughly with a certified HEPA vacuum—and, we repeat, not a household vacuum with a HEPA filter. Using the wand and nozzle attachment, vacuum right over the plastic sheeting to remove as much loose dust as possible.
STEP 10
Carefully remove the plastic sheeting covering the floor and doorways. Fold its edges into the center to trap any remaining paint chips or particles before rolling up the sheeting and placing it in a garbage bag. It may be permissible to put the bag in your outdoor garbage can for pickup, but it’s a good idea to check with your local waste authority first—a different disposal method may be recommended or required.