
We may earn revenue from the products available on this page and participate in affiliate programs. Learn More ›
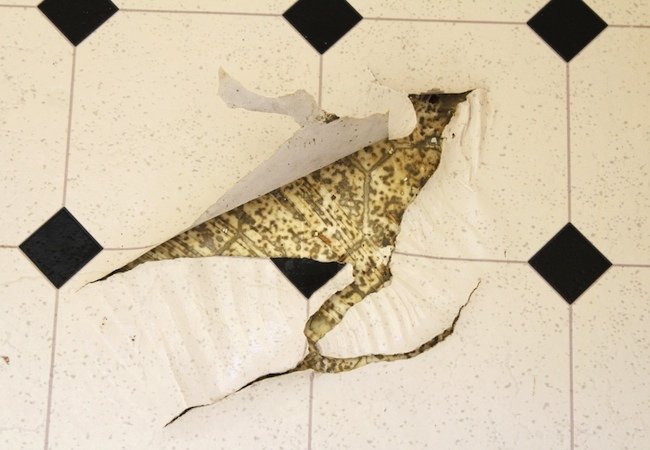
Let’s be clear: It’s no fun to remove vinyl flooring. Peeling up the material itself is no picnic, but the real trial is to get rid of the glue that had been securing the vinyl to the subfloor.
The only silver lining here is that while the work may be tedious and time-consuming, anyone can learn how to remove vinyl flooring. No special tools or advanced skills are required. It’s really only a matter of elbow grease.
Follow the steps below to get the job done with a minimum of frustration.

Carpet, hardwood, vinyl, and tile flooring.
Bob Vila has partnered with Empire Today to help you easily get beautiful new floors at a great price.
Free In-Home Estimates
STEP 1: Clear the area.
To remove vinyl flooring, you must first take all furniture out of the room, giving yourself unimpeded access to the work area. You’ll also need to carefully remove all baseboards and any other trim that meets the floor.
STEP 2: Cut into 12-inch strips.
Next, locate a section of the floor with no glue underneath. Start removing vinyl flooring right here, using a utility knife to cut the material into 12-inch strips.
Pull up each one gently. Where you encounter resistance from the glue, use a scraper tool (or even a kitchen spatula) to get the strip loose. In places where the glue is especially tenacious, you can use a hammer-and-chisel combination to chip at the hardened adhesive.
STEP 3: Get rid of the glue.
If you remove vinyl flooring but the glue remains lodged on the subfloor, try this: Combine warm water and soap in a bucket, then apply it liberally to the glue, allowing time for the mixture to soak in. When you return, the glue will have softened and become easier to remove.
No dice? OK, it’s time to bring some heat into the equation. Buy or rent a heat gun—or in a pinch, use your hair dryer—and hold it directly over the stubborn adhesive long enough to soften the glue (but not long enough to cause any damage to the subfloor). Then go at the glue with your trusty scraper.
STEP 4: Clean up.
Finish removing vinyl flooring with some cleanup: Use a broom or shop vac to pick up all the debris that now litters the room.
An Alternative to Removing Vinyl Flooring
If all of the above seems like way too much work, there’s always the option of renting a power scraper from your local home center. There’s a cost attached, but it’d certainly make much quicker work of things. If you opt for the power scraper, be sure to test it first in an inconspicuous area; you will need to adjust its angle so that it removes only the vinyl-and-glue layer, not the underlying subfloor. Score the vinyl into 10-inch sections with the utility knife, then turn on the scraper and get busy.
Safety Precautions
Until the mid-1980s, asbestos often served as an ingredient in vinyl flooring products. If you know that the installation you’re dealing with has been around that long—or if you’re not certain how long the vinyl floor has been there—it’s only common sense to have the material tested before you move forward. I believe in hiring pros when it’s appropriate, and in the case of asbestos-laced vinyl flooring, it’s eminently appropriate to pay people who know what they are doing.