
We may earn revenue from the products available on this page and participate in affiliate programs. Learn More ›
Buckles, splinters, and cracks, oh my! These are all clear-cut signs that your vinyl siding needs to be replaced. Despite this material’s widely extolled reputation for superior strength and durability, it doesn’t last forever. After 10 to 15 years of exposure to the elements, your siding will no doubt reach its expiration date, but having the panels removed professionally can cost up to $3,000. So why not DIY and put the money you save towards a new exterior? It should only take a day or two to remove siding from a typical house—and this guide will help you get the job done.
Tools & Materials
Bobvila.com may earn a commission from purchases made through these links.
Step 1
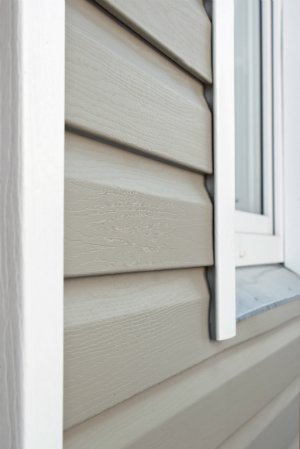
First, understand the system. Siding, which is generally sold in 12-foot panels, is attached via an interlocking strip-and-lip channel system, with the strip (at the top of the panel) nailed to the wall and the lip (at the bottom of the panel) locking onto the panel below. Removal requires you to unlock or “unzip” each piece from the one above, so to perform this part of the task efficiently and effectively, invest in a $5 vinyl siding removal tool—also known as a zip tool. You’ll work a panel at a time, first unzipping and then removing the nails.
Step 2
If you’re not using temporary scaffolding (which can be rented from a home center for about $25 a day), position your ladder securely against a top corner of your home and climb to the top. To remove the uppermost piece, start at one end of the bottom of the first panel and push the end of the zip tool up under siding until it hooks onto the underside of the lip. You won’t be able to see the lip but should feel it lock on.
Step 3
Once the zip tool is latched onto the lip, pull the siding piece downward and slide the tool horizontally across the entire length of the panel, unhooking the lip. Working in one direction, unzip the channel lock across the entire length of the piece of siding. Be careful not to extend beyond your reach. If you’re not using scaffolding, climb down and reposition your ladder as necessary. Once that’s done, the panel will hang loose, exposing the nail strip.
Step 4
After unzipping the first panel, pry off the nails from the top strip using the claw end of the hammer. (Although nails on the uppermost panel will already be exposed, don’t try to remove them before unlocking—always unlock first and remove nails second.) Find any stubborn nails? Grab your carpenter’s pincer pliers to loosen.
Step 5
Once all the nails are removed, unhook the siding piece by pulling straight down and out. Carefully bend the panel to free it from the receiving channel. Continue working in one direction from the top down, one panel at a time—unzipping, then removing the nails—until you’ve got them all down.
Step 6
Once the vinyl is removed, determine how to dispose of the unwanted exterior properly. If you’re only removing a few damaged panels for replacement, disposal isn’t such a big deal. But if you’re taking on your entire house, renting a dumpster might be your best bet for cleanup. Though most companies only rent by the week, the average national cost runs about $400. Seems a fairly small price to have the cumbersome panels hauled off to the landfill.
Now, don’t jump the gun on your home’s new look! Because vinyl siding is notoriously vulnerable to water penetration, be sure to check for moisture damage, which could lead to underlying wood rot and pest infestation. Do a thorough repair before putting up new siding or any other exterior.