
We may earn revenue from the products available on this page and participate in affiliate programs. Learn More ›
Thanks to the simplicity of their design and function, light switches seem to last pretty much forever despite daily use. Indeed, most of us rarely give a second thought to these humble, hardworking components, but there are certainly instances when you’ll want to replace them. Perhaps you just want a better-looking or more functional switch, or maybe the switch is acting up, either emitting sparks or making a popping noise.
Whatever your reason for researching how to replace a light switch, you may be looking to call in an electrician. After all, as with any home repair that involves electricity, it’s always wise to err on the side of caution. Yet, so long as you observe basic safety measures, you can probably replace a light switch on your own, saving the hassle and expense of hiring a professional. Chances are that your toolbox already contains the necessary tools, so aside from a new switch and the following instructions, you need only a spare hour to complete this small project.
Tools & Materials
Bobvila.com may earn a commission from purchases made through these links.
Step 1
Before beginning in earnest to replace a light switch, go first to the electrical panel and cut power to the room where you’re going to be working. If the breakers in the box are unlabeled, use trial and error to determine which one governs the circuit that includes the switch you’re replacing.
To do this, first flip the switch on. If it controls a ceiling fixture, make sure the light goes on. If it controls an outlet, plug a lamp into the outlet and make sure it goes on. Then, one by one, toggle each breaker and check the ceiling fixture or test lamp to see if it goes off. (Enlist a friend or family member to help so you can avoid having to make multiple trips back and forth.)
Once you have identified the right breaker, move it to the “off” position. Next, to make absolutely certain there’s no electricity reaching the light switch, remove the faceplate and hold a non-contact voltage detector within about a half inch of the switch’s screw terminals. (If you’re using a different type of voltage tester, such as a multimeter, follow the manufacturer’s instructions.)
If the detector does not register a current, it’s probably safe to continue to the next step, but before you spring ahead, it can never hurt to test the detector by trying it on a nearby outlet that you’re certain is receiving power.
Step 2
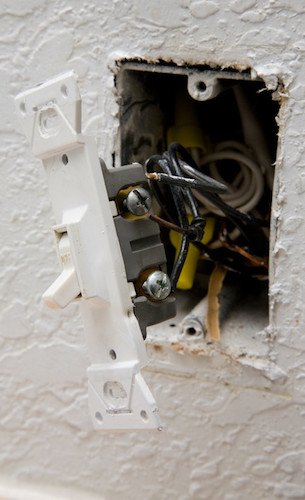
Now that you’ve taken off the faceplate, proceed to remove the screws that fasten the switch to the wall. Next, pull the switch out from the wall and inspect the wires feeding into it. If those wires loop around the terminal screws on the side of the switch, simply loosen the screws to free up the wires. If, however, yours is a newer switch, the wires may connect not to the terminal screws, but through holes in the back of the switch. (These are known as “back-wired,” “backstabbed,” or “push-in” switches.) To remove the wires, gently tug on each one while inserting the flat blade of a small screwdriver into the slot beneath the hole where the wire enters the housing.
As you work, be sure to keep track of which wire goes where, especially if the wires aren’t color-coded. The black or red “hot” wire attaches to the brass screw (or goes in the hole on the same side as the brass screw). Meanwhile, the white “neutral” wire connects to the silver screw (or goes in the hole on the same side as the silver screw). Finally, note the location of the ground wire. This green or bare copper wire is usually attached to a green terminal screw on the light switch, so you’ll need to unscrew it. Sometimes, the ground wire is connected to a screw on the electrical box itself, in which case you can leave it alone.
Step 3
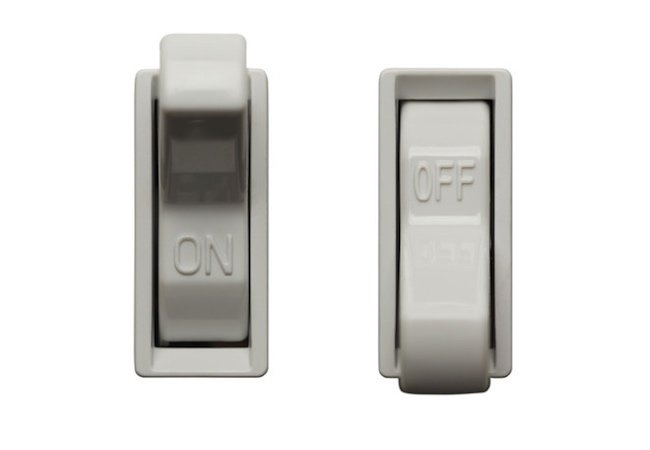
If necessary, use a wire stripper to expose about a half inch of both the hot and neutral wires. Now, get the replacement light switch ready, using its on-off labels to help you orient the unit right-side up. Next, starting with the hot wire, begin attaching the wires to the new switch. If you’re connecting the wires to terminal screws, twist the exposed portion of the hot wire into a clockwise loop, fit the loop over the brass screw (with the tip of the wire pointing away from the room), then tighten the screw. If, however, the switch has push connectors on its rear side, simply guide the hot wire into the appropriate hole.
Step 4
Move on to attaching the neutral wire to the light switch, using the same technique you used to attach the hot wire. If the ground wire had been connected to the old switch, complete the wiring by attaching the ground. If the ground wire had been (and is still) connected to the box, let it be. Once all the wires are hooked up, push the switch back into the electrical box and secure it to the wall with screws at top and bottom. Finally, return to the electrical panel and restore power to the light switch. Test to make sure it works, and if it does, screw the faceplate back into position.
A parting word: If want to replace a light switch with a dimmer, you can follow the process described above, but remember—not all dimmers are created equal. For a successful installation, double-check that your chosen dimmer has sufficient wattage to control your fixture. Add up the maximum wattage of the bulbs you wish to put on the dimmer, and make it a point to seek out a dimmer switch with a wattage rating above the calculated total.