We may earn revenue from the products available on this page and participate in affiliate programs. Learn More ›
Your kitchen gets a lot of use. So it doesn’t take long to begin seeing signs of wear and tear on wood cabinets. Soon you may decide that some changes or updates are needed. And sometimes the simplest remedies are the best—and the most budget-friendly, too.
If your stained or painted kitchen cabinets are in need of a facelift, you can give them a fresh new appearance with only a minimal investment in tools and materials.
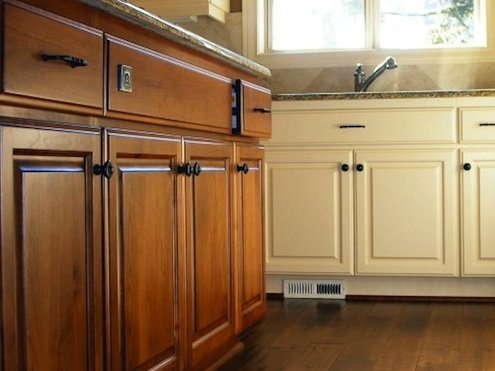
Restoring Cabinets with Stain
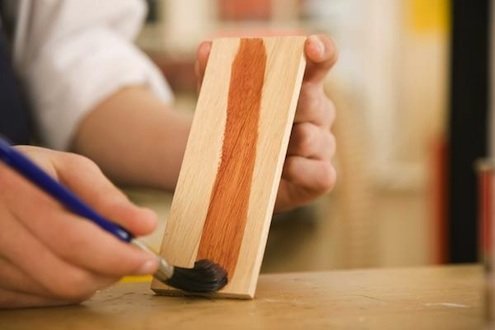
If your stained cabinets are still serviceable but have worn-out surfaces, or if you decide on a different look, then applying a new stain is easy.
- If you like a darker tone: First clean your cabinets with a mix of TSP and water. Once they’re dry, sand the cabinets lightly and use a tack cloth to remove dust. Then apply a polyurethane varnish (tinted to whatever tone you find appealing). This varnish-stain combo is likely to do the job in one application.
- If you like a lighter tone: Remove as much of the old stain as possible with paint remover or, if necessary, chlorine bleach (or an aggressive stripper). Opt for elbow grease and a scraper if your cabinet doors feature crevices or contours. Before sanding to create a smooth surface, take the opportunity to apply wood filler to any dents, cracks, or deep scratches. After applying the stain you’ve selected, let it dry before adding a coat of protective wood sealer. Rub surfaces dry with 000 steel wool and clean with a tack cloth.
Restoring Cabinets with Paint
Just as you can restore cabinets with stain finishes that have tired out, you can also restore cabinets whose painted surfaces have seen better days.
- Remove as much of the old finish as possible with a paint stripper. Then use a sharp scraper, where needed, to remove all traces of the old finish.
- Next, use wood filler to repair any dents, scratches, or other forms of surface damage.
- When newly smoothed surfaces are dry, finish off with sandpaper—100 grit, then 180 grit, and finally, 220-grit.
- Paint in whatever color you like; before applying sealer, clean surfaces with a tack cloth.
- When the sealer dries, rub surfaces lightly with 000 steel wool and use tack cloth to remove residual dust.