We may earn revenue from the products available on this page and participate in affiliate programs. Learn More ›
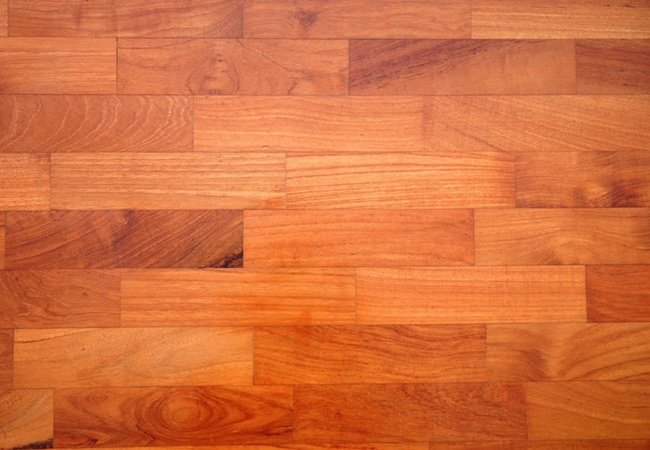
Hardwood flooring offers rich, warm, timeless beauty, and can even favorably affect the resale value of your home. Without question, wood costs more than other types of flooring, but many homeowners view the material as a wise long-term investment. Why? Because when a hardwood floor starts to show wear and tear, you can refinish it and in so doing, revitalize its look and performance. Make no mistake, however: Sanding, staining, and sealing a wood floor takes time and effort. It’s a demanding project, even for a veteran home handyman. That said, you can save a considerable sum by doing it yourself, sometimes more than half of what it would cost to hire a pro. If you’re ready and willing to take on the task, keep reading for the details on how to stain your own hardwood floors.
The weekend-long process follows these steps:
- Empty the room.
- Use a random orbital sander to sand the floor three times, using a lighter-grit abrasive with each pass.
- Remove dust with a heavy-duty shop vac followed by rags dampened with mineral spirits.
- Apply stain to the hardwood floor in one 2-foot section at a time using a lambswool applicator.
- Top the finish with a protective and glossy coat of polyurethane sealer.
Tools & Materials
Bobvila.com may earn a commission from purchases made through these links.
- Shop vacuum
- Tack cloth
- Random orbital sander
- Protective eyewear
- Dust mask
- Palm sander
- Lambswool stain applicator
- Cleaning cloths
- Two-inch paintbrushes
- High-density foam roller
Step 1
Before doing anything else, get the room ready. Relocate all furniture, and if the room has baseboards use a pry bar to remove the quarter-round shoe moldings that mark the transition between the baseboard and the floor. (Note: Label each piece of shoe molding with its location to ensure easy reinstallation later.) Because floor sanding creates a great deal of dust, don’t forget to cover the doorways with plastic sheeting or a set of old sheets, preventing dust from traveling beyond the work area. You may also want to cover any light fixtures or HVAC vents. In short, if there’s something you don’t want filmed by a layer of dust, now is the time to protect it.
Step 2
Sanding may be the single most critical step in the process; it largely determines the quality of the end result. If you don’t sand the floor carefully and deliberately, that’s going to show once the stain dries. Adding even more stress to the task: For any room larger than a closet, you’ll need a similarly large sanding tool to get the job done—namely, a waist-height random orbital sander. The good news is that random orbital sanders are readily available for rent at your local home center. They’re also generally user-friendly and pose little risk of damaging the floor, so long as you read and adhere to the operating instructions provided with the unit.
Be prepared to sand the floor three times, using a lighter-grit abrasive with each pass. First, set up the sander with 60-grit sandpaper and, after donning protective eyewear and a dust mask, start moving the sander over the floor. The preferred technique isn’t so different from the one you’d use when mowing the lawn: Sand the floor in rows, overlapping your runs by approximately half the width of the sander. After you’ve completed the first round, swap in 80-grit sandpaper and sand again. Remember to keep the sander level, and never stop the sanding disks when they are in contact with the floor. Finally, switch to 100- or 120-grit abrasive and sand one more time. In any area where the random orbital sander is too large to reach, use a palm sander or a detail sander to achieve the desired level of smoothness.
Step 3
At this point, your job is simple but painstaking: Thoroughly vacuum up the enormous quantity of dust created during the sanding stage of the project. Don’t use your regular household vacuum, though—it’s probably not up to the task. Opt instead for a heavy-duty shop vac, fitted with a brush attachment and, ideally, a new filter. Even after vacuuming every inch of the space, there’s still more to do. Using either tack cloths or rags dampened with mineral spirits, wipe down the floor until it’s clean and clear of dust and debris. Doing so may take more sweat than you anticipated, but for a quality stain finish, it’s an important and sadly unavoidable effort.
Step 4
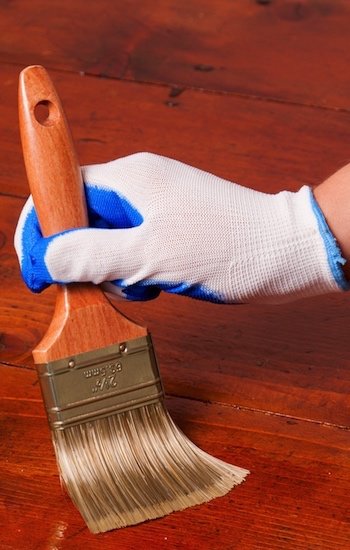
At last, you’re ready to stain—but not before ensuring proper ventilation (after all, floor finishes can emit harmful vapors). Once you’ve ensured a safe work environment, stop a moment and strategize. You need to make sure that when the floor has been freshly stained, you’ll be able to leave it without stepping all over your work. It’s usually wise to begin in one of the corners opposite the door and then work your way toward the exit. Once you’ve mapped out your path, get started. Using a lambswool applicator, apply the stain to the floor, aiming for even distribution over one two-foot section at a time. Wipe away the excess with a rag before moving on to the next section. Try not to let the “wet edge” dry. Rather, start the applicator a couple of feet away from the edge, then maneuver it to meet the previously coated section. In the corners, or where the floor meets the baseboards, a two-inch paintbrush may prove handier than the applicator. Finished? Let the stain dry, then assess whether you’d like the finish to be darker. If so, apply a second coat in the same way that you did the first.
Step 5
When the stain is completely dry, it’s time for the last step—protecting the finish with polyurethane sealer. Using a high-density foam roller (and, if necessary, a two-inch brush for some parts of the room), apply a thin, even coat across the entire floor surface. Wipe up any excess, then let the coat dry to a glassy finish. If the type of sealer you’re using does not require sanding between coats, you can proceed directly to the second application of polyurethane. Otherwise, sand the floor with fine, 320-grit abrasive to ensure that the second coat properly adheres. Don’t be tempted to use the brawny random orbital sander to sand at this late stage; here, finesse is the name of the game. Instead, sand either by hand or with a sanding pole. After cleaning up the inevitable dust with your shop vac and tack cloths, apply the second, final coat of sealer, then let it dry. You typically must wait 24 hours before being able to walk safely on the floor again, and as long as 72 hours before replacing furniture in the room. The drying period is a little annoying, but for a beautiful new finish and a dramatically transformed room, the wait’s worth it.