
We may earn revenue from the products available on this page and participate in affiliate programs. Learn More ›
A paint sprayer can shorten your production time and improve the finish quality on large or small projects. These convenient tools produce a fine even mist of water- or oil-based paints and stains to evenly coat smooth, rough, and patterned surfaces of all kinds. Weatherproofing a fence or deck, painting a house, finishing furniture or cabinets, and adding color to any number of small craft or hobby projects are just a few of the many times when using a paint sprayer could be the best choice.
However, while spraying is fast and easy, it is not always the best option for a few different reasons. Sprayers use about 33 percent more paint than rollers. Using a sprayer requires thorough protection from overspray, which takes additional time to set up. Also, cleaning a sprayer may take longer than cleaning a brush or two. But, for large or complicated projects and for small repetitive projects, spraying is often the more convenient way to go.
Learning how to use a paint sprayer can be easy. Perfecting your paint spraying technique takes a little bit of practice. I tested eight paint sprayers for Bob Vila in a month and learned a few tips and tricks along the way. Continue reading as we cover how to paint with a sprayer to get the most out of this efficient tool.
Tools & Materials
Bobvila.com may earn a commission from purchases made through these links.
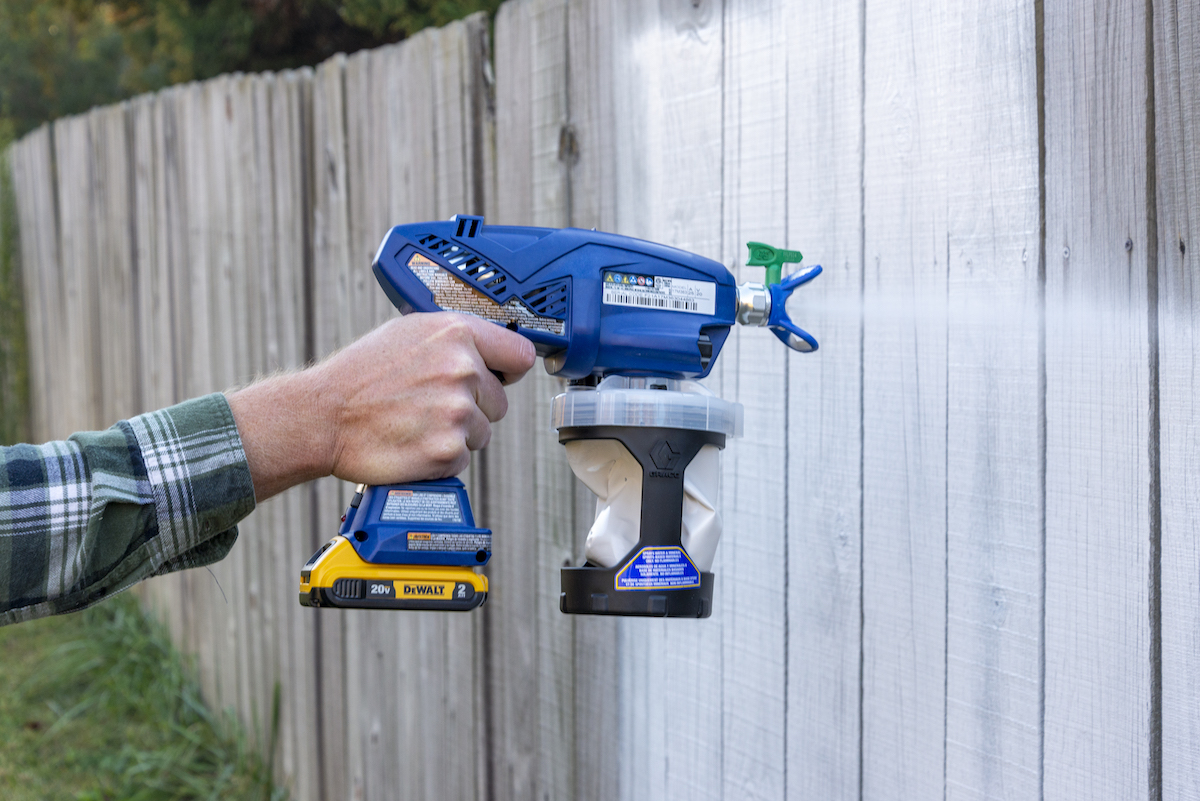
Get to know your paint sprayer.
Before starting a painting project, it’s important to choose the right paint sprayer type for the kind of painting projects you plan to do. The two most common types are High Volume Low Pressure (HVLP) and airless paint sprayers. HVLP sprayers are more popular for smaller detailed projects, while airless sprayers are commonly used for larger jobs and high production work.
HVLP paint sprayers inject air into the flow of paint at the sprayer tip to atomize the paint. These sprayers work with both oil- and water-based paints and stains. Some require different sized sprayer tips for different fluid types. The paint is loaded into a paint cup, typically up to a quart in size. Thick paints must be thinned to an appropriate viscosity to flow properly. HVLP sprayers are known for their superior finish quality, but may require multiple coats for complete coverage.
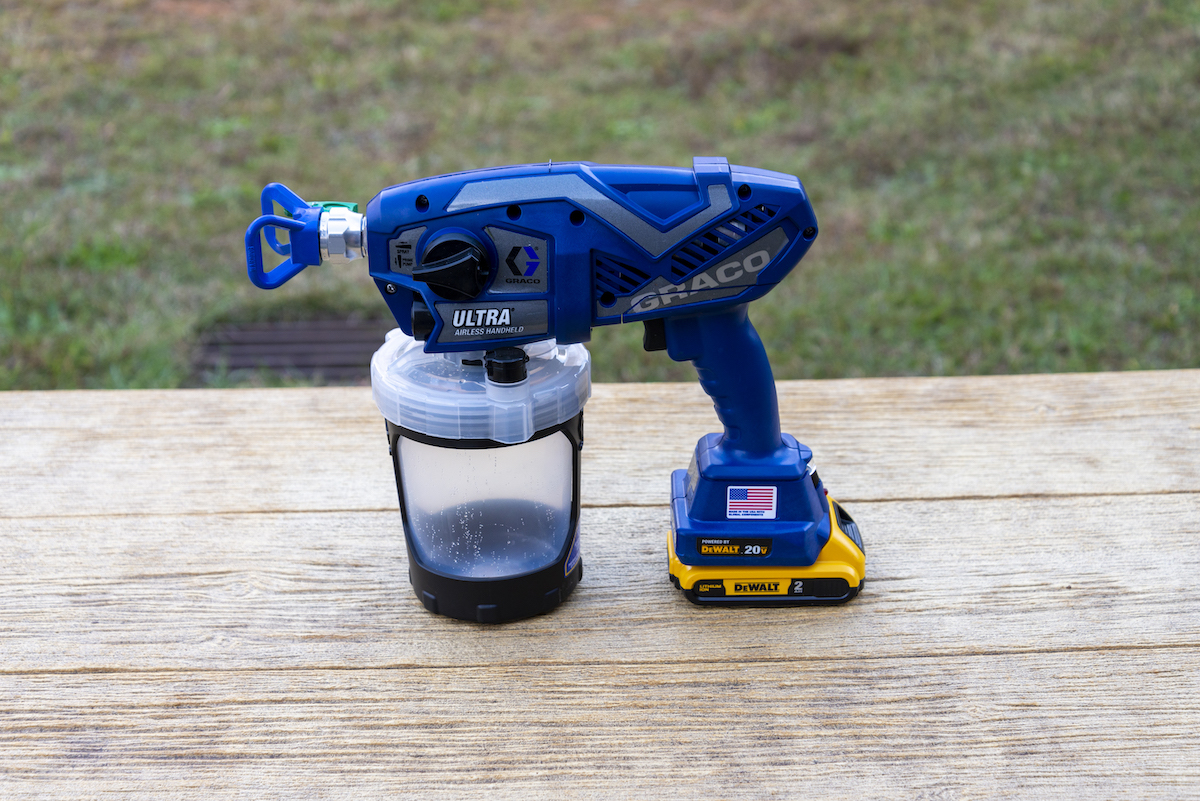
Airless paint sprayers pump the paint at high pressure, up to 3,000 psi, which causes it to atomize as it is discharged through the sprayer tip. These sprayers also work with both water- and oil-based paints and stains, and require an appropriately sized sprayer tip to match the material being applied. Handheld airless sprayers use a paint cup, while larger models are configured to feed paint directly from 1-gallon or 5-gallon paint pails. Because they work at high pressure, many airless sprayers can apply unthinned paints. With practice, these sprayers can provide complete coverage with a single coat.
STEP 1: Cover everything you don’t want painted.
Be sure to protect yourself and your surroundings before you begin painting. Work in a well ventilated area, and wear a respirator and goggles to avoid ingesting atomized paint particles. Also consider wearing long sleeves, closed-toe shoes, and protective gloves. Be especially careful with high pressure airless sprayers, as they produce enough force at the spray tip to break the skin.
Clear the working area of clutter to avoid trip hazards and to avoid accidents with air hoses, power cords, airless hoses, and paint containers. Use drop cloths and painters’ tape to cover any surface that you wish to keep paint free. Spraying is not usually the best option for painting the walls and ceilings of rooms, unless the room is empty and the floors are not finished. But it can be a fast and easy way to prime new construction and major remodeling projects.
STEP 2: Fill the reservoir with paint and practice using the sprayer on a scrap surface.
Regardless of the type of sprayer, straining the paint before loading it into the sprayer is a good practice to avoid clogs inside the gun. Place a paint strainer over a clean paint bucket and pour the paint or stain slowly to remove dried paint pieces and other foreign particles.
If you are using an HVLP sprayer to apply thick paint, you may need to thin the paint to achieve a sprayable viscosity. Depending on the type of paint, how to thin paint for a sprayer varies. How to thin oil based paint involves mineral spirits and how to thin latex paint for a sprayer requires just water. Use a viscosity funnel (often included with the sprayer) and your sprayer’s owner’s manual to determine the proper thickness of the paint.
After straining and thinning paint for sprayer compatibility, load the paint into the sprayer. At this point an HVLP sprayer is ready to spray. If you are using an airless sprayer, follow the manufacturer’s instructions for priming the pump and priming the airless hose (if relevant). When your sprayer is loaded and primed, test spray on scrap material before beginning the paint job. Adjust the paint flow, air flow, or spray pattern as necessary.
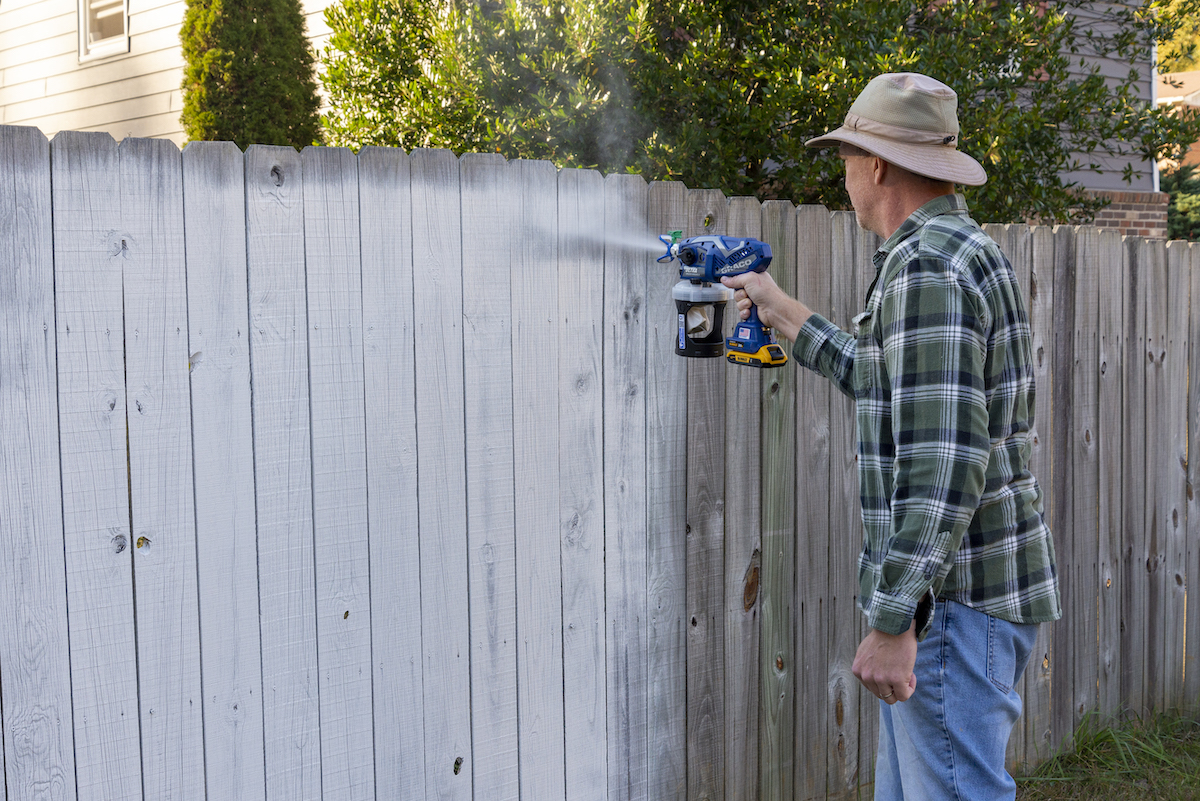
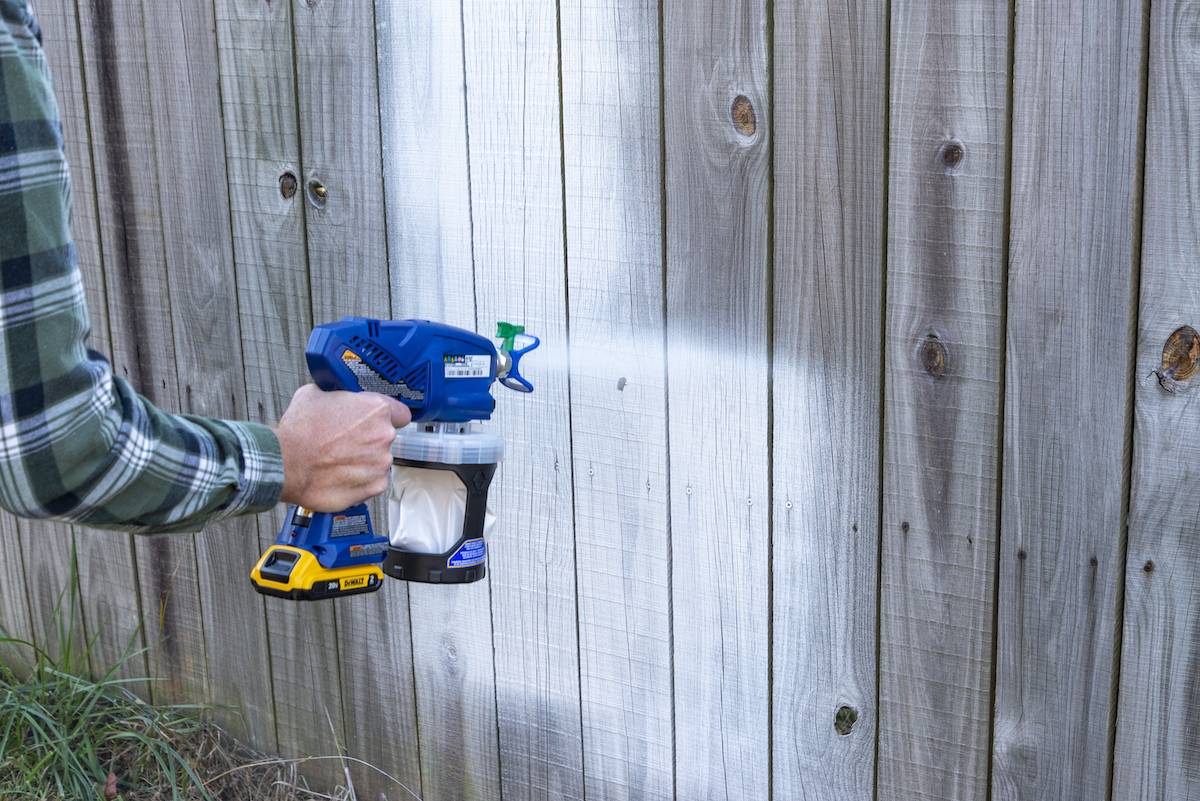
STEP 3: Use smooth consistent strokes to apply paint to your project’s surface.
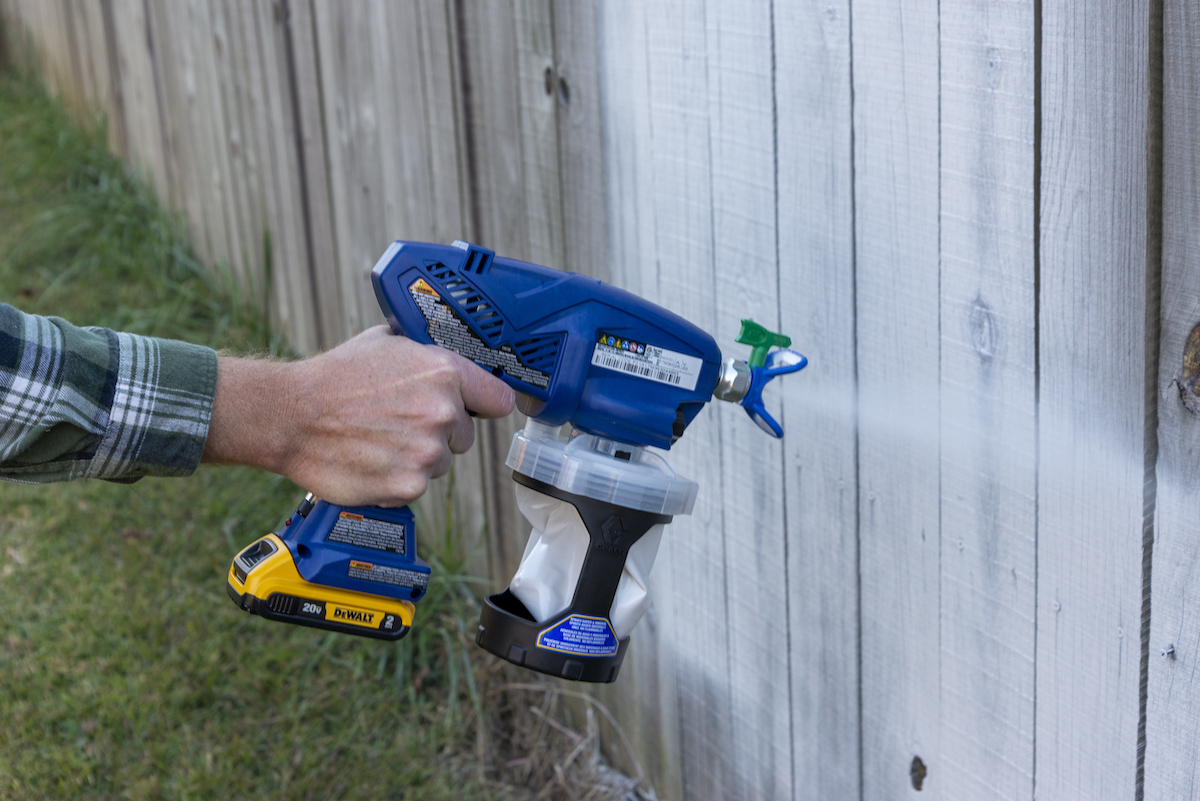
Paint sprayers can apply either a vertical or horizontal fan, or apply paint in a round pattern. Adjust the sprayer nozzle pattern according to the direction you will be painting. Orient the pattern vertically for side-to-side movement, horizontally for up-and-down movement, or round for greater detail.
Proper spray technique feels almost robotic. The gun should remain at a consistent distance–typically 6 to 12 inches–from the surface being painted. It is always perpendicular to the surface, and never at an angle. Never bend your wrist, but instead move your whole body to maintain the proper distance and angle.
Work in short strokes, no more than 18 inches wide or tall. To avoid runs and drips, never trigger the spray gun at a standstill. The pattern of motion is: move-trigger-untrigger-stop. Practice triggering a split second after beginning to move, and releasing the trigger while still moving in the same direction. Overlap the edges of the spray pattern by a few inches for a smooth and even coat.
STEP 4: Clean the paint sprayer thoroughly.
To keep the sprayer in top condition, follow the manufacturer’s directions to disassemble and clean the tool immediately after painting. Empty unused paint into its original container. Use the proper cleaning solution (water for water-based materials, mineral spirits for oil-based) to clean paint residue from the paint cup and intake tubes. Discharge fresh cleaning solution through the spray gun until it comes out clear. Finally, disassemble the spray gun to clean sprayer tips and nozzle parts, and to clean and lubricate all seals.
Be sure to dispose of paint and paint cleaning materials safely. Some paint sprayers have special instructions for long-term storage, so be sure to read and follow the manufacturer’s instructions.
What are the top things to know about using a paint sprayer?
A paint sprayer can be a powerful tool to reduce work time and improve the look of a paint job. Whether you use a powerful commercial paint sprayer or a small handheld unit, the basic principles are the same. Read the owner’s manual and get to know the tool before loading it with paint. Disassemble and reassemble the parts to gain familiarity with them before they are full of messy paint.
When you are ready to start a new painting project, start by protecting yourself with appropriate clothing and safety equipment and covering all nearby spaces with drop cloths and tape. Give yourself some time to develop good paint spraying techniques. And protect your investment by cleaning and maintaining the tool according to the manufacturer’s directions after every painting session.