

We may earn revenue from the products available on this page and participate in affiliate programs. Learn More ›
Q: Lately, when I take a shower, more water drips and runs out from behind the shower head faceplate than comes out the spray holes. I’ve also noticed water leaking from the shower head when it’s not in use. What gives? Should I call a plumber?
A: If a constant drip, drip, drip keeps you awake at night, or if you get startled by a spray of water from a leaking shower head every time you hop into the shower and turn it on, it’s time for a little shower servicing. If left unattended, those droplets can really run up your water and energy bills and even stain the interior of the shower—especially if your water supply is high in iron.
Fortunately, fixing a leak from behind a shower head faceplate will likely be a quick project that won’t require special tools or skills. Repairing a leaking shower head that drips when turned off is more complicated but, depending on the cause, may also be solved without a plumber.
Give the shower head and shower head handle a quick clean.
Before attempting to fix the leaks, it’s a good idea to clean the shower head and handle. Besides, removing any built-up residue and minerals may help unclog some of what’s causing the shower issues. It’s not necessary to remove the shower head at this point. (In general, it’s good practice to clean the shower head regularly, so try to do it whenever you’re cleaning the rest of the bathroom.)
Choose an all-purpose bathroom cleaner that does not contain strong chemicals, as they can damage nozzles and discolor some shower head finishes. First, use the cleaner to wipe any residue from the shower head and handle with a soft cloth. Then, spray the cleaner on the shower head and scrub the nooks and crannies of the nozzle with a small nylon-bristled brush or toothbrush. Test out the shower head to see if this simple cleaning fixed the issue. If not, move on to the next step.
Turn off the water supply to your shower.
While you don’t need to turn off the water supply to the entire house to fix most plumbing fixtures, showers don’t usually have their own accessible shut-off valves. (However, if there’s a shut-off valve in an access panel, go ahead and use it.)
For those who don’t have an easy-access shower shutoff, head to the main water supply shutoff. It’s usually on the lowest floor, typically in a basement on the wall where the water meter is located. The knob is usually a circular spigot or a ball valve with a lever handle. Turn the circular knob clockwise until you can’t turn it any further, or turn the lever clockwise 90 degrees. Then, head to a sink on the lowest level of the home and turn on the taps (both hot and cold) so water in the pipes above can drain out.
Remove the shower head.
After making sure the water is turned off to the shower, cover the drain hole in the shower to prevent any of the pieces you’ll be removing from falling into the hole. Then, remove the shower head by loosening the nut that secures it to the shower arm.
For older showers, this step may end up being much harder than it sounds. If the shower head is stuck, cover the shower head with a soft cloth and then use pliers to release it. Without the cloth, the force of the pliers could damage the finish on the shower head.
Soak the shower head in vinegar.
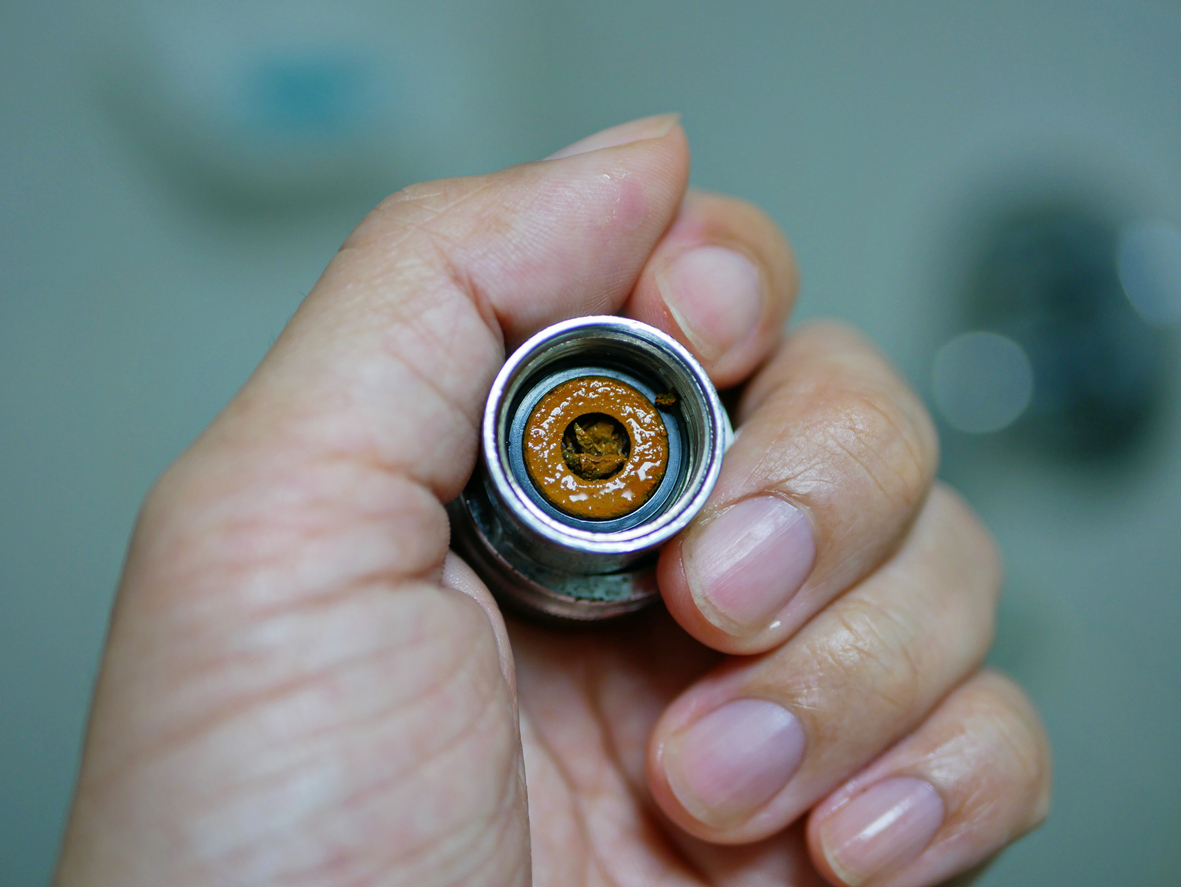
Now that the shower head is removed, it may be easier to see why the spray isn’t as good as it once was. Over time, hard water deposits can build up in the holes of the shower head, restricting the spray of water and forcing the backed-up water out around the faceplate or out from the junction of the shower head and arm.
To break up the hard water deposits, soak the shower head overnight in white vinegar to soften the mineral deposits, and then scrub away any remaining residue with an old toothbrush or soft-bristle brush.
Check for a worn seal and install an O-ring replacement.
If you have noticed the shower handle leaking water, the problem may lie in the seal between the shower arm and the shower head. Washers and O-rings form watertight seals between connections on a shower head, but they can harden or split over time, which allows water to leak out. This type of leak is especially common in shower heads with swivel connections, which have a seal behind the swivel assembly. If you suspect a worn seal, remove and disassemble the shower head to replace the washer or O-ring.
Tip: When purchasing a new plumbing seal, take the old one with you to the hardware store to ensure that you bring home an exact match.
If you have a compression faucet and the leaking persists, replace the faucet washer.

If you notice your shower faucet leaking, the problem may be a worn washer assembly within the faucet. Compression faucets have two handles: one hot and one cold. In a compression-style faucet, the washer can become worn over time, leading to leaks if not replaced.
First, determine which handle, hot or cold, is causing the leak by feeling the temperature of the dripping water. Then, remove the faulty faucet handle, which is held in place with a screw located below the handle or hidden under a pry-off cap. Slip off the cover trim to gain access to the faucet stem, which is secured with a hex nut. Use a deep socket wrench to remove the nut, and you should find a rubber washer. Replace it with a new rubber washer, and reassemble the faucet.
In rare cases, the small curved area behind the washer (called the “seat”) can become so corroded or damaged that even a new washer won’t seal tightly enough to prevent water from leaking out of the shower head. If this happens, you’ll probably need to call in a plumber to replace the entire assembly.
Consider a shower cartridge replacement in the valve body if all else fails.
What does a shower valve cartridge do? In many newer showers, a single handle controls the flow of both hot and cold water. The handle contains a valve with a cylindrical cartridge made of hard plastic that regulates the flow of hot and cold water to the shower head. If the cartridge becomes worn or cracked, water can seep through—even when the handle is in the “off” position. This can cause water to drip or trickle from the shower head.
Here, too, replacing the worn shower valve cartridge requires turning off the water supply to the shower. Access the cartridge by removing the shower handle (which is held in place with a small screw) and taking off the shower valve trim and the cap that covers the valve body stem (by twisting or by removing a screw, depending on the model). Slip off the stem cover, which should give way easily, to reveal the end of the plastic cartridge.
Most cartridges are secured with either a twist-on nut or a clip. Remove the nut or clip, then use a pair of pliers to grasp the stem of the cartridge and pull the cartridge out. Take the worn cartridge to the hardware store to get an exact match, install the new cartridge, and reassemble the faucet. If replacing the cartridge doesn’t solve your leaking shower head, the valve body is probably damaged. Replacing a shower valve body is a job for a DIYer with intermediate plumbing skills or a professional plumber.
All shower plumbing works in a similar manner, but faucets, shower heads, and valve body assemblies vary in the ways they connect. When in doubt, refer to the manufacturers’ manuals (often found on their websites) or leave it to the pros.
Wrap the shower arm with thread-sealing tape.
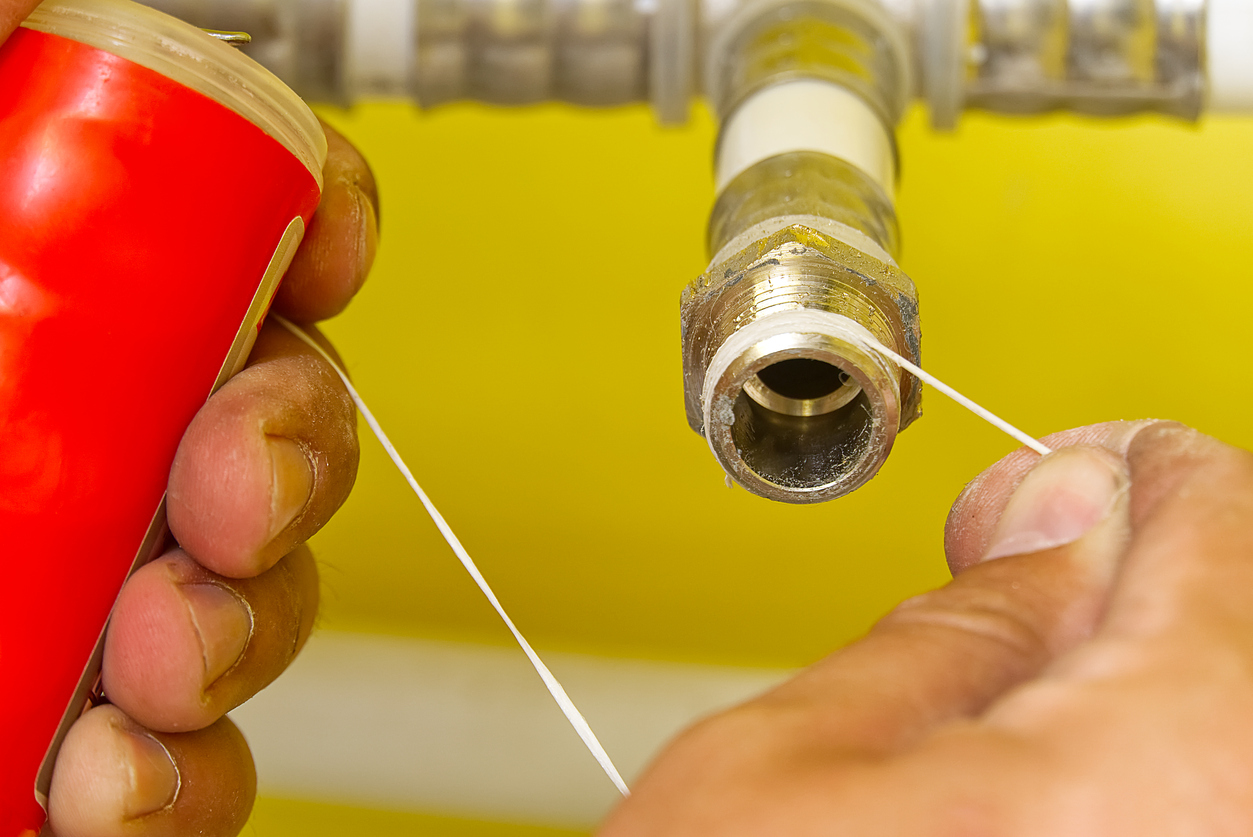
The Teflon plumber’s tape around the shower arm can deteriorate over time, creating opportunities for leaks. Even if you haven’t noticed a leak at the shower arm, it’s a good idea to replace the tape while the shower head is disassembled.
Start by removing the existing Teflon tape from the pipe stem. It’s usually easier to slowly peel it away, as it will still have some sticky residue on the surface. If there is any residue left behind, use an old toothbrush to remove it. Then, wrap new plumber’s tape around the threaded tip of the pipe stem.
Change the shower head.
If the shower head can’t be fixed by any of the strategies described above, or if you just want to replace the old shower head with a spiffy new one, switching out a shower head is a DIY project that most homeowners can successfully accomplish. If the shower head matches the current pipe, the job is even easier.
If there’s an issue with the shower arm, or if it doesn’t match the finish of the new shower head, you may first need to replace the shower arm. Start by unscrewing the old shower arm, then wrap the threads of the new shower arm a few times with plumber’s tape. Screw the new shower arm into the wall fitting, seal the opening with plumber’s putty, and slide the matching shower flange over the arm and into the putty to seal it.
Next, use plumber’s tape to wrap the shower arm’s base threads and attach the new shower head onto the shower arm. Turn until it’s snug, but don’t overtighten.