
We may earn revenue from the products available on this page and participate in affiliate programs. Learn More ›
Decorative tile floors can add an element of elegance to a humdrum living space, but often at great expense. To avoid the hassle of ripping out existing flooring—not to mention the high cost of commercial, patterned tiles—some crafty homeowners choose to achieve a similar look by painting their tile floors.
This savvy DIY solution can create a variety of finishes from matte monochrome to playful patterns. Are you ready to transform your existing tile floor on a dime? Put on your painter’s hat, roll up your sleeves, and get the scoop on all you need to know about painting tile floors.
Which floor tiles should you paint?
Although paint can be applied to ceramic tile in any room of the house, it doesn’t hold up equally well under all conditions. Prolonged exposure to moisture, for example, will cause paint to peel away from the tile over time. For long-lasting results, only paint tiles located in drier areas of the home. If you do opt to paint tile floors in high-moisture spaces, such as the bathroom, choose a section of the floor far from the mildew-prone splash zone of the shower or bathtub and/or choose a paint labeled as specially made for bathrooms.
How to Prepare Tile Floors for Painting
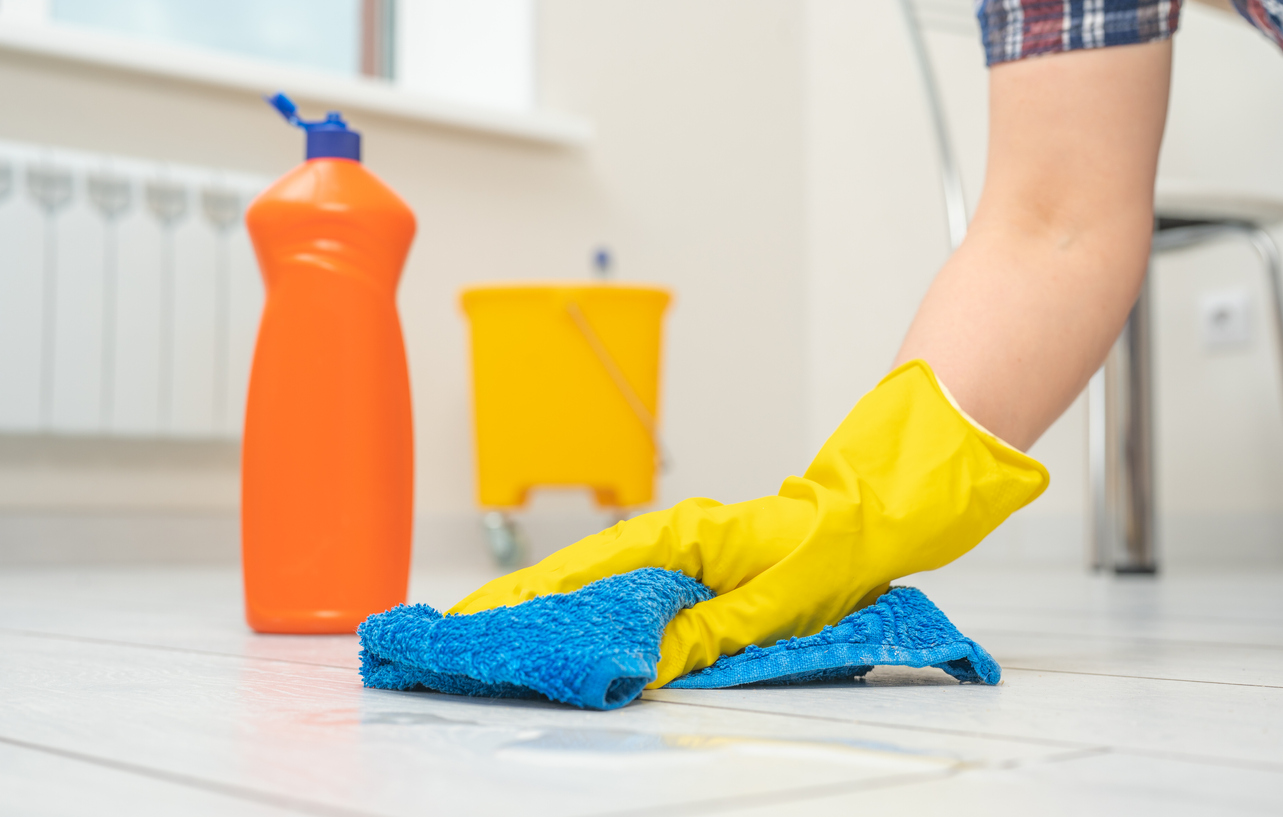
The key to achieving a pristine paint finish is starting with a canvas of smooth, undamaged tile. “Don’t skip prep work,” says Richard Fuessel, professional painter and director of Your Local Painters Melbourne in Melbourne, Australia. “Thoroughly clean the tiles with a degreaser and remove any grout haze. Sanding glossy tiles slightly helps paint adhesion,” he adds.
- Sand and vacuum the tile you want to paint.
- Get rid of dirt, grime, and mold by scrubbing the tile and grout lines with a homemade solution of equal parts bleach and warm water. Alternatively, you could clean the tile with a commercial cleaner that removes mold.
- Donning protective gear and maintaining proper ventilation in the room, repair any visible chips or cracks in the tile with caulk or a 2-part epoxy.
- Once the floor is prepped, protect nearby baseboards from paint splatter by applying painter’s tape where the baseboards meet the tile floor. If you don’t want to paint the grout lines, cover them with acrylic masking tape.
RELATED: Buyer’s Guide: The Best Painter’s Tape We Tested This Year
Choosing the Right Paint
When painting a tile floor, first and foremost, “choose the right paint,” Fuessel says. “Opt for epoxies, alkyd urethanes, enamel paints, or silicone-based paints designed for tile adhesion and resistance to moisture and wear. Regular wall paint won’t stick or last.” Casey Finn, CEO & Founder of The DIY Playbook adds, “Rust-Oleum makes a paint specifically for this purpose. It’s designed for painting floor tiles. Don’t use regular ol’ wall paint, or it won’t work!”
How to Apply Paint to Tile Floors
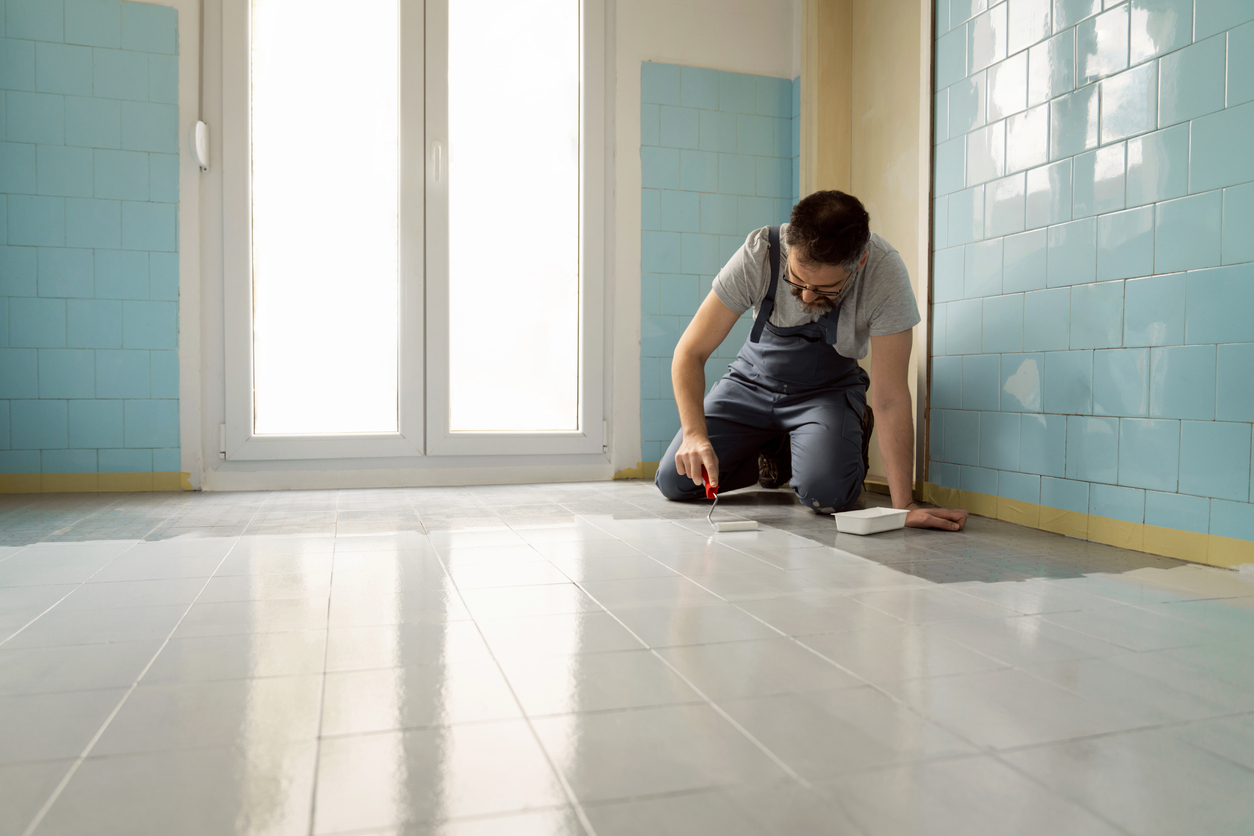
To achieve the perfect painted tile floor, follow these steps:
- If you’re planning to paint an entire floor, use a brush or roller to apply paint over the exposed tile and grout in a continuous motion. But if you’re painting alternating or random tiles instead of the entire floor, start by cutting in with a brush along the edge of one tile with an angled brush. You can use a brush for the hard-to-get areas, like around bathroom fixtures and along baseboards.
- Next, either brush or roll paint over the rest of the tile in unidirectional strokes, repeating this painting process for every tile you intend to paint. Mix a little paint thinner with the paint if you have trouble spreading it. “Apply several thin coats instead of one thick [coat] to prevent drips and cracking,” advises Fuessel. If your goal was a monochromatic tile floor, you are now completely finished painting.
- Allow the paint to dry for at least 2 or 3 days. Seal the tile with two or three coats of a clear, water-based urethane sealer—not an oil-based sealer, which can yellow the colors—allowing the first coat to dry completely before applying the next.
- Remove any painter’s tape and spruce up the grout lines by painting over them with grout paint, if needed.
If you plan on adding a pattern to the tile floors, let the tile dry for 2 or 3 days before moving on, and seal the floors after the pattern has dried.
RELATED: The 10 Best Painted Tile Floors We’ve Ever Seen
How to Paint a Pattern on a Tile Floor
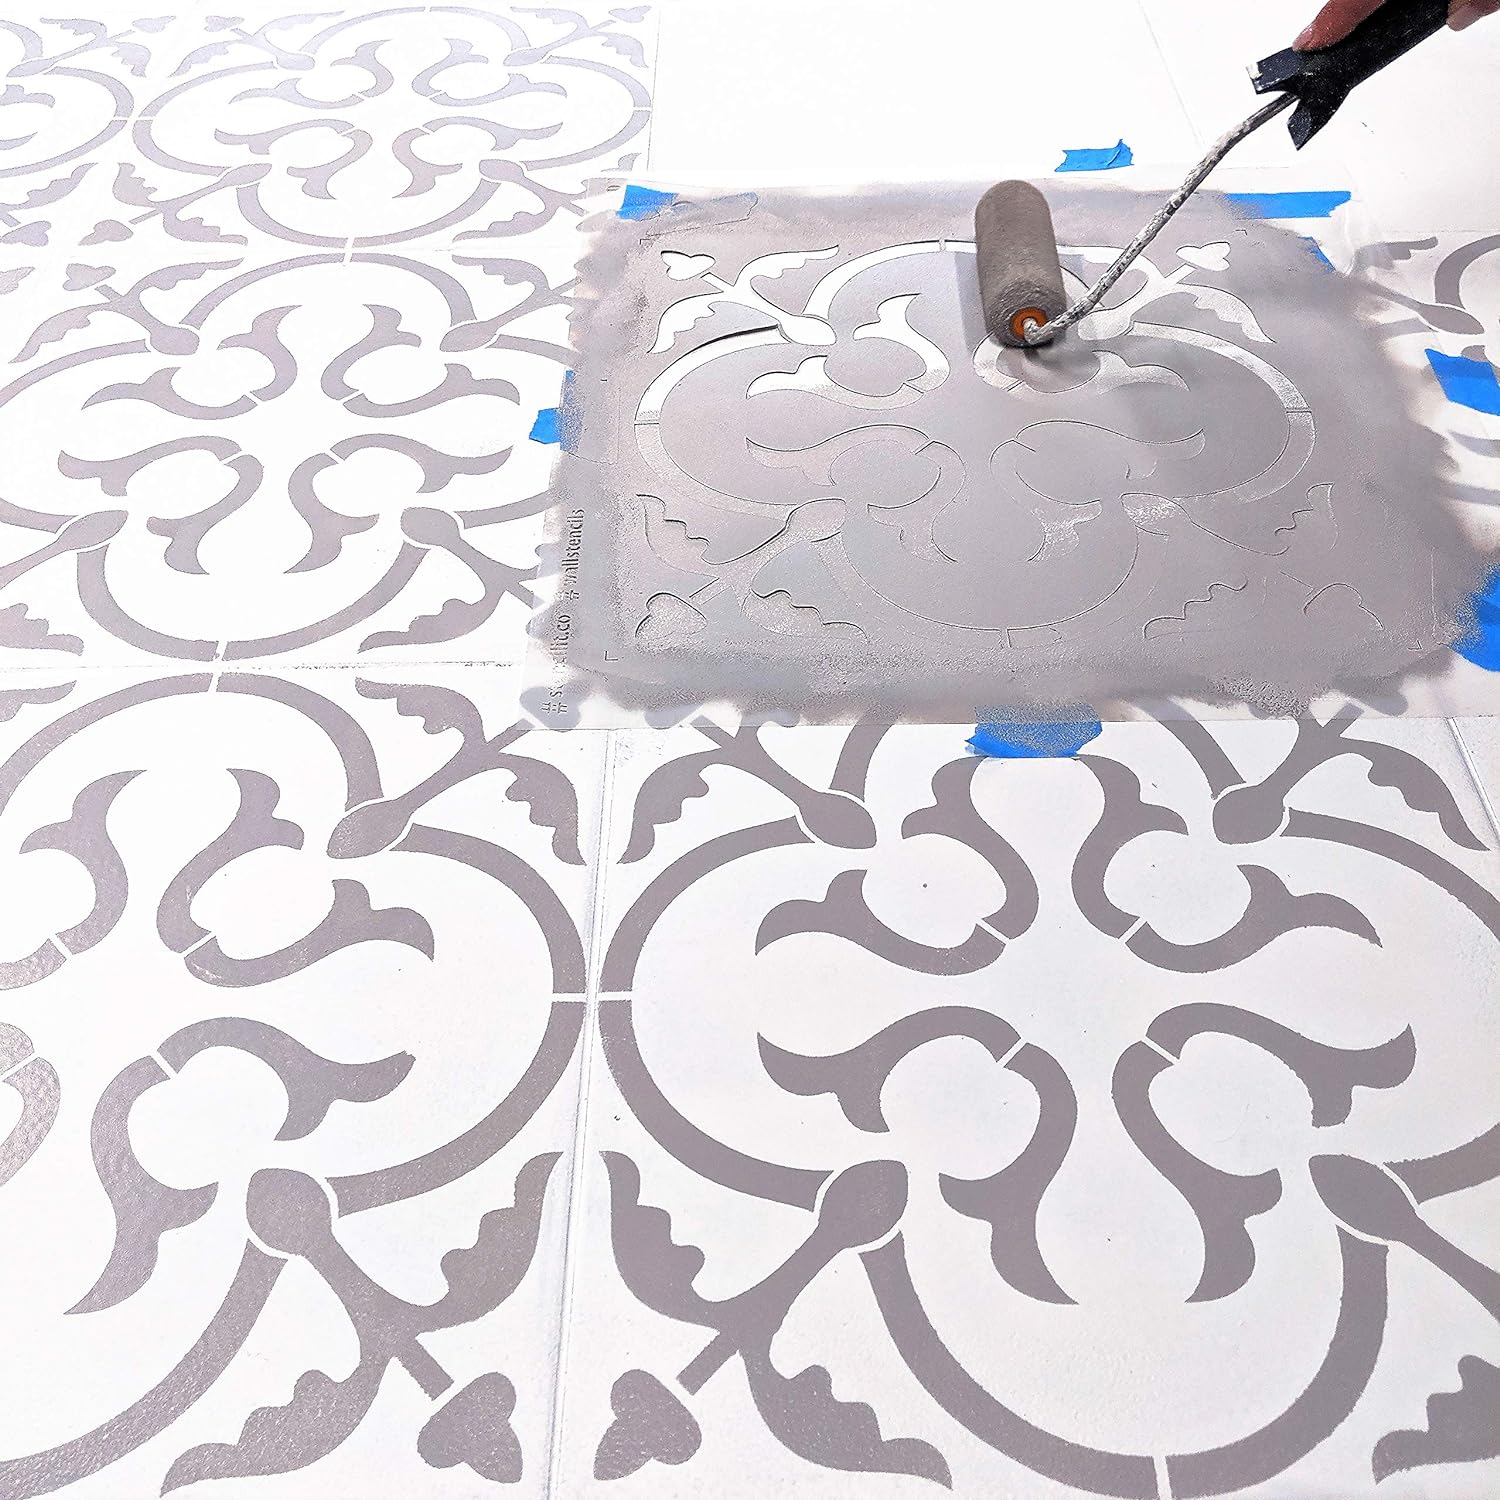
The easiest way to apply a pattern to painted tile is with a stencil, which simplifies the painting process. “Find a cool stencil to make it look realistic. Or you can always use painter’s tape and create your own design,” Finn says. Stencils are easily accessible from Etsy and local craft stores, and they’re available in a range of designs and patterns. For a personalized approach, you can also use a Cricut machine to design a custom stencil.
Whether you opt for a quilt-like pattern similar to the one DIY Playbook did in their guest bathroom, a sharper geometric pattern like the one found in the Brown Acres kitchen, or something altogether more whimsically Moroccan, be sure to start by buying or DIY-ing a stencil—indeed, multiple copies of the same stencil, to make the paint job go faster—that fits the dimensions of the existing tile. The outer tips of the graphic inside the stencil should reach the outer edges of the tile. You’ll also want to consider the stencil’s material. “Choose reusable stencils made from durable materials like mylar or plastic,” Fuessel says.
- Secure the stencil to the floor with painter’s tape, taking care not to cover any parts of the graphic with tape. You could also “use a light but even coat of temporary spray adhesive to prevent the stencil from shifting,” Fuessel says.
- Then, using a paint roller with a foam roller cover, apply paint directly over the stencil. Rolling over one section of the stencil at a time instead of painting across the entire stencil can help prevent roller marks.
- Move the stencil to another tile and repeat this process across the entire floor, taking care not to mar any freshly painted tiles with the stencil.
If you run into partial tiles at the edge of the floor, you can paint over partial sections of the stencil. Use an artist’s paintbrush to make any necessary touch-ups to the pattern, and allow the paint to dry completely before finishing it with a clear, water-based sealant. “Don’t overload the stencil with paint,” Fuessel says. “Dab the brush lightly to prevent bleeding under the stencil,” he adds.
RELATED: Buyer’s Guide: The Best Paint Rollers and Covers We Tested This Year
How to Maintain Painted Tile Floors
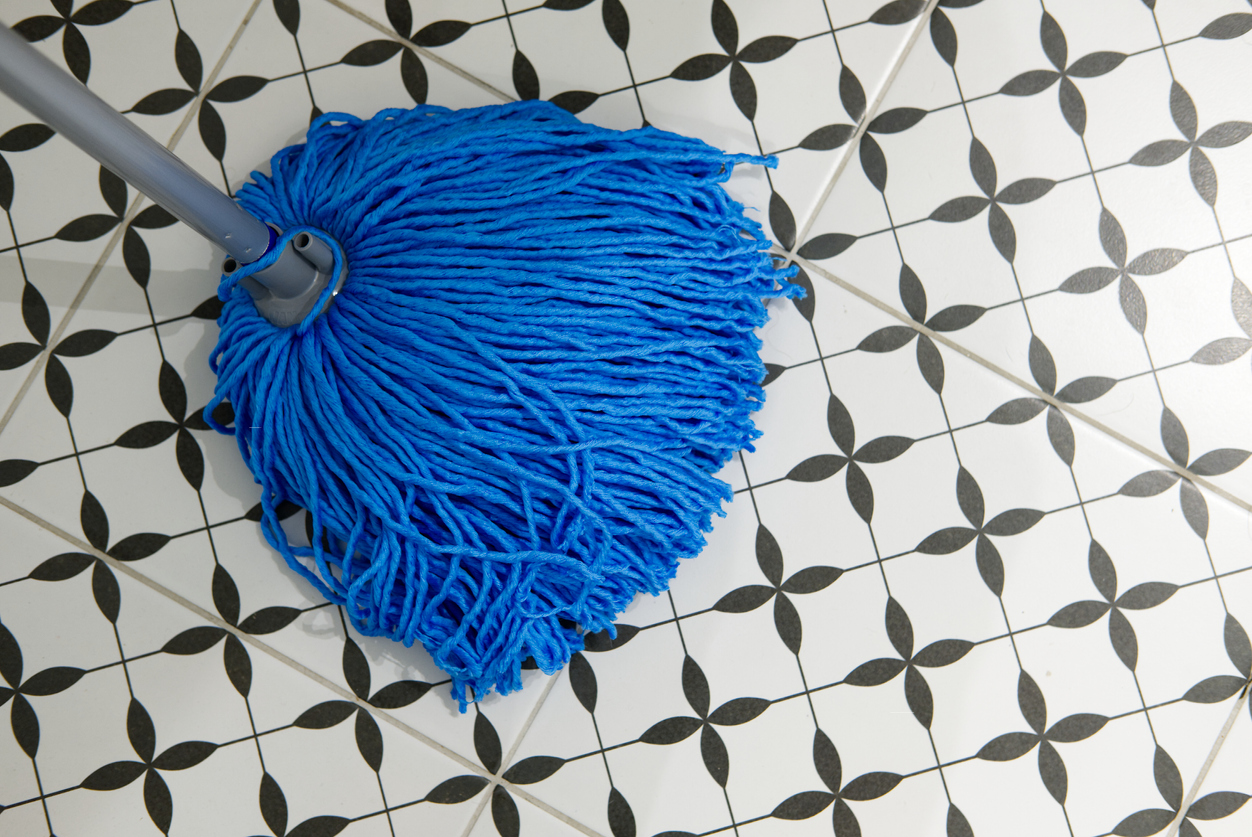
A high-quality sealant can protect the painted tile floor from grime, moisture, and mold, as well as scuff marks and scratches from foot traffic. Even so, regularly sweeping, vacuuming, and damp-mopping debris from the floor will help retain the sheen of a painted tile floor and keep its pattern looking sharp and distinct.
You can also provide the painted tiles with an extra barrier of protection from everyday wear and tear by setting mats in high-traffic areas and floor pads directly below furnishings on the tile. When you need to clean painted tile thoroughly, use neutral pH solvents and rub them into the floor lightly with a non-abrasive chamois mop.
RELATED: Buyer’s Guide: The Best Mops for Tile Floors We Tested This Year
Steer clear of steel wool, scouring pads, or chemical cleaners, all of which can discolor or erode the paint. Don’t let cleaners or plain water settle for too long on painted tile; the excess moisture can make the paint more prone to peeling.
A paste of baking soda and warm water makes for a gentle homemade cleaner that not only works wonders on grime-ridden tile, but can render your grout lines pearly white again. After using this homemade cleaner, wipe the clean tile dry with a lint-free cloth.
Final Thoughts
Painting tile floors is “a straightforward project if you follow the directions closely,” Finn says. “Make sure you consider dry times when planning out this project because you won’t be able to step on the floors when they’re wet. If this is your only bathroom, that will be tricky,” she adds.
By mastering these tile maintenance dos and don’ts, you can maintain the unforgettable finish of your painted tile floor for many years. “We’ve since renovated the bathroom, but it stayed looking great for about 2 years until demo day,” Finn states.