
We may earn revenue from the products available on this page and participate in affiliate programs. Learn More ›
While pony walls aren’t new to the housebuilding scene, they’ve recently seen a resurgence in popularity—even before Joanna Gaines designed one on an episode of Fixer Upper. For good reason, too: A well-placed pony wall can partition large, open areas of your home without losing all of the airiness that once was there. If you’re interested in why pony walls are worth a comeback, keep reading. We’ll take a close look at what these features are, where they got their interesting name, and how you can modernize your home with this trendy look.
RELATED: Own Your Open Floor Plan with 8 Smart Design Tricks
A Fun Name for a Functional Wall
Also known as a “half wall” or a “knee wall,” the pony wall label emerged more than 150 years ago in Nebraska when a farmer by the name of Walter Clydell decided to build short walls in his horse stable to make it easier to see into the stalls. Being sociable creatures, the horses probably enjoyed the upgrade as well.
The pony wall name was a hit with Clydell’s farming neighbors, and the term spread until it came to represent virtually all types of short walls, in homes and commercial buildings as well as in barns. In any of the settings, the concept allows for household members and guests in separate rooms to see one another and remain connected—handy for everything from entertaining to keeping an eye on children while you work in the next room.
RELATED: 17 Parts of Your House You Never Knew Had Names
For all intents, a pony wall is just a short wall that does not reach the ceiling; it need not be any particular height nor width, though it typically reaches about 3 feet tall.
Pony Wall Particulars
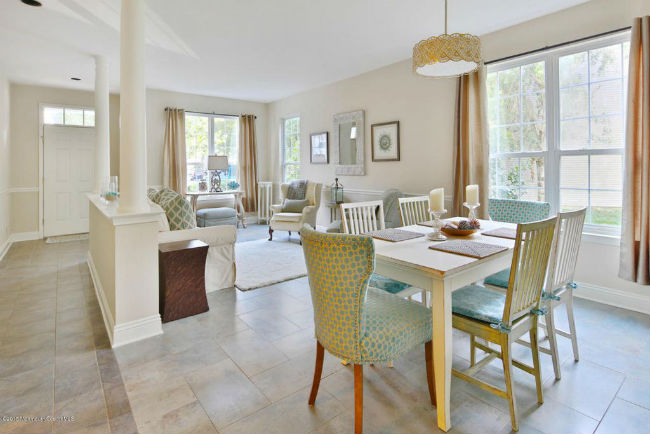
Two basic types of walls are found in home construction: load-bearing walls that support overhead weight and partition walls that do not support any weight. Pony walls fall into the latter category, installed by attaching an end to an adjoining wall for support or by securing it to framing in the floor beneath the pony wall. Since it doesn’t stretch all the way to the ceiling, the visible top of the pony wall (often about countertop-height) features a cap that offers a finished horizontal ledge.
Division With an Open Look
A pony wall creates a visual and functional barrier between two areas of a large room or open floor plan, without closing them off from one another and leaving either segment feeling cramped. Because it doesn’t extend all the way to the ceiling, the newly created spaces retain an open look and feel.
As it happens, you’ve probably seen many pony walls, even if you called them by a different name or no name at all. Common pony wall locations include:
- Along a stairway opening. Instead of full walls on both sides of a descending stairway, some builders will install a pony wall along one side of the opening. This type of installation acts as a safety measure to keep residents from tumbling off the edge, plus a half-wall creates an ideal backdrop against which to position furniture.
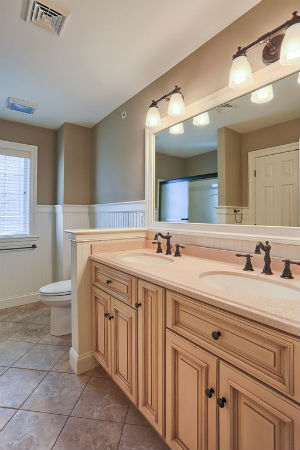
- In a bathroom as a privacy separation. A short wall may be positioned between a commode and other bathroom fixtures or, in a custom shower, as a base on which glass panels are installed.
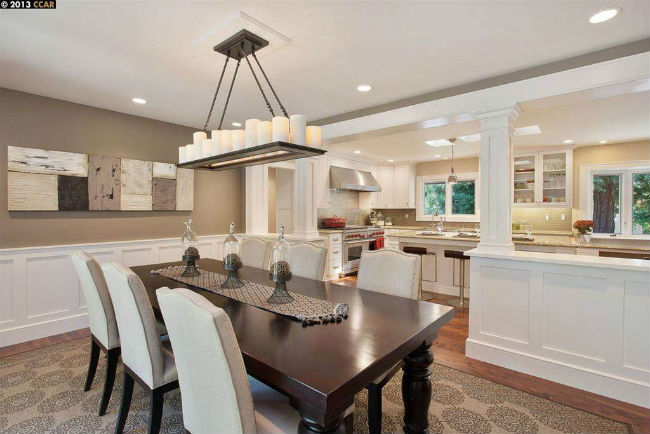
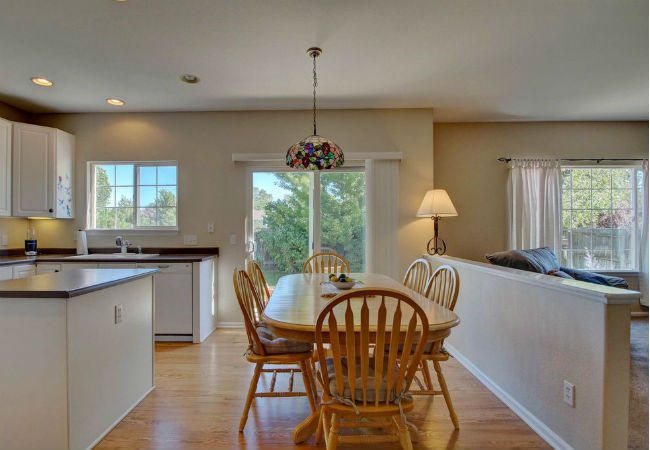
- Between the kitchen and eating area. Love the idea of an open kitchen but prefer to keep some of the mess of the meal contained? One or more pony walls that extend just taller than your countertops can help hide dirty pots and pans (even a buffet) from sight during your meal. More simply, though, they help create a visual division between spaces that often blend together, such as between a kitchen and eating area or between an eating area and a living room.
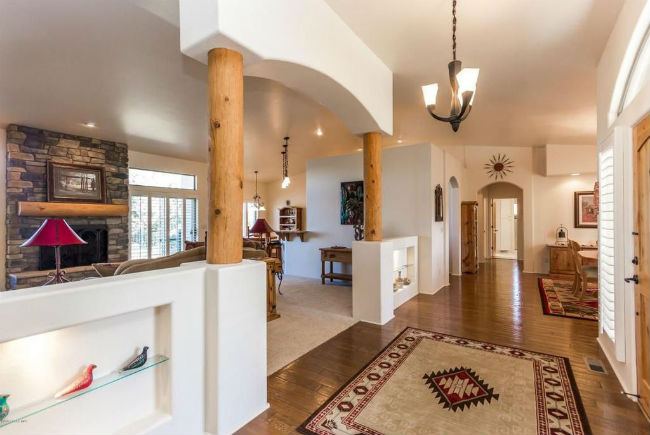
- Throughout great rooms. With so much open space, it can be hard to organize a layout. Home builders may opt to include some pony walls to divide the square footage into workable spaces, such as a designated home office or play area.
- Directing foot traffic into any area of the home, especially in entryways.
- Where additional electrical outlets were needed. In older homes where outlets can be scarce, the construction of a pony wall can serve to create the extra wall space needed to install more outlets—on one or both sides.
Pony Wall Design Details
Many pony walls are designed to match the style of the room in which they are installed, but there are no hard fast rules here. Start with the following pointers and let your imagination be your guide.
- A pony wall that’s finished out in drywall and painted to match the walls and trim will look like a natural extension of the room.
- Opting to finish the pony wall in a complementary or contrasting color will draw the eye and create a focal point.
- Paneling, beadboard, and drywall are all commonly used to finish the sides of pony walls stationed in living spaces, while the top caps are often made from stained hardwood or painted finish-grade plywood. In the bathrooms, however, tile is commonly used to finish pony wall sides and caps.
- Decorative elements, such as small columns or open cubbies, can be built above the pony wall to hold books or knickknacks while still retaining the open-wall feel.
DIY Installation Tips
You can always opt to have a carpenter build your pony wall. However, since this type of wall doesn’t bear any weight, enthusiastic do-it-yourselfers who are familiar with basic framing and carpentry concepts should be able to construct their own. If you’re up to the task, read through these tips before you start building pony walls into every room:
- Build the frame of your pony wall before attaching it. This is the simplest method and is similar to the way framers build larger walls during the initial construction of a house.
- Endwall support is the most common method of installing a pony wall. This means attaching the end of the pony wall to the studs in an existing wall. You’ll need to cut away the existing wallboard to expose the studs in order to attach the new pony wall frame securely.
- Additional in-floor reinforcement is recommended if the pony wall will be more than 3 to 4 feet long. The bottom plate of any pony wall should be attached, either by nails or screws, to the subfloor, but that may not be enough support if you’re planning to build a longer wall. In-floor reinforcement involves cutting away the subfloor and using longer pony wall framing members bolted securely to the floor joists beneath the subfloor. Forgo this step at your own risk: Long pony walls without in-floor reinforcement have a tendency to wobble over time.
- Shorter pony walls can be installed directly on top of hardwood, tile, or linoleum. If you don’t need to cut away the subfloor for in-floor reinforcement, just use nails or screws that are long enough to penetrate the subfloor. Is your flooring carpet or a floating floor like laminate? Neither is suited as a base for a pony wall, so cut it back and reinstall around the new pony wall.