We may earn revenue from the products available on this page and participate in affiliate programs. Learn More ›
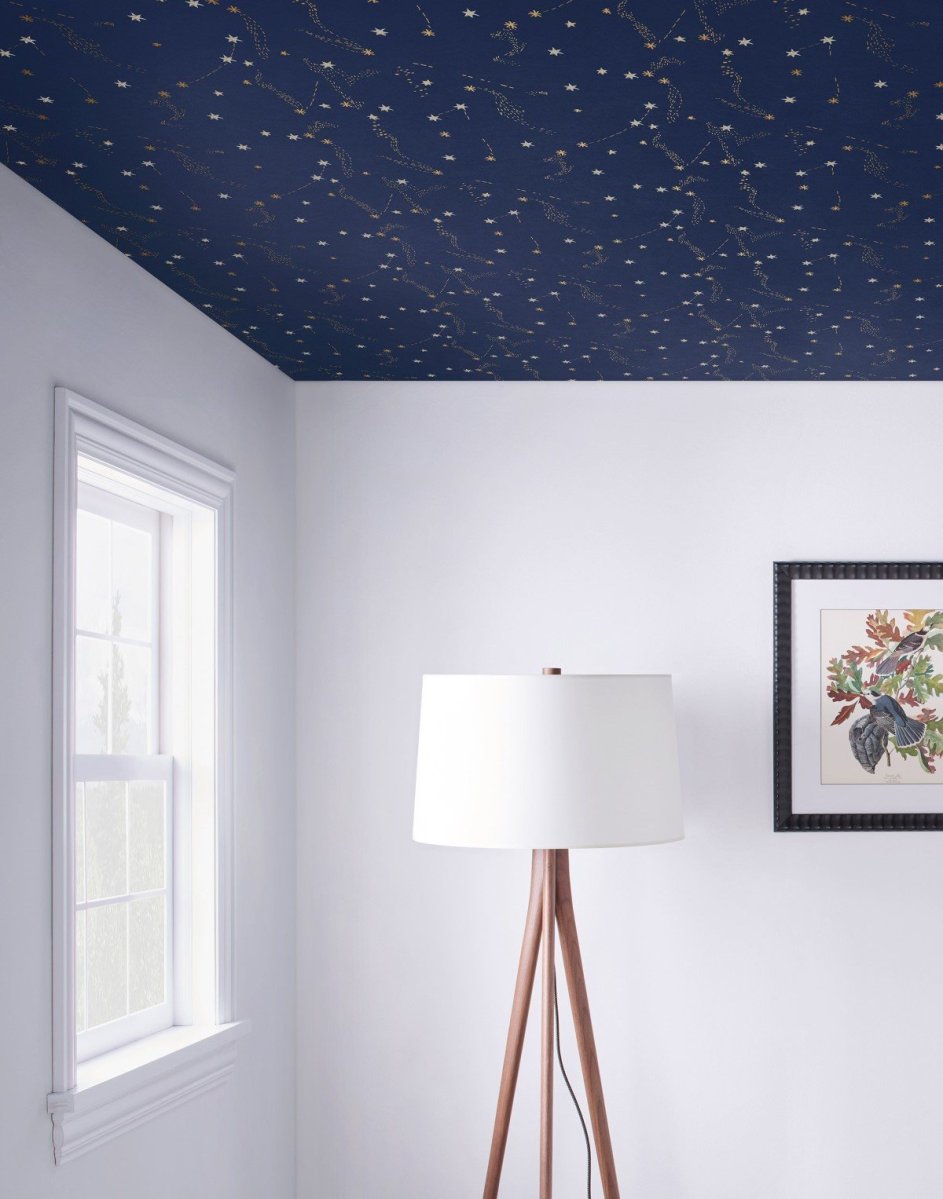
Things are really looking up for ceilings, thanks to the impact wallpaper can add to a formerly neglected space. That’s right, wallpaper quietly snuck back into style during the last several years—and is by no means limited to your grandparents’ dated floral and damask designs. Available today in a variety of patterns from bold botanicals to modern geometrics, wallpaper can easily elevate even the most contemporary spaces, including the ceiling, where it’s least expected, for a high dose of drama.
RELATED: 7 Reasons to Reconsider Wallpaper
Equally cool for crafty types, wallpaper is more DIY-friendly than ever. Of course, as with any project, there are a few considerations to factor in—and some planning and prepping too—before taking the plunge. Whether you’re dressing up a bare-bones room or complementing its already awesome architecture, here’s some must-know info to keep in mind when you wallpaper the ceiling.
1. Make sure your ceiling is conducive to wallpapering.
Though you may hope to hang wallpaper to hide imperfections, you’re asking for trouble if you’re not starting with a smooth, clean, structurally intact surface. If you live in an old house with a ceiling that’s prone to cracks, wallpaper may buckle as further cracks develop. Popcorn ceilings also aren’t good wall covering candidates, as paper may not adhere well and the texture will likely show through. Instead, consider features like beadboard, exposed wood beams, or embossed tin, which may prove to be more durable decorative options for your ceiling.
2. Choose the right type of wallpaper.
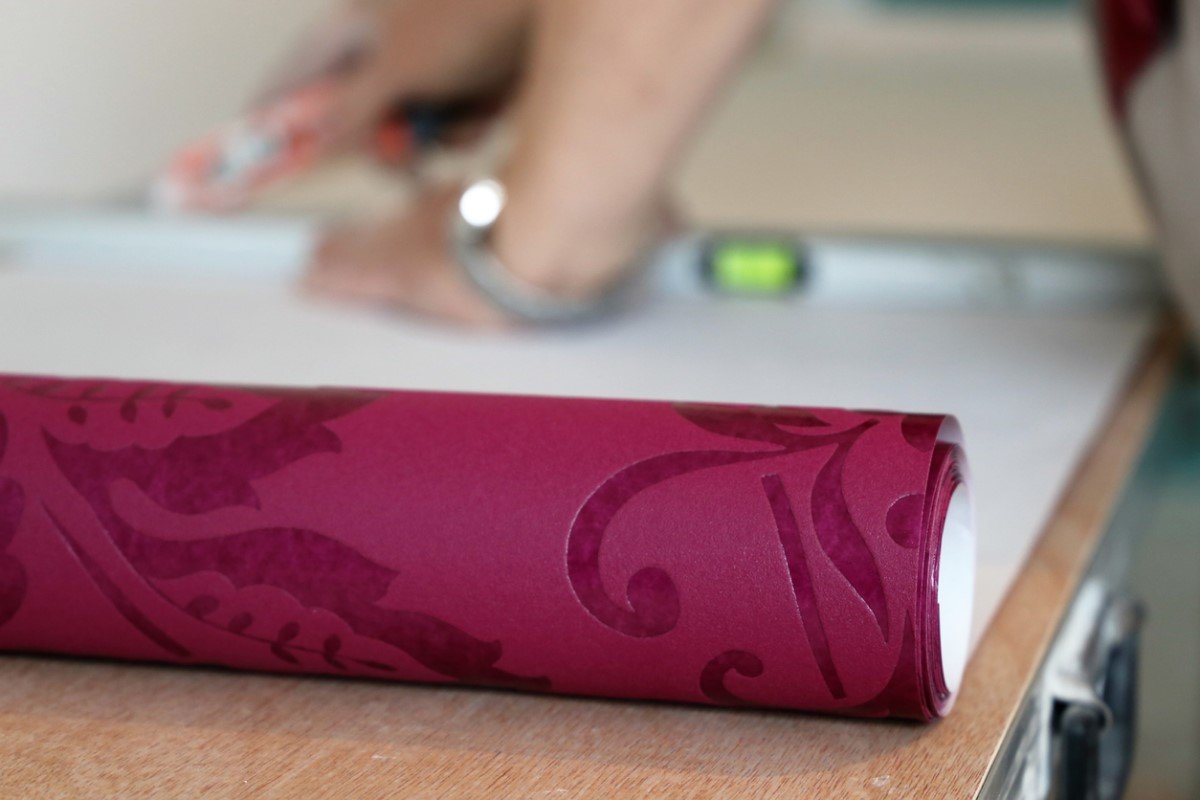
Applying wallpaper can be tedious and time-consuming, but newer versions help make the project less of a drag. There are now three types of wallpaper:
- The traditional kind, requiring you to apply glue;
- pre-glued, a somewhat easier process but which still requires water to activate the paste;
- and removable, which comes with a peel-off backing.
Removable (a.k.a. temporary or peel-and-stick) wallpaper goes up and comes off most easily, but it can’t outlast high-quality traditional papers. There’s also a more limited selection of removable wallpaper available, but fortunately, if you have an eye for patterns, companies like Spoonflower.com allow you to design your own.
3. Plan for removal.
What goes up, usually must come down. Even though traditional wallpaper has an average lifespan of 15 years or more, styles and tastes change. Make sure you choose a style that will age well—especially true for kids’ rooms, where more youthful motifs won’t necessarily stand the test of time as your child grows up.
If you think that you may tire of the look you choose, opt for removable wallpaper. Removing traditional wallpaper from the wall is hard enough; on the ceiling, it can be back-breaking work. Removable wallpaper is designed to peel right off, sparing you from steaming and scouring to loosen the glue.
4. Use wallpaper to the room’s architectural advantage.
Some rooms, like kitchens and utility spaces, are particularly good candidates for ceiling wallpaper because between cabinetry and bulky appliances, there’s not much actual wall to decorate. The same rings true for rooms with more doors, windows, or shelving than usual. Similarly, wallpapering the ceiling in a top-floor room with dormers can help disguise its awkward angles.
5. Pick color and pattern carefully.
Color and pattern will play an important role in the vibe of the finished space. Darker tones on the ceiling tend to weigh down a room—desirable if you’re looking to achieve a cozier feel. On the flip side, lighter colors can make smaller rooms feel larger, and metallics can help reflect light in cramped spaces.
You’ll also need to choose between a small- or large-scale motif. Larger-scale patterns, with a repeat of 12 inches or more, can be easier on the eye. However, smaller-scale patterns disguise installation misalignments easier, which may be preferable if you’re DIYing wallpaper for the first time. If you go with a bold, small-scale pattern, consider simpler décor down below—if not, your room may start to feel overly busy.
6. Don’t neglect the prep.
There’s some significant prep work required before putting up wallpaper. First, repair any cracks or imperfections in the ceiling with spackle or joint compound, then sand the area smooth with a fine-grit sandpaper. Remove any light fixtures or air vents (make sure to disconnect the electricity first). Clean the ceiling, using a duster on a long extension pole or a shop vacuum with a soft brush attachment to remove all initial dust; go over the ceiling a second time with a rag or tack cloth to touch up.
RELATED: 7 Essential Wallpaper Tools Under $20
Next, prime the ceiling. Use a specialty primer made specifically for wallpaper application and let it dry for at least 48 hours (follow the manufacturer’s specific instructions). This will help prevent damage to your walls down the line when the wallpaper is eventually removed.
7. Set yourself up for success with careful planning.
Precision is the biggest challenge to successful wallpaper installation—you must make sure your lines are straight and your patterns are aligned from sheet to sheet. One technique the pros use is cutting paper to run across the shorter length of the ceiling, so you’ll have less loose paper to wrangle as you install it. Even then, mistakes are bound to happen if you attempt this project solo, so make sure you have an extra pair of hands—and eyes—to help.
To make the job even easier, consider renting scaffolding, which would allow you to lay down close to the ceiling while you work. You can rent scaffolding from big-box stores like Home Depot for about $55 per day. Your helper can hand wallpapering supplies up to you and support the end of the paper while you work (even while standing on the ground, they can hold the paper up close to the wall with a clean, dry mop like this Tidy Tools option from Amazon). You’ll also want to make sure to move as much furniture out of the way as possible before getting started so you can move the scaffolding or your ladder quickly while you work.