We may earn revenue from the products available on this page and participate in affiliate programs. Learn More ›
This article has been brought to you by DRYLOK. Its facts and opinions are those of BobVila.com.
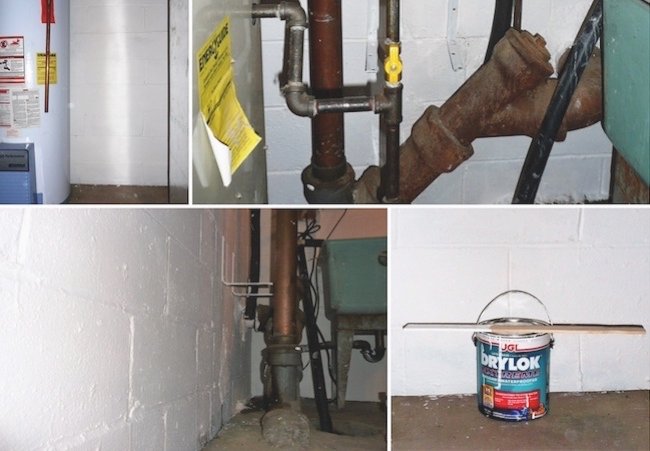
As homeowners, we all have our dirty little secrets, whether it be a carpet stain concealed by strategically placed furniture or in my case, a basement furnace room that resembles a horror-movie set. Despite being dimly lit, with exposed pipes spreading like tentacles all around, I know the room would have problems much worse than aesthetics, if it weren’t for the sump pump and drains I opted to add several years ago. The combination worked wonders to stem the tide of basement leaks we’d been struggling to control until then. But recently, I began to recognize that although pools of liquid water no longer suddenly appear on the floor, another, subtler warning sign—unsightly, unhealthy mildew—proves that basement moisture remains an issue.
So I decided to launch on a new campaign aimed not only at protecting against future mildew growth, but also at improving the look of the furnace room once and for all. Of course, I’m not the first homeowner to take on a project like this. In fact, scores of waterproofing paint products exist for the purpose of solving moisture and cosmetic issues simultaneously. Formulated for use on masonry surfaces like the concrete block in my basement, waterproofing paint effectively halts moisture seepage, even while transforming the look of the material it’s protecting. Best of all—and in contrast to other, more elaborate water-control solutions—working with a waterproofer isn’t complicated. You can apply it yourself, sidestepping the hassle and expense of hiring a pro.
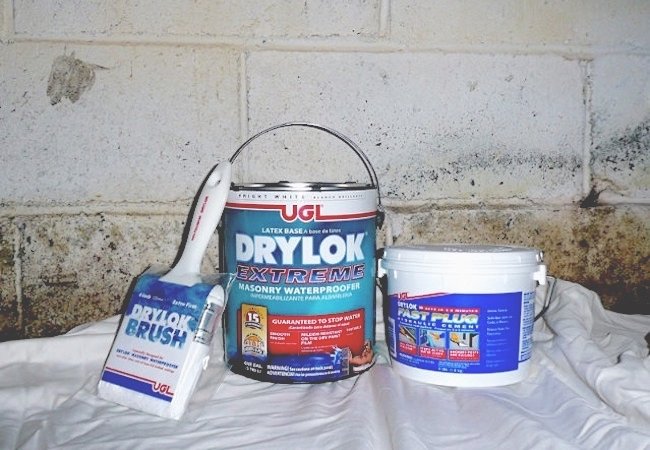
DRYLOK, a longtime leader in the category, stands out for many reasons. Not least is that for its full line of waterproofers, the company guarantees results on all masonry walls, interior or exterior, above or below grade. For maximum protection, I opted for DRYLOK Extreme. Recommended for the most demanding conditions and capable of resisting the hydrostatic pressure equivalent to a 33-foot-tall wall of water, DRYLOK Extreme does what other, broadly similar products do, only better. Plus, thanks to a special added ingredient—a non-hazardous biocide—DRYLOK Extreme also prevents precisely the sort of mildew growth that had motivated me to confront the issue, research solutions, and finally tackle my furnace room project in the first place.
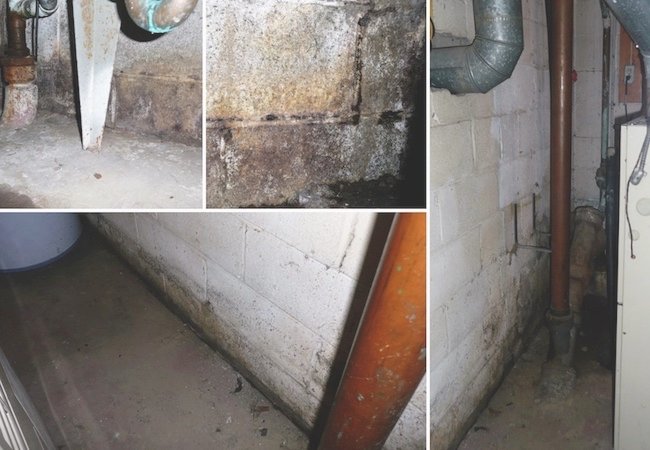
I felt confident DRYLOK Extreme would be successful in defending against leaks and seepage. But I didn’t necessarily feel sure it’d be able to beautify the room. As the above photos attest, the walls in the room had seen better days—much better days. In other words, in setting the goal of improving aesthetics here, I certainly had my work cut out for me. Fortunately, working with DRYLOK couldn’t be much easier. In many ways, it’s no different from painting a panel of drywall. Both projects even start with the same step—choosing a color. By default, DRYLOK Extreme comes in crisp, pure white, but importantly, if you don’t like white, bear in mind you can tint the coating to any color you want. For my furnace room, I chose to stick with white and in order to do the recommended two coats, I stocked up on four gallons of the product (each covers 75 to 100 square feet). Keep reading for all the details on what I did next!
Stage 1: Preparation
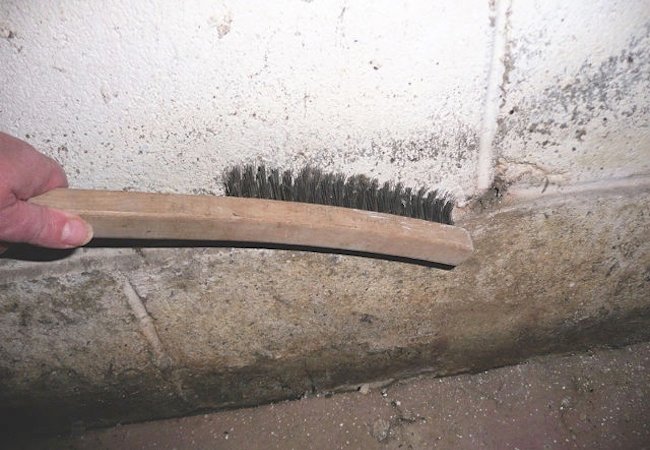
First off, I cleaned the walls thoroughly with a wire brush, removing years of dust, dirt, and debris in the process. Next, to brush away any lingering crud, I went over the walls one more time, now with a natural-bristle brush better able to catch smaller particles. While working, I encountered several white, powdery patches of efflorescence. I’d ignored these deposits in the past, because while efflorescence wasn’t doing the furnace room any favors in the looks department, it wasn’t doing any real harm to the home. However, for the DRYLOK product to adhere properly, I needed to remove it all—and I did, using DRYLOK Etch (muriatic acid also works). With the walls now clean, and since there was no pre-existing paint to strip, I moved right on to the next step.
Note: When cleaning masonry surfaces prior to applying waterproofing paint, look not only for efflorescence, but also for cracks, holes, and gouges. Any such imperfections must be patched before continuing. Theoretically, you can repair damage in masonry walls with any type of hydraulic cement, but many do-it-yourselfers choose to rely on Fast Plug, a product DRYLOK makes specifically for the purpose at hand. How does it work? You simply mix the compound, then work it into the crack, hole, or gouge until flush with the surrounding masonry. To finish, smooth the patch with a putty knife, then wait for Fast Plug to harden. True to its name, Fast Plug doesn’t take long—no more than five minutes—but of course its results last a lot longer.
Stage 2: Application
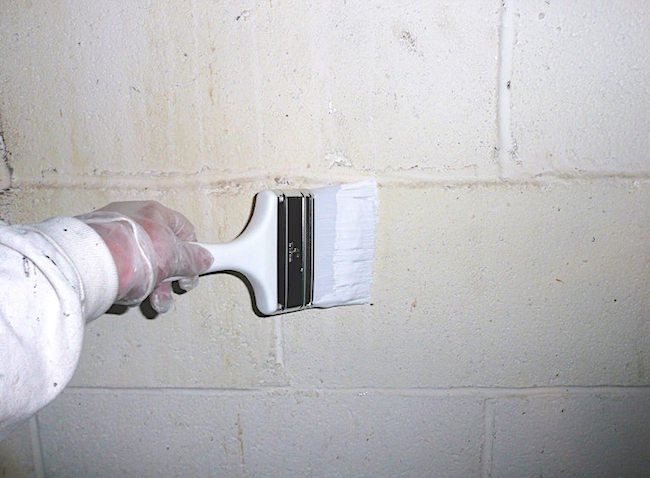
DRYLOK Extreme comes pre-mixed, but it’s important to stir the product, both before you begin and during the process, just as you would a can of regular paint. That said, applying masonry waterproofing isn’t exactly the same as painting. Whereas you would apply paint in thin, light layers, DRYLOK goes on thick, and for best results, you need to work it as deeply as possible into the pores of the surface. For me, though, the hardest part wasn’t getting good coverage—it was working around the various obstructions impeding access to the walls. It took a few acrobatic feats of dexterity, but in the end, I managed to complete the first coat. Then, three hours later—that’s how quickly DRYLOK fully cures—I put on the second coat, taking care to fill every last pinhole.
And now? Gone are the dark, dingy walls that made the furnace room look so much like, well, a furnace room. Instead, the space now boasts smooth, glossy, white walls that not only create the optical illusion of greater square footage, but also give the space a clean-and-cared-for look. In other words, now that it’s bright and inviting, the furnace room isn’t my dirty little secret anymore. It’s never going to be my favorite part of the house, but for the foreseeable future, I expect it to remain in its current state. With regular paint, I’d concerned about moisture eventually peeling, blistering, or otherwise ruining the finish. But since DRYLOK Extreme does double duty, beautifying and waterproofing at once, the results of my day’s labor should stand the test of time.