We may earn revenue from the products available on this page and participate in affiliate programs. Learn More ›
For the Kids
Have you ever wanted to make a sandbox for your kids? It’s really quite easy and similar to making a garden box. My husband and I aren’t carpenters, so if woodworking is your thing, you may have better tips on proper wood selection and concept design. But here’s what we did using our basic home improvement knowledge.
Simple Sandbox
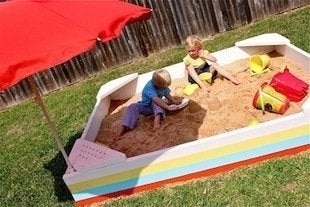
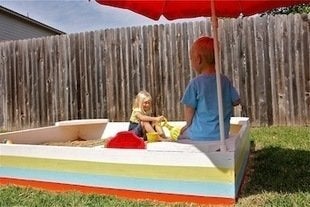
We built a simple backyard sandbox with colorful stripes, benches for sitting, holes to trickle sand through, two spots for holding a beach umbrella, and lots and lots of sand.
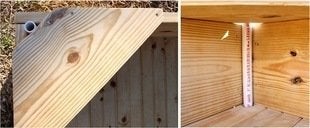
Blueprints
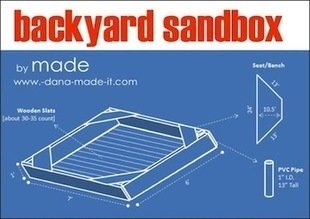
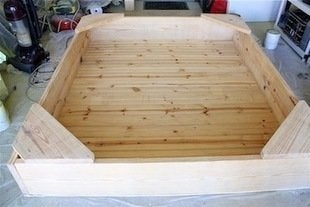
Here’s our diagram. The sandbox is a simple 6-foot by 7-foot rectangle, and the bottom is made of wooden slats that interlock with each other. We used leftover wood to create benches for the four corners (perfect seats for Mom and Dad).
Supplies
We spent about $150-$200 on supplies and sand, but you can spend less. Also, you may choose to create a cover for the sandbox. We’ve never had a problem with stray cats in our neighborhood using it as a litter box, but some people have mentioned this as an issue.
Pick Your Spot
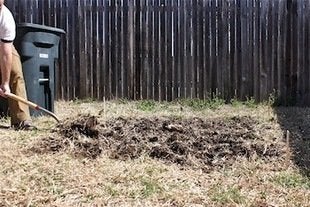
Choose a suitable place in your backyard for a sandbox. We went with a vacant corner of the yard that was flat, near the fence, and out of the way. We also dug out the grass to make sure the ground was even.
Gather the Goods
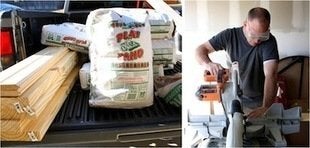
Decide on the design and dimensions for your box, then gather supplies from you local hardware store. We chose 10-foot pieces of wood (about 1 and 1/2-2 inches thick). Use a saw to cut all four pieces of the sandbox frame to the proper lengths.
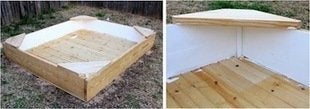
Frame It
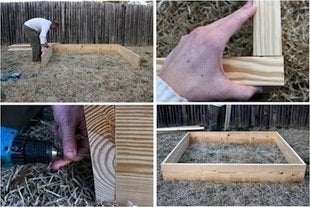
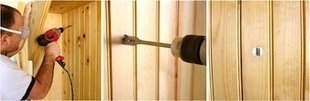
Build the basic frame. This is very “Building 101” here: just butt the 6- and 7-foot wood sides next to each other and either nail or screw them together (we used a power drill and screws). Look, you’ve got a frame!
Floor or No Floor?
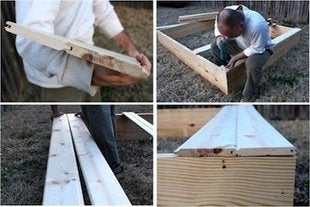
You don’t actually need a bottom on your sandbox, but without one you risk the frame warping or pulling apart over time. We decided that a floor was best and one using about 35 interlocking wooden slats, which we cut to the desired length and attached with screws.
Benches
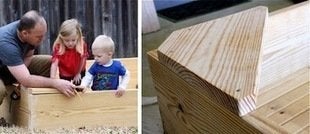
With the frame and bottom built, let’s add benches! The benches are mainly for sitting and relaxing, but they also add support to the box in each corner. Take wood left over from building the frame and mark/measure four seats. Cut the benches with a saw and sand off the rough edges.
Drainage
Drill a few holes in the bottom of the floor to allow for water drainage. The jury’s still out on whether this is necessary, but we think it’s allowing some of the sprinkler water to seep out.
Pipes and Umbrellas
One final touch on the frame: Add a short piece of PVC pipe in one of the corners to allow a beach umbrella to stand up and provide shade. We drilled a hole in the bottom of the sandbox to hold the pipe, and it sits snugly between the bench and the corner of the frame. Place a beach umbrella right into the pipe, and you have a shady spot to sit.
Add Some Color
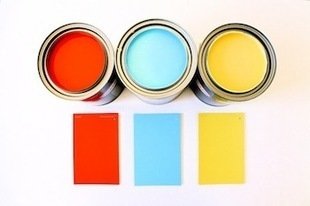
Now let’s get on with the really fun part: painting. I knew I wanted stripes and colors that match the palette of our house, so I went with these Glidden shades in semi-gloss finish.
Classic White

For all of the white parts, I used my favorite—Behr, Ultra Pure White, Satin finish, Exterior.
Prep Work
Paint the inside walls of the sandbox with white paint. Prop the sandbox up on scrap pieces of wood to get the box off the ground for a clean paint job on the outside (don’t do this when painting the inside, since you’ll need to stand inside the box). Paint the benches and outside of the box with white paint.
Stripe It Out
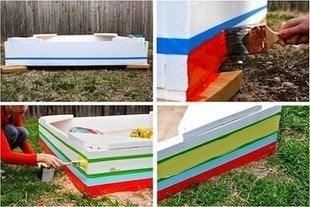
Decide how many stripes you do the match to ensure that each stripe gets the same width. Use painter’s tape to mark off equal stripes, one at a time. Paint the bottom stripe color, let it dry for 6-8 hours, then carefully peel off the tape. I’ve found the tape comes off better if it doesn’t sit too long on the previously painted layer; this is why you want to do the stripes one at a time instead of taping off all at once.
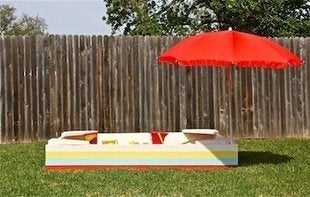
Finished Product
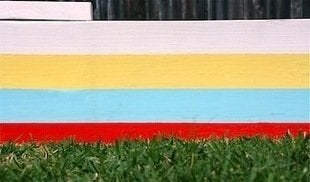
Continue this process with all your colors, leaving white as your top stripe, and when you’re done, you’ll have this! (You may need to touch up the paint here or there.)
Add Sand
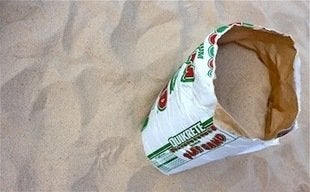
Finally, pour in the sand. You’ll need 20-30 bags of “Play Sand” to create good volume.
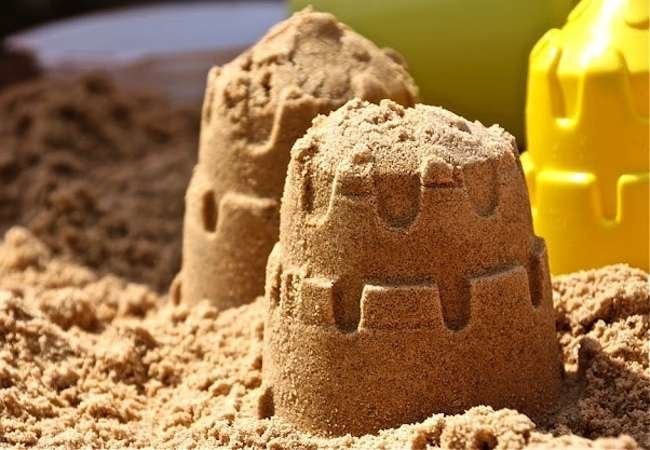
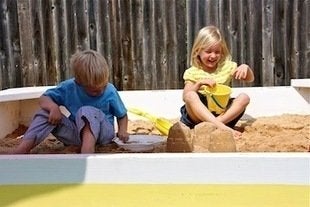
Sandcastles and Such

But any amount of sand is more than fun… especially when it gets wet—the perfect consistency for sandcastle building.
Play Time
Enjoy your new backyard addition! For the full tutorial, visit Willard’s website, MADE, at danamadeit.com.