We may earn revenue from the products available on this page and participate in affiliate programs. Learn More ›
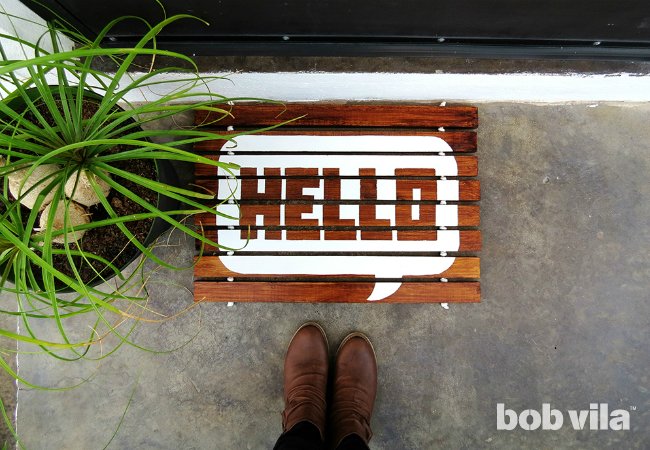
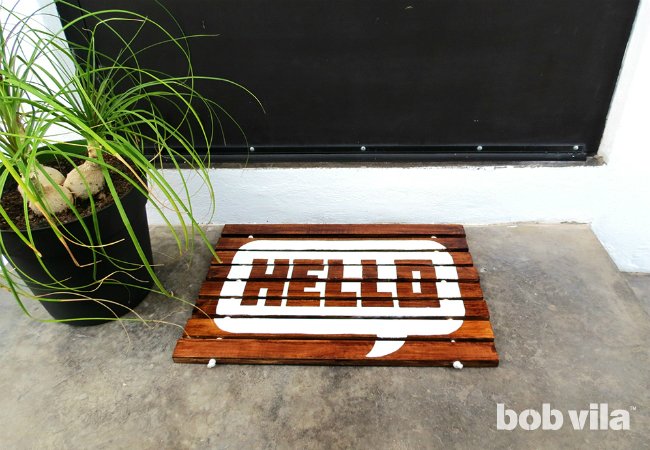
The entrance to your home is the first impression that strikes visitors, so why don’t you make it a friendly one with a cheery greeting? This season, as friends and family drop in for summer barbecues, welcome them at the door with a custom doormat. A little wood, stain, and paint go a long way in this DIY!
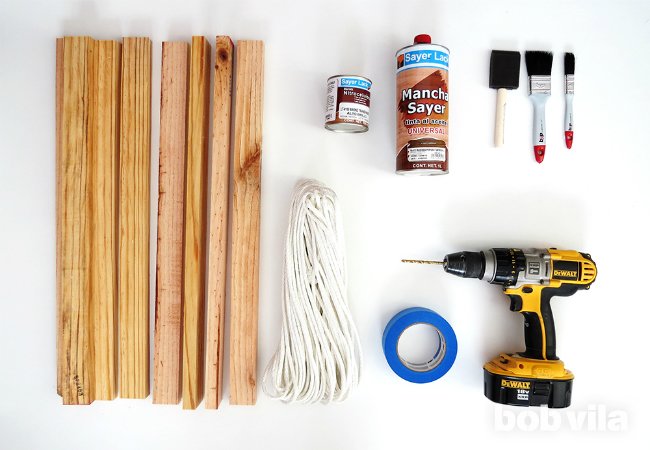
TOOLS & MATERIALS
– 16 feet of 1″ x 2″ lumber
– Handsaw (optional)
– Sandpaper
– Drill with 1/4″ bit
– Wood stain
– Printer
– Scissors
– Painter’s tape
– Acrylic paint
– Brushes
– Wood varnish
– Synthetic rope
– A lighter or silicone glue
STEP 1
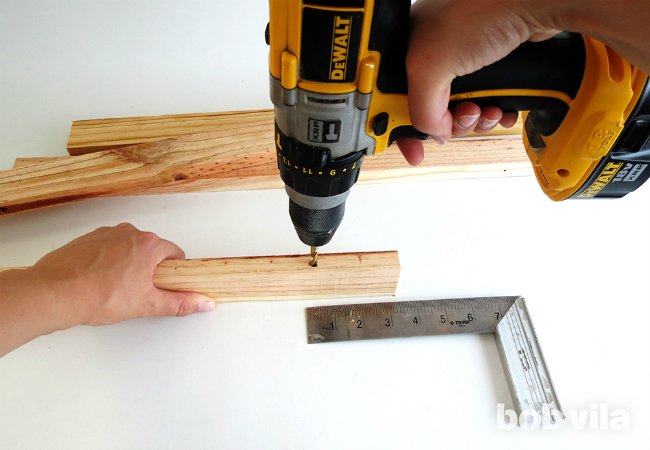
First, cut your wood into a total of eight equal pieces, each two feet long. You can make it easier on yourself by asking for the cuts at your local hardware store when picking up the wood.
Along the thinner side of every slat, measure three inches from each end, mark it, and drill a hole through the center. This will be where you slip a rope through to hold the mat together, so the drill bit you use should be the same thickness as the rope; we used a 1⁄4-inch bit on ours.
STEP 2
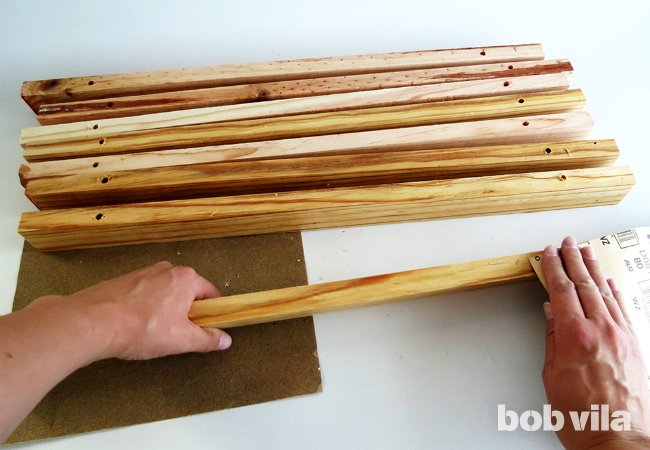
Sand down the eight pieces in order to remove any splinters around the holes.
STEP 3
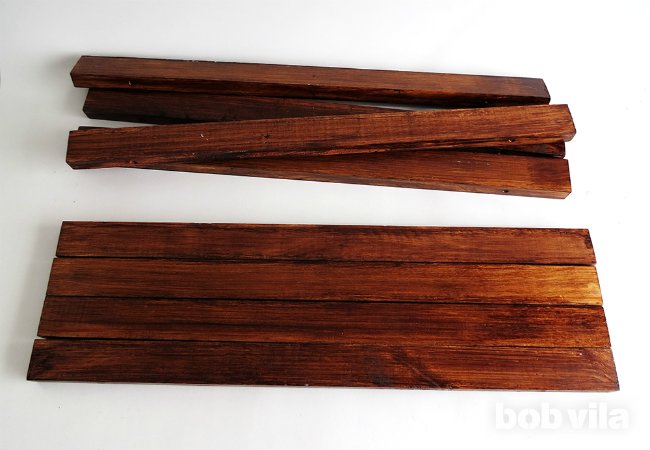
Now, stain the wooden slats in a tone that best complements your outdoor features; we went with a medium brown color. Follow package instructions for dry time before continuing.
STEP 4

Print out this handy PDF pattern to help you create the speech bubble. Simply assemble the four sheets to line up the outline of the bubble, tape them together, then cut out the shape.
STEP 5
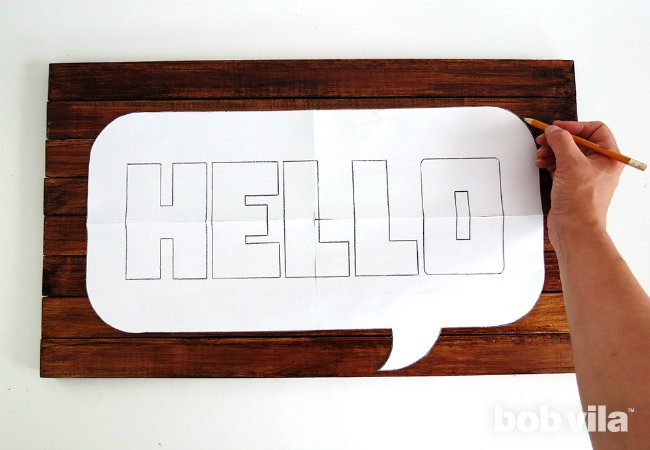
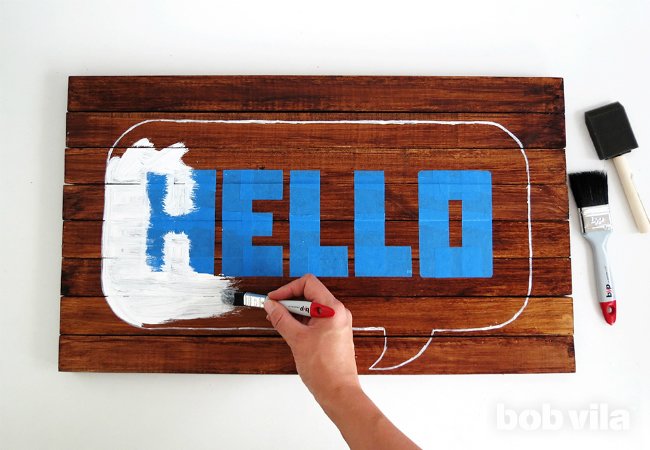
Align the wood pieces together horizontally, leaving no space between slats, and center the bubble on your wooden rectangle. Trace the shape onto the wood using a pencil.
STEP 6
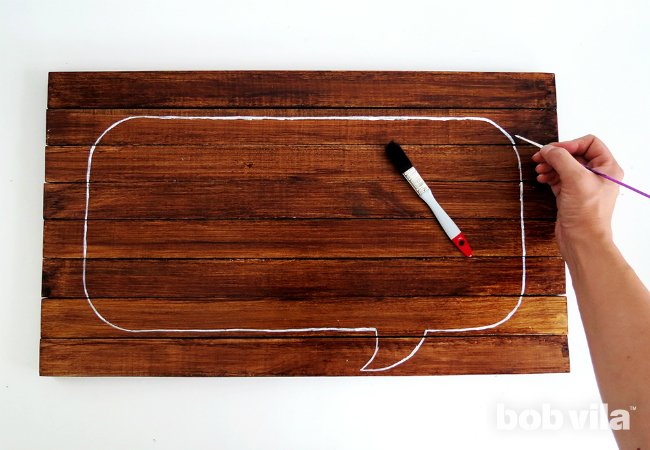
Time for paint! We chose a white acrylic, but you can pick any color you like. Using a thin brush, paint a line that follows the pencil marks you made in Step 5. This will delineate the area to be painted and help you to center the letters in the space.
STEP 7
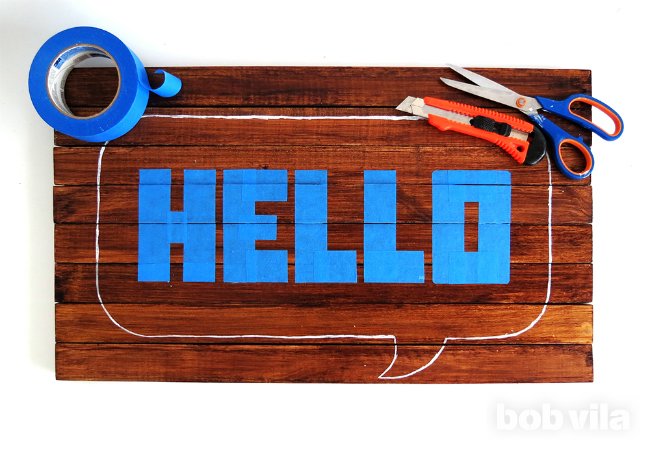
Now for the message: Spell out “HELLO” with strips of painter’s tape. Try to make your letters all the same size; if you need guidance, you can use the PDF to cut out and trace each letter.
STEP 8
Start filling in the bubble with paint, working in light coats to avoid any drips. If you’ve chosen a light color on a dark background, you will be likely to need at least three coats to achieve its brightest hue.
STEP 9
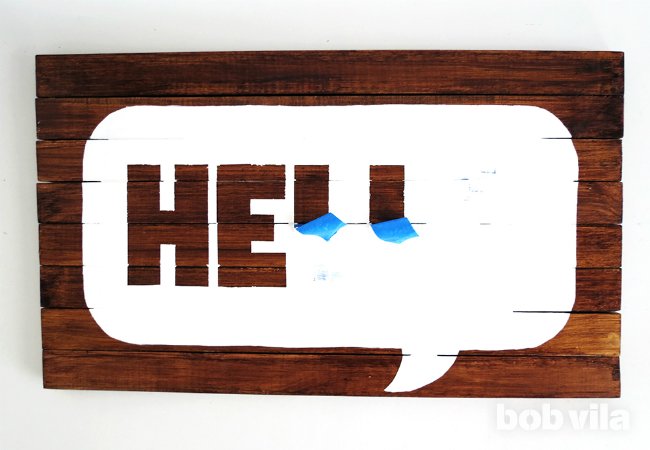
When the paint is dry, carefully remove the painter’s tape.
STEP 10
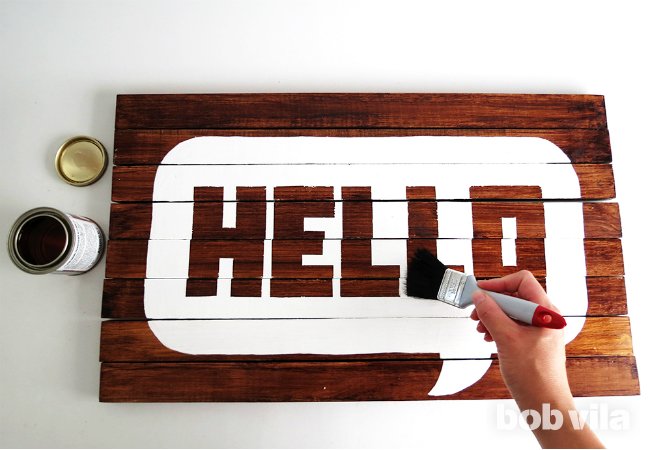
Apply two coats of varnish on each slat so your outdoor mat will be well protected against the weather.
STEP 11
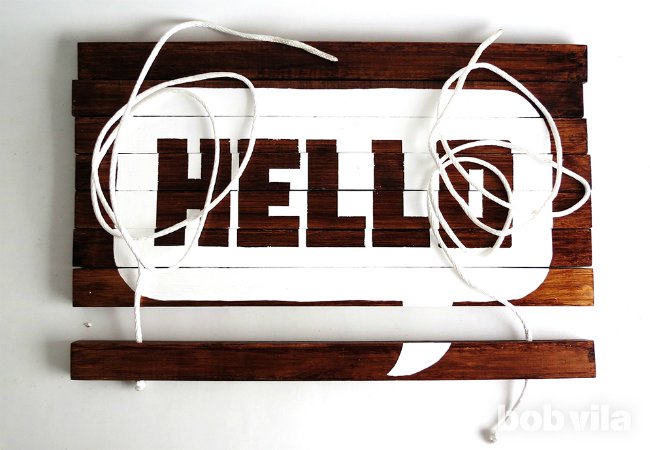
When the varnish is dry, you’re ready to start assembling the doormat! Cut two pieces of synthetic rope, each roughly 2 feet or so long. Make a knot at the end of one, and thread the string through the bottom left hole on the mat’s bottom piece of wood. Repeat with the second rope and the other hole.
A tip to secure the knot: Use a lighter to carefully burn the end of it. The synthetic rope will melt a bit, and the knot won’t come undone.
STEP 12
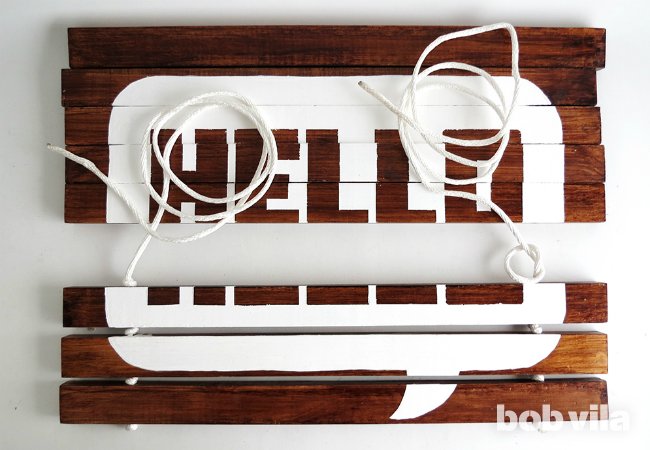
Tie knots in each rope, then pass them through the holes of the next slat up. You’ll continue the pattern of knot, slat, knot, slat until you get to the last wooden piece.
STEP 13

Make the two last knots, and cut the extra rope length. If you don’t feel comfortable burning the rope ends, instead dab some silicone glue around them to secure the knots. All that’s left is to move your DIY welcome mat outside—and to put a summer get-together on the calendar so your cheerful accessory can greet your next visitors!
Ama is a DIY addict and the creative mind behind Ohoh Blog. She likes home decor, lighting, and furniture projects that may involve painting, sewing, drilling…no matter the technique! Whatever she has on hand is inspiration to create and fodder for her serious addiction to upcycling.