We may earn revenue from the products available on this page and participate in affiliate programs. Learn More ›
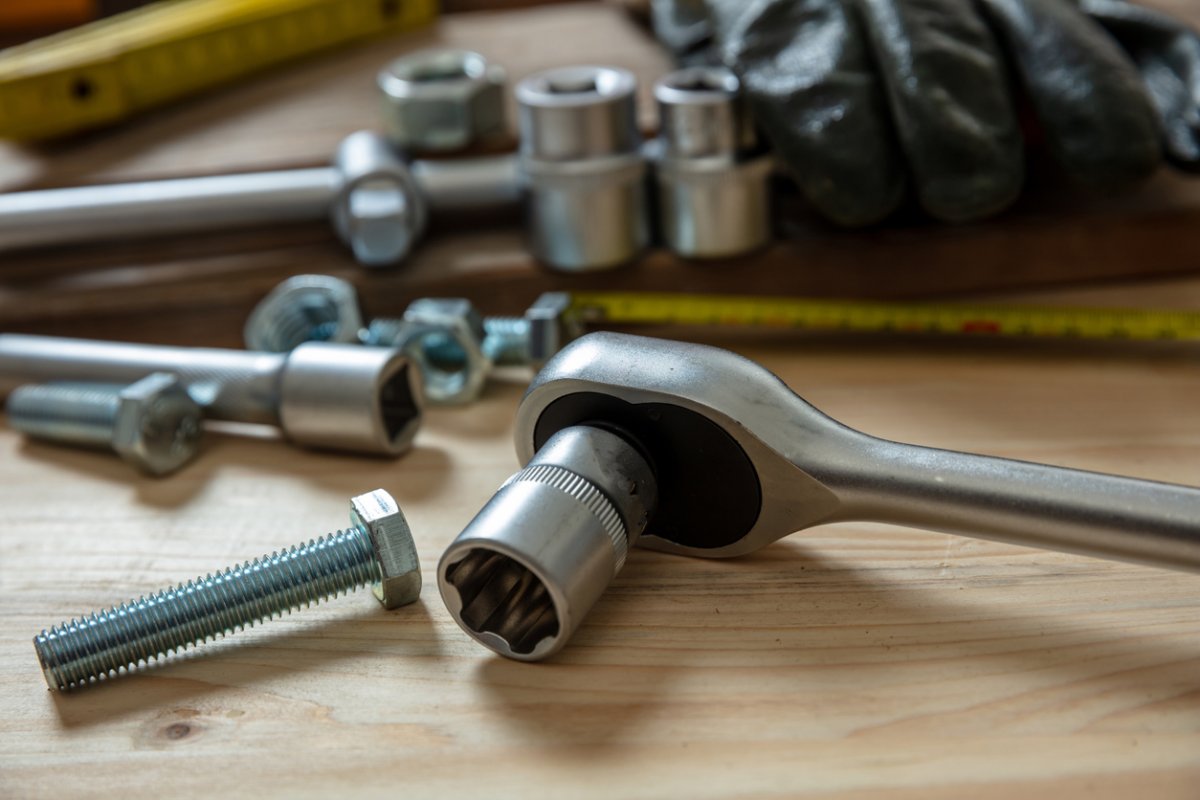
Especially important when it comes to car maintenance, a torque wrench tightens bolts to a specific torque level, ensuring that the fastener is tight enough before completing a job. If a part of the vehicle—like the lug nuts—are not properly tightened, they may loosen or come apart altogether during operation, posing a dangerous risk.
To ensure that a torque wrench is accurate, it’s necessary to check the calibration of the wrench before use. Typically, users can calibrate torque wrench accuracy to within ±4 percent, though top-of-the-line products may have a more precise accuracy range.
Find out how to use a torque wrench, how to check the accuracy calibration, and more with this informative guide.
Parts of a Torque Wrench
Before learning how a torque wrench works, it’s a good idea to get acquainted with its parts. Once you know its key parts you’ll be in a position to understand how to set a torque wrench and how to adjust a torque wrench so that it can be calibrated for future use.
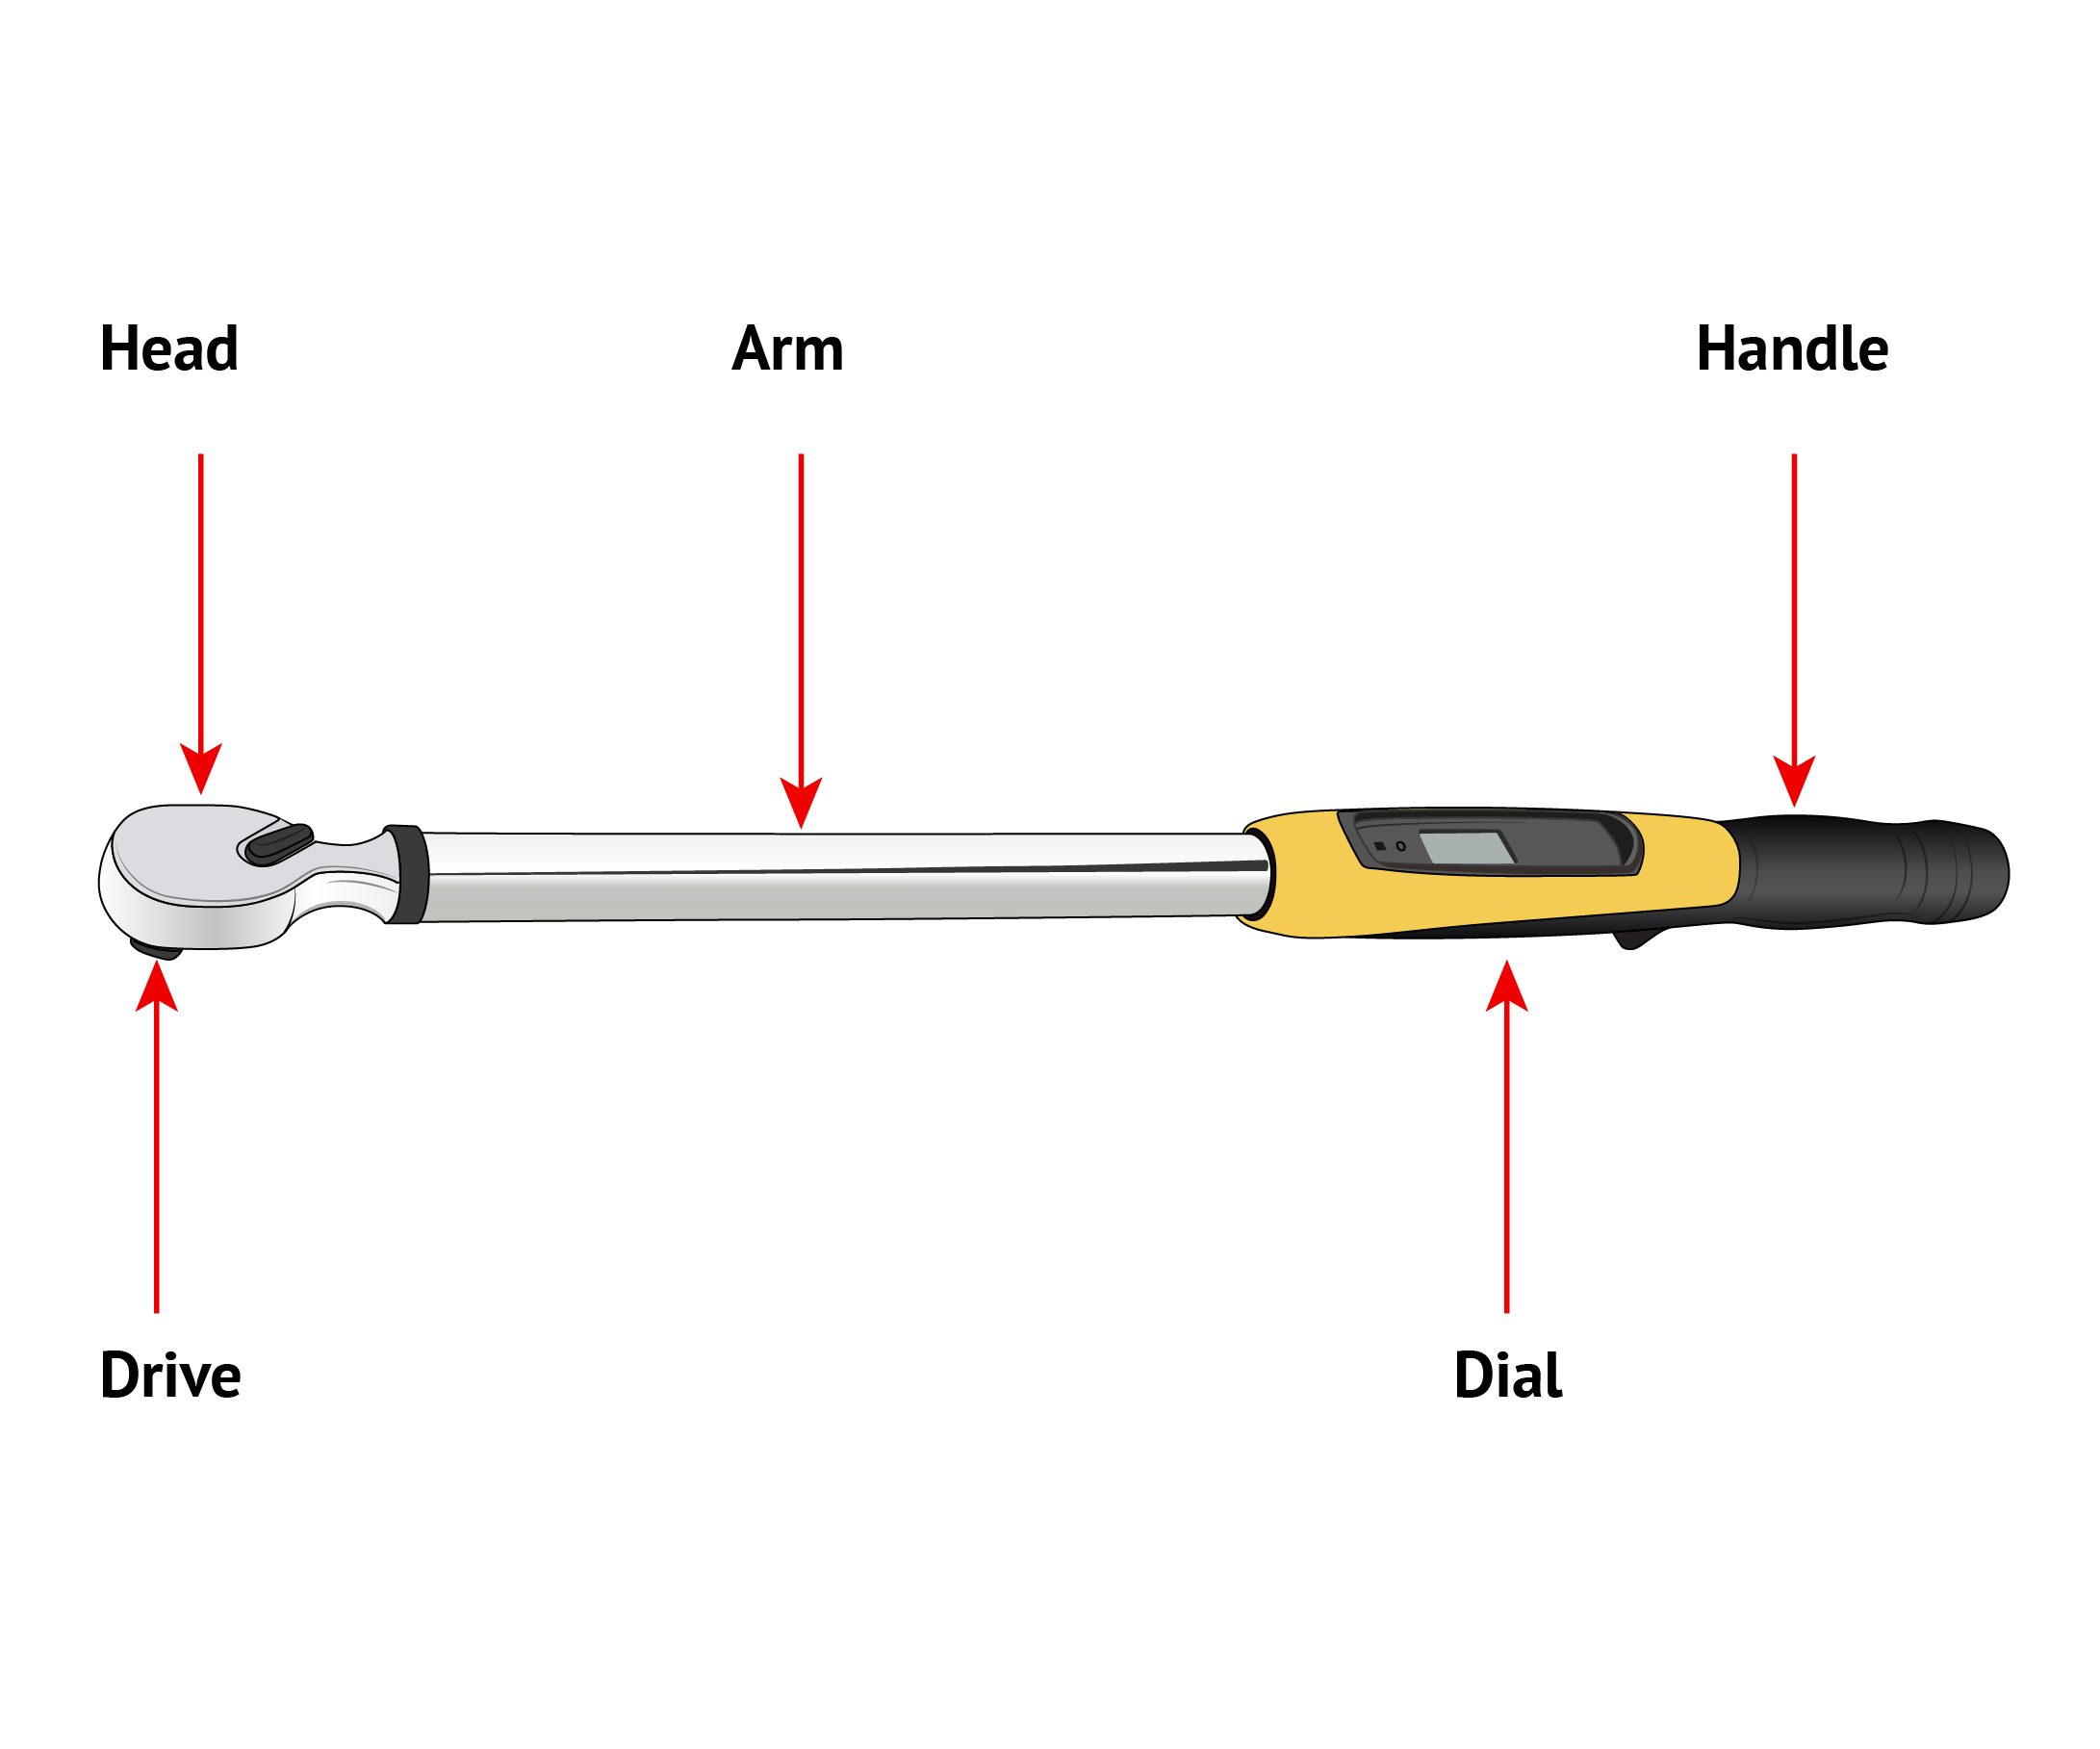
- Head: A torque wrench head is the rounded or square part located at the opposite end of the handle.
- Arm: The arm of the torque wrench extends from the handle to the head and typically contains a lubricated tensioning spring to adjust the torque setting.
- Handle: The handle is the part of the tool that the user grips to operate the wrench, though, depending on the type of torque wrench, it may also be used for setting a torque wrench by rotating the handle.
- Dial: The exact appearance of the dial depends on the type of torque wrench, but the purpose of this part is to display the torque setting.
- Drive: Located on the head of the torque wrench, the drive is used to equip standard sockets or a torque wrench extension bar to the wrench.
3 Types of Torque Wrenches DIYers Should Know
There are a variety of torque wrench types that can be used to work on cars, trucks, bicycles, motorcycles, and any other vehicle or piece of equipment that requires accurate bolt and nut tightening. The most common torque wrench types include beam, click, and digital torque wrenches.
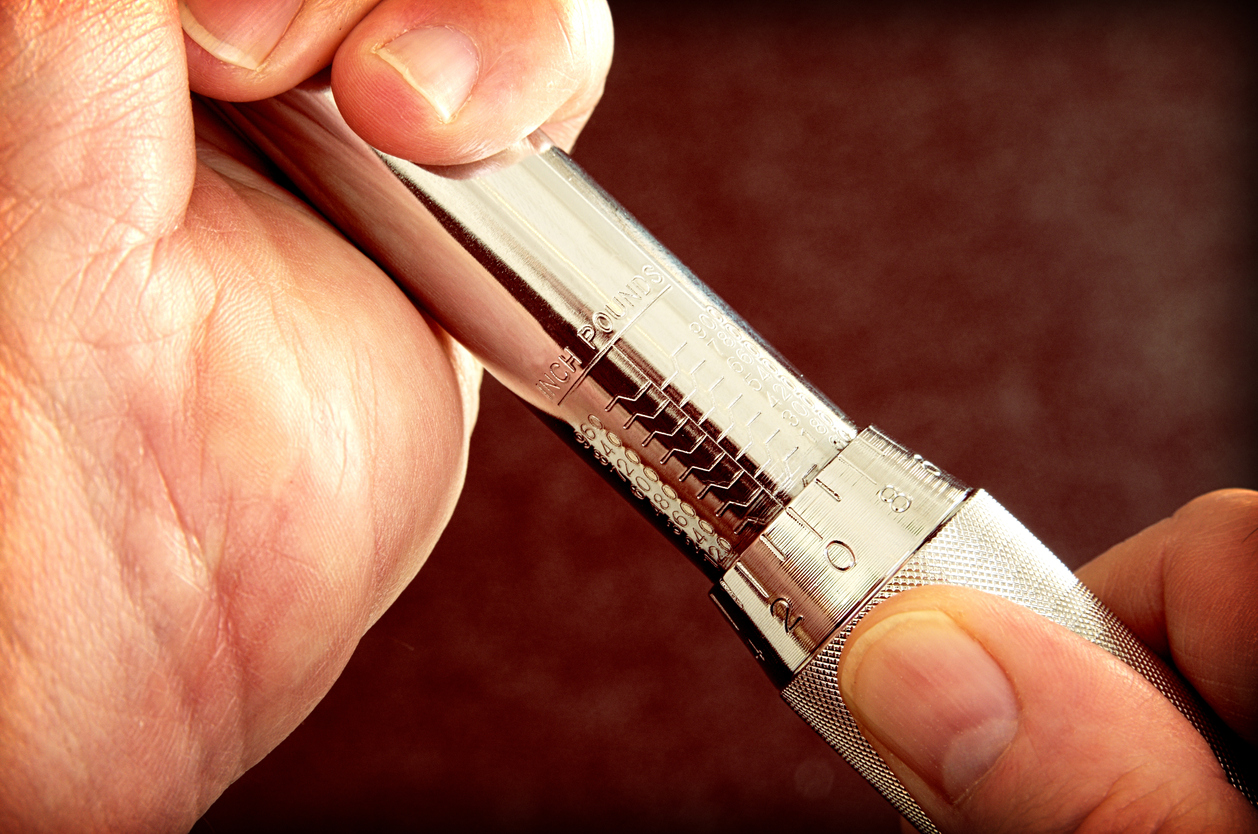
1. Beam
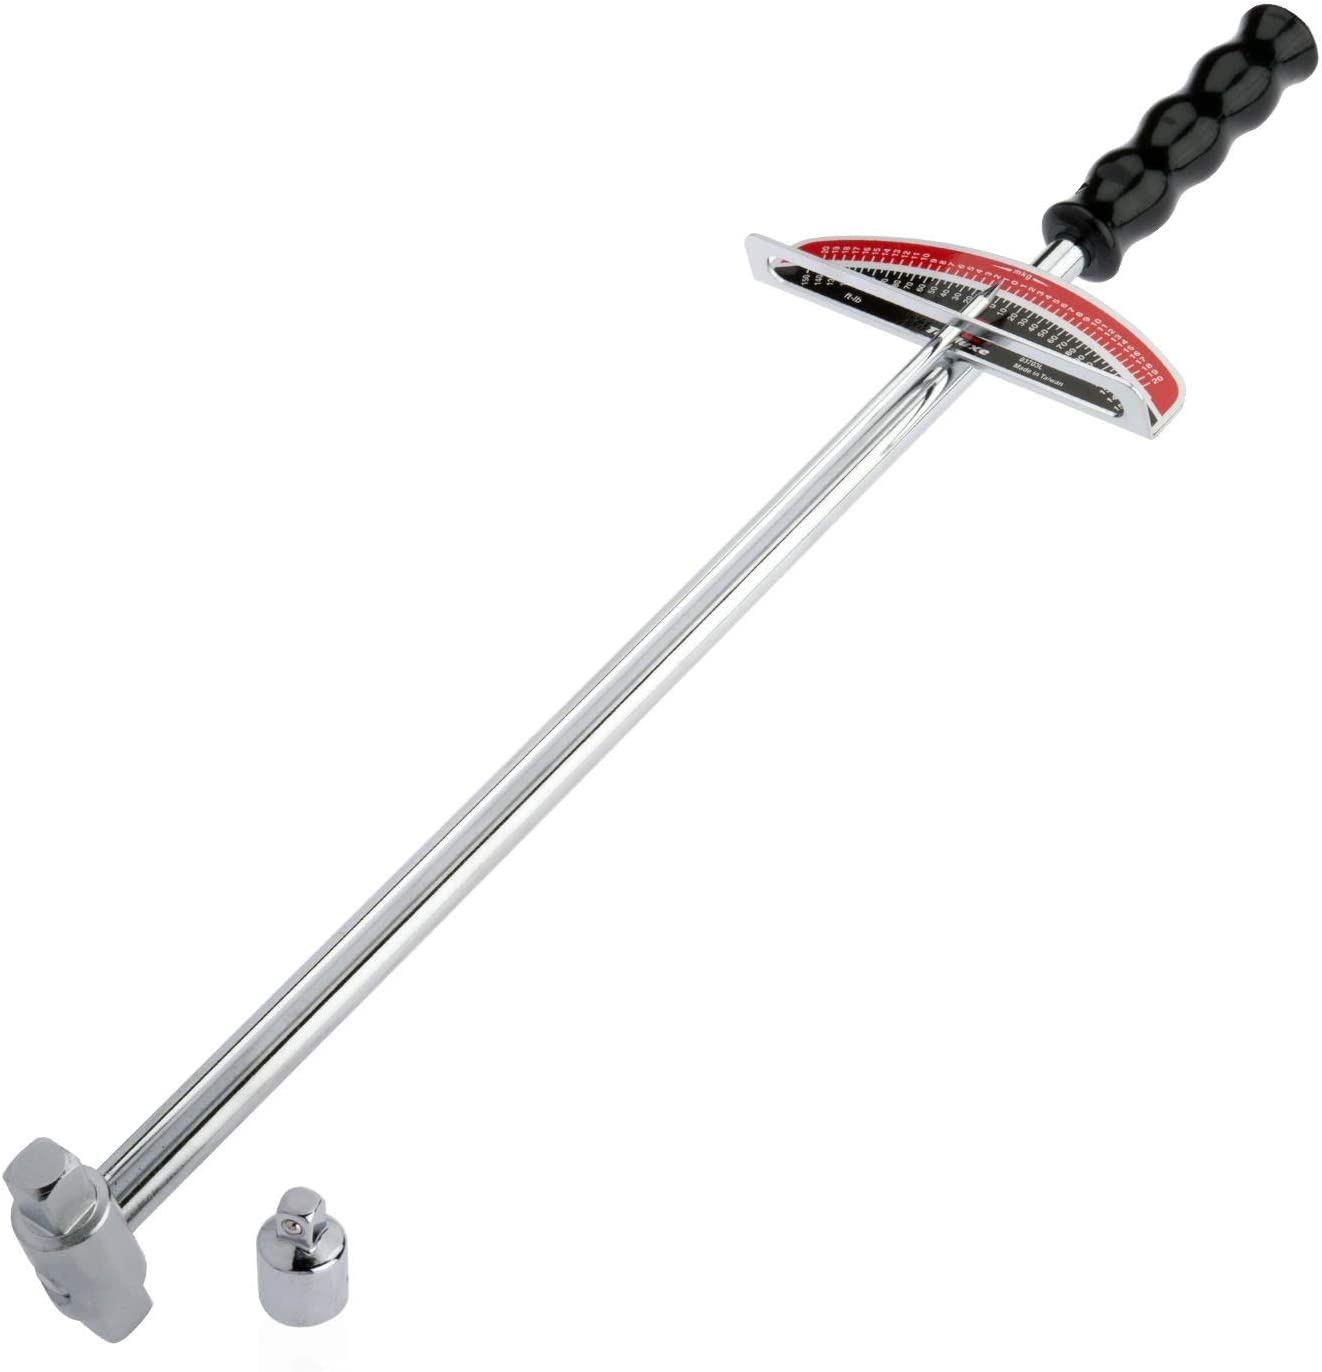
Beam-style torque wrenches don’t rely on anything except the flex of the wrench to measure the torque on the fastener. Users can check the current torque being exerted on the fastener with a scale dial, located near the handle.
When force is applied to the wrench, the beam or arm of the wrench bends slightly, changing where it intersects the scale to provide a reading of the current amount of torque on the fastener. This type of torque wrench is relatively inexpensive and doesn’t require frequent calibration or maintenance.
Our Recommendation: Get the Tooluxe ⅜- and ½-Inch Dual Drive Beam Torque Wrench at Amazon for $19.97.
Made of hardened alloy steel, this simple, effective beam-style torque wrench comes with both ⅜-inch and ½-inch drives for improved versatility.
2. Click
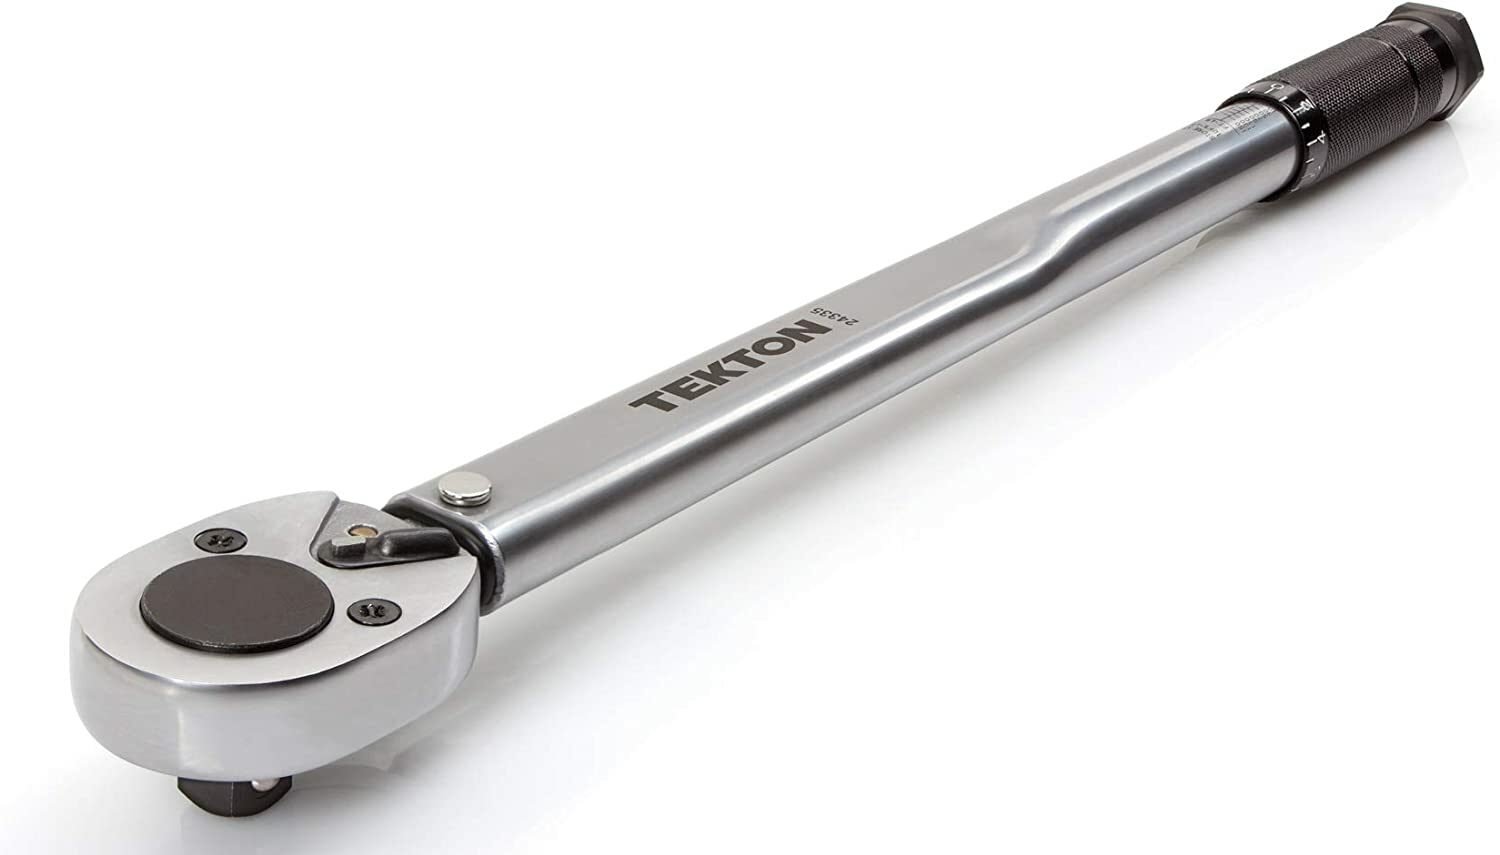
A click torque wrench is the most commonly used type of torque wrench due to the low cost, relatively simple maintenance, and because it can be set to a specific torque level, so users know when to stop applying force to the wrench.
If the user applies enough torque to reach the set level, the click-style torque wrench makes an audible click sound. When the wrench clicks, this is an indicator that it’s time to stop tightening the fitting. If you overtighten the nut or bolt, the fastener may bend, crack, or split entirely.
Our Recommendation: Get the Tekton ½-Inch Drive Torque Wrench at Amazon for $38.79.
The click-style torque wrench by Tekton has a ±4 percent accuracy rating and full steel construction, improving the overall durability of the tool.
3. Digital
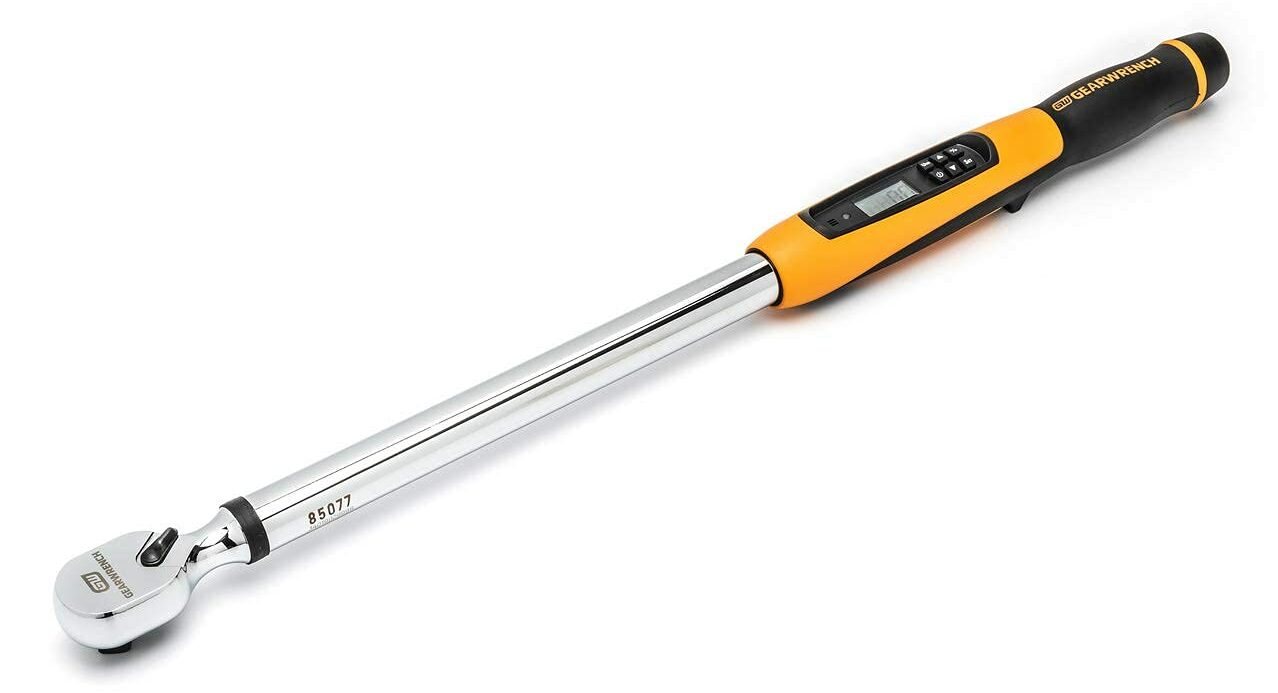
Digital torque wrenches are a step up from click-style wrenches with clear torque readings on a digital screen. Some digital torque wrenches may allow the user to set multiple torque levels, making it easy to quickly switch between everyday automotive tasks with the push of a button.
Similar to click-style torque wrenches, a digital torque wrench will typically notify the user with a buzz, beep, vibration, flashing light, or some combination of these alarms to help prevent overtightening. Just keep in mind that this type of torque wrench requires batteries, so it’s a good idea to have new batteries on hand to avoid interruptions.
Our Recommendation: Get the Gearwrench ½-Inch Drive Electronic Torque Wrench at Amazon for $149.97.
Ensure the most accurate torque reading with this electronic torque wrench that boasts a narrow ±2 percent accuracy rating.
Torque Wrench Safety Tips
Before using a torque wrench, it’s recommended to inspect the tool and any sockets or fasteners that will be used with it. If the wrench or any accessories are cracked, dented, or warped, these parts should be replaced before proceeding. Similarly, if a torque wrench is dropped on the ground or knocked against a hard object, users will need to put the project on hold until they can recalibrate the wrench. This is because the impact from dropping or hitting the wrench can throw the tool out of calibration.
Additionally, it is important to avoid using the torque wrench to loosen nuts, bolts, or any other type of fastener. These sensitive tools are only designed for tightening. Using the torque wrench to loosen a fitting can reduce the accuracy of the tool, requiring more frequent calibration to keep the torque wrench functioning properly.
Initial Setup and Calibration
Calibrating a torque wrench isn’t overly difficult, though it’s important to proceed slowly through these steps to ensure the accuracy of the tool. Users will need a bench vise, a 20-pound weight, a thin rope or string (capable of holding at least 20 pounds), and a measuring tape.
- Measure the length of the torque wrench from the square drive on the head to the exact point on the handle where you grip the wrench. This point is often marked already on a torque wrench, so you shouldn’t have to estimate based on average usage.
- Put the square drive of the torque wrench into the bench vise and tighten it.
- Set the torque wrench using the measurement from step one, and multiply it by 20.
- Tie a loop through the 20-pound weight with the string and hang it from the end of the handle where you took your first measurement.
- If you hear a click, lift the weight and move it towards the head of the wrench. If it clicks each time you put the weight down, continue moving it until the clicking stops.
- If you don’t initially hear a click, tighten the spring in the wrench by turning the screw clockwise, then lift the weight and lower it again to test it, repeating the process in Step 5.
- If done correctly, you will end up with a very precise area on the torque wrench where the weight can hang without causing the wrench to click.
- Measure the length of the torque wrench from the square drive to the point where the weight is hanging and multiply this finding by 20 pounds.
- With the information you have gathered, you can now calculate the applied torque of the wrench using the formula Ta = Ts x (D1/D2). Where Ta is applied torque, Ts is torque setting, D1 is the distance measured in step 1, and D2 is the distance measured in step 8.
- Using this number, multiply your intended torque by the difference. The result is the correct torque setting for your specific torque wrench.
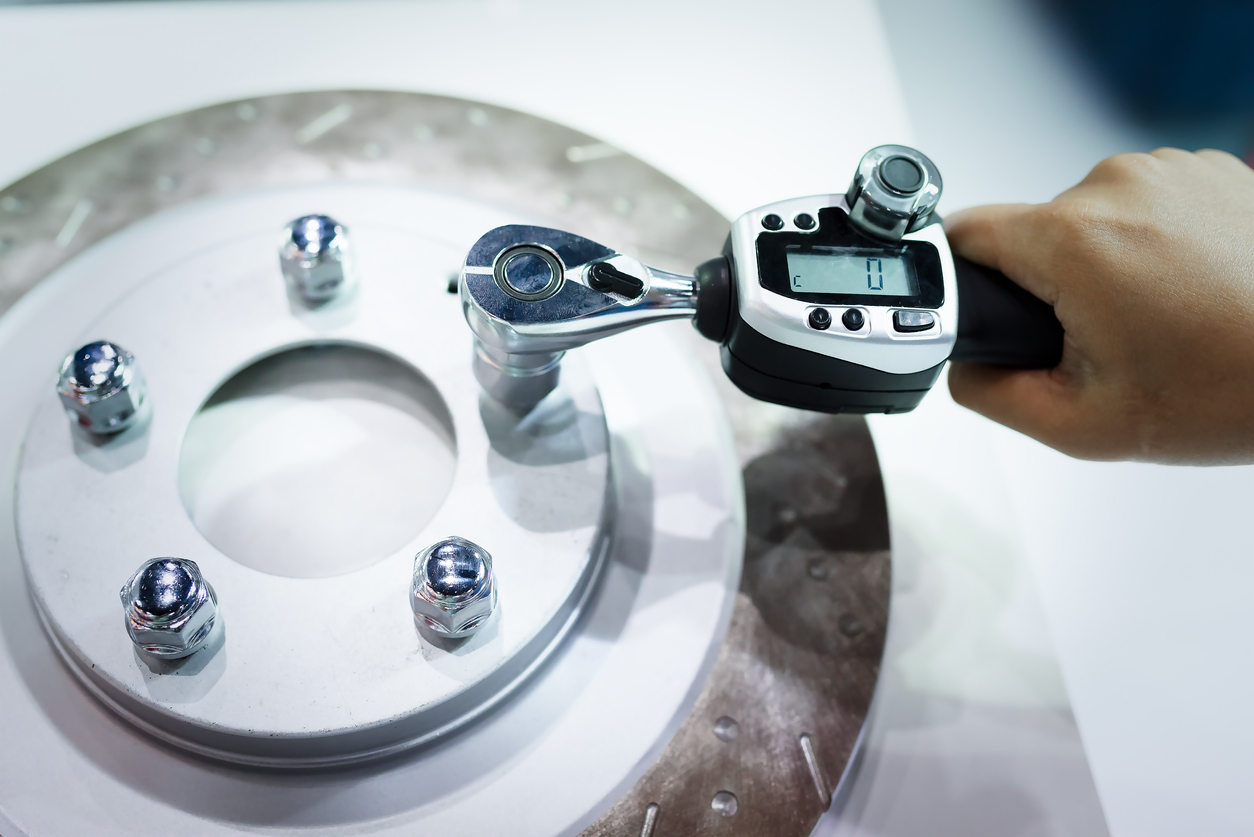
How to Use a Torque Wrench for Tightening Lug Nuts

Tightening lug nuts on a vehicle is one of the primary uses of a torque wrench. Follow these straightforward steps to learn how to use a torque wrench to ensure the lug nuts are properly secured without overtightening.
Step 1: Select the correct drive size and sockets.
Torque wrench drives can range from a ¼-inch size for small machinery, like motorcycles, mopeds, or lawnmowers, to 1-inch drives for working on massive vehicles, like a semi-truck. The appropriate size for tightening lug nuts is a ½-inch drive. Make sure you have the right size sockets to fit the drive before proceeding.
Step 2: Set the torque level.
The next step is to set the desired torque level. If you are using a beam-style torque wrench, then you can skip this step, but if you have a click-style or digital torque wrench you can select the target torque value on the wrench.
Use the digital controls to increase or decrease the torque value on a digital torque wrench. With a click-style torque wrench, you can set the torque level by twisting the handle so that it lines up with the desired torque level on the dial.
Step 3: Position the torque wrench and tighten the fastener.
Hand tighten the lug nuts as much as possible, then slide the torque wrench socket onto the first lug nut. Turn the torque wrench to tighten the lug nut. If you are using a beam-style torque wrench, keep an eye on the dial and stop applying force to the wrench when you have reached the target torque level.
If you are using a click-style or digital torque wrench, apply force to the fastener until you hear a click, beep, or any other auditory or visual signals that indicate you have reached the specified torque level. Keep in mind that while some digital torque wrenches have programmable tolerance limits to prevent overtightening, this isn’t a standard feature. Make sure to stop applying force when the alarm indicates the fastener is at the intended torque level. Repeat this process with the remaining lug nuts to finish tightening the wheel.
Torque Wrench Maintenance Tips
Torque wrenches are specialized tools that can be thrown out of calibration if they are dropped or knocked against a hard surface. If the tool is dropped on the ground, then it will need to be recalibrated before it can be used. When properly cared for, a torque wrench can retain its accuracy, so you don’t need to calibrate it before every use. Just make sure to store the torque wrench in an appropriate case when it’s not in use. Keep the wrench adequately calibrated when it’s not used by changing the torque setting to the manufacturer recommended level before storing the tool.
Final Thoughts
As mentioned above, torque wrenches should never be used for loosening fasteners, as this can cause lasting damage to the tool. Only use a torque wrench for the purpose of tightening a fastener to a specific torque level, such as when you are replacing spark plugs or changing a tire.
When not in use, this sensitive tool should also be kept safe in a case or storage container to help ensure the device remains adequately calibrated. For those who are having difficulty deciding on the best type of torque wrench to add to their workshop, a click-style torque wrench is both affordable and relatively easy to use. If price isn’t a deciding factor, a digital torque wrench provides better accuracy and may be easier to use. Research potential options and select the right type of torque wrench to efficiently handle the job.
The prices listed here are accurate as of publication on December 17, 2024.