We may earn revenue from the products available on this page and participate in affiliate programs. Learn More ›
When summer is on, it’s time to get outside and play. If you’re looking for ways to make your backyard more fun, why not build a horseshoe pit? There’s more than one way to approach this easy, inexpensive project, but the basics hold true no matter your approach. Read on for a full tutorial on how to build a horseshoe pit for entertainment for all ages—all season long.
Tools & Materials
Bobvila.com may earn a commission from purchases made through these links.
-
STEP 1: Measure Your Space
In a “regulation” pit, horseshoe pit dimensions require stakes be exactly 40 feet apart. Those stakes should sit within a box that—while at least 31 by 43 inches—measures no larger than 36 by 72 inches.Common horseshoe pit dimensions for backyard play is 36 by 48 inches. You can make only one box, but horseshoes technically involves two boxes: one for stakes and one for pitching. So in all, a 48-by-6-foot rectangular area must be set aside for the game. Note: Orient your pits in a north/south direction so that you can play comfortably all day. -
STEP 2: Build Your Boxes
Assuming a pair of 36 by 48-inch horseshoe pits, you will need to cut eight pieces of lumber—that is, four pieces measuring 36 inches and four pieces measuring 48 inches. Using fasteners appropriate for the lumber you’ve chosen, assemble the wood pieces into two identical rectangular boxes. -
STEP 3: Set Your Boxes
You can get away with simply setting your boxes on the ground, but it’s preferable to dig trenches so that each box can sit flush to the ground. If you want, place landscaping fabric at the bottom of each horseshoe pit. This liner suppresses weed growth and keeps sand from sinking into the dirt. -
STEP 4: Set Your Stakes
Set your stakes a minimum of 21 inches from the front of your box. Be sure the stakes are sticking up about 14 or 15 inches from the ground. Drive the stakes on a bias, so they lean toward the other pit at a slight angle of about 3 inches. -
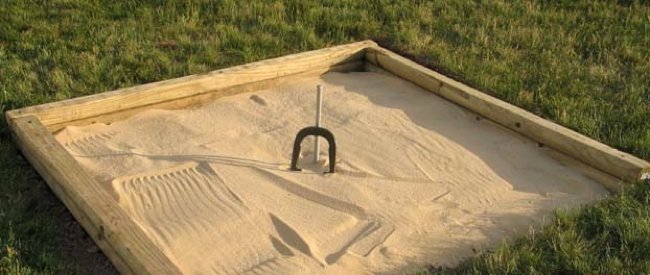
STEP 5: Add Your Sand
Fill both pits with sand. The type used for sandboxes is the best and most accessible in stores. Depending on the exact dimensions of the boxes you’ve built, expect to use five or six bags of sand to fill each pit. There’s nothing left to do now but to grab a brew and start pitching….
If you want to invest more real estate and effort, you can upgrade your pit with backboards and pitching platforms. Most of the time, however, a no-frills design is more than enough to enthrall players of all ages and skill levels. If only “scoring a ringer” were as easy as it is to build a horseshoe pit!