We may earn revenue from the products available on this page and participate in affiliate programs. Learn More ›
Install wood paneling in any room to inject architectural detail, warmth, and character into your home. Traditionally used on the walls of kitchens and entryways, many homeowners have begun to install wood paneling in less likely places—bedrooms, for example.
Related: 5 DIY Wood Wall Treatment Ideas
All you really need is a wall, and the process is simple enough to be tackled by intermediate DIYers. Here are a few tips for success:
STEP 1: Choose Your Paneling
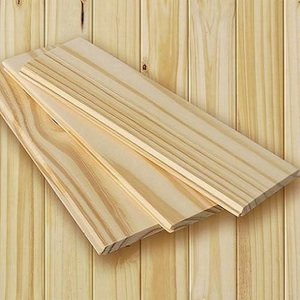
Sheet paneling is inexpensive and easy to install, but in older homes, it can accentuate uneven and wavy walls, plus it’s difficult to install over plaster. So I recommend tongue-and-groove paneling, which is a bit more expensive and takes a bit more effort to install. It’s worth the investment, though: Tongue-and-groove paneling will look better and add more value to your home.
STEP 2: Create the Framework
Install wood paneling over one-by-two-inch furring strips installed horizontally at sixteen-inch intervals. Complete the furring portion of the job by cutting the strips to length before nailing them into wall studs. If you notice any unevenness in the wall, fasten scrap wood behind the furring in these areas in order to keep your tongue-and-groove planks in plane. Minor protruding areas can be sanded away or flattened with a handheld block plane.
STEP 3: To Finish or Not to Finish?
Before you install wood paneling, first decide on a finish. While a paint finish can be added post-installation, it’s easier to apply stain and clear coat beforehand (on account of all the grooves). It’s possible to purchase pre-finished paneling; just be cautious not to chip it.
STEP 4: Nail It
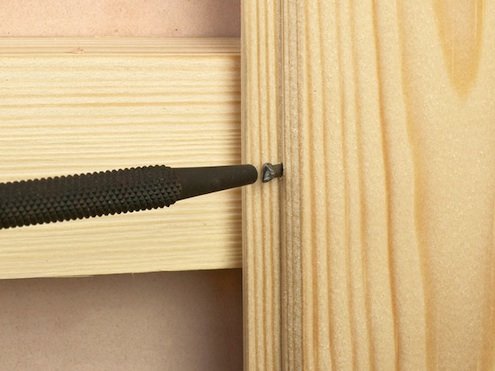
There’s an easy technique for working with any tongue-and-groove product. Start with a single plank. Once you’ve made sure that it’s level and flush, nail the plank to the furring with finishing nails. (If you don’t have an air nailer and compressor, rent one; it makes quick work of tasks like these.) Next, nail into the tongue of the plank at a 45-degree angle, making sure your compressor is set to sink the nail head just below the wood surface. (If using a hammer, you can sink the head with a punch.) Sliding the groove of the next plank onto the tongue of the first, repeat the process above.
Further Considerations
For a traditional look, why not install a tongue-and-groove ceiling? Here’s a way to install a tongue-and-groove ceiling without damaging the wood.
- Set a board in place.
- With a scrap piece of tongue-and-groove stock as a block, give the board a firm tap. This forces the tongue tightly into the groove.
- Using finish nails, secure the backboard in place. All the tongues remain intact and undamaged if you use a block.
Watch how it’s done!