We may earn revenue from the products available on this page and participate in affiliate programs. Learn More ›
The pharaohs capitalized on the beauty and strength of stone, overseeing the construction of architectural gems whose magnificence has endured into the modern age. Fortunately for do-it-yourselfers, stonework has changed a great deal since Ancient Egypt, and we no longer toil with monolithic blocks hewn from raw earth. Today, stone veneer is a lightweight and user-friendly option for home interiors and exteriors, and available in numerous colors and textures.
Application
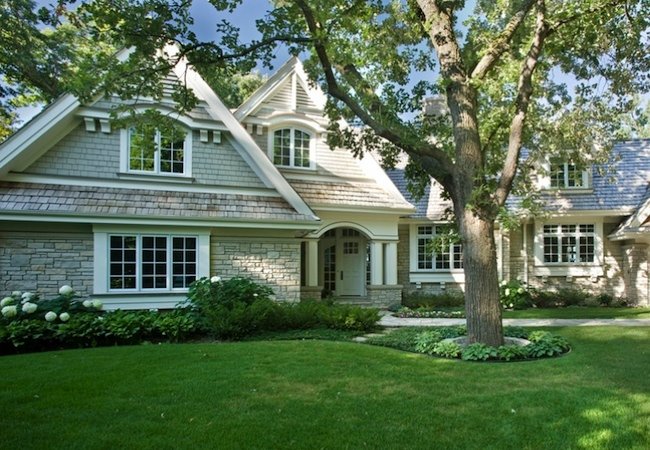
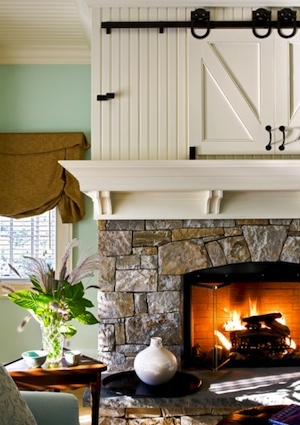
You can add stone veneer to a host of surfaces, both inside and outside your home. One popular choice is to use stone veneer to cover a fireplace mantel for an earthy look of permanence. Elsewhere in the home, stone veneer can be used to stunning effect in kitchen islands, eye-catching backsplashes, and spa-like showers. Stone veneer succeeds equally well as a house siding material, imparting an Old World look even to new construction. Yet another area where stone veneer can be put to good use is the backyard, where it can soften the transition between natural surroundings and manmade features, such as the patio or pool.
Selection
There are essentially two types of stone veneer. The first involves genuine stone, so it comes at a relatively high cost. For those with deep pockets, however, it’s a gorgeous, long-lasting choice. Traditionally, natural stone veneer has been heavier than engineered products, but recent advancements have all but eliminated that issue. Manufacturers nowadays are able to cut the stone so thinly that its weight is not out of line with that of its artificial cousins.
Faux stone, sometimes known as cultured stone, is the second type available to homeowners. In years past, artificial stone veneer looked, well, artificial, but times have changed. To the eye and even to the touch, manmade stone veneer now convincingly emulates the real thing. (Sure, you can tell the difference if you look closely, but you really have to look closely.) Lighter and a little tidier to work with, cultured stone veneer is the more DIY-friendly of the two options.
Stone Veneer Installation
The process of installing stone veneer remains the same, more or less, whether you are applying a natural or cultured stone product, and whether you are working inside or outside the home.
First things first: The surface to which you are adhering the stone must be clean and free of paint, dust, or dirt. If the stone veneer is going to cover an installation of brick or concrete, it can be directly applied. Any other surface must be sheathed beforehand with metal lath. Note that on exterior walls, it’s recommended that a weather-resistant vapor barrier be installed behind the lath.
Next, apply a scratch coat of mortar composed of two parts washed sand to one part Portland cement. Layer on a thickness of about a half inch. While the mortar is still soft, use a metal scraper to lightly carve horizontal grooves across the surface. Then allow the scratch coat to cure for 24 hours.
You now have a masonry surface over which you can install stone veneer. Here’s the procedure.
- Mix an appropriate quantity of mortar using two parts washed sand to one part Portland cement. Stir the mortar for at least five minutes, until it has a thick and creamy consistency.
- Lay out the stones in the pattern you wish. If necessary, trim individual stones to a usable size by means of a masonry hammer (or a skilsaw outfitted with a masonry blade).
- Remove all dust, dirt, and loose particles from the stones, washing with water if needed. Once the stones are clean and dry, moisten (but do not saturate) their rear sides with a masonry brush. Doing so helps to ensure a strong bond between the stone and mortar.
- Spread a half inch to one inch of mortar over the back of the stone. Press the stone to the wall. As you press, rotate slightly, forcing some of the mortar to squeeze out around the edges of the stone. Before the mortar has a chance to set, remove any excess from the surface of the stone with a rag or brush. Keep the joint lines as narrow as possible between adjacent stones for the most attractive appearance.
- Once you have installed the stone veneer over the scratch coat using the technique described in Step 4, proceed to grout any large gaps between the stones.
Maintenance
Approximately four weeks later, apply a quality sealer to the stone veneer in order to protect the surface. Once applied, the sealer must be reapplied periodically, especially in an outdoor installation. Keep in mind that a sealer may change the coloring of the stone, so experiment with the sealer first in an inconspicuous area; if you aren’t thrilled with the result, try a different product. One great thing about stone veneer is how easy it is to clean: If the hose fails to do the trick—or if you’re cleaning indoors—water and a stiff brush will almost always produce satisfactory results.