and so the walls are just about ready for paint.
And over here, we've got a feature that I think will really make the living room of our in-law suite very, very cozy.
Basically what this is, is a majestic wood burning fireplace.
And what's unique about it, compared to most fireplaces, is this actually uses outside air for combustion.
It draws the air in from the outside to feed the fire.
It operates similar to a wood stove in that, when you have the fire operating in it, you're going to run it with the doors closed.
What we did is we measured ahead of time to make sure that we had enough room for them to put the finish material on, the marble and the mantle and all that type of thing.
So we measured out from the two sides and allowed for a six foot mantle, basically.
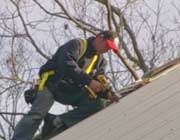
What we are going to do now is, we're going to get the pipe.
There's a wall upstairs that's lined up with this wall, and it's also lined up with the peak of the roof, so we want to make sure we stay far enough enough away that we can get the flashing to fit on the chimney without getting on the edge of the roof.
So we're going to use a couple of these components here.
These are 30 degree offsets and these are the the most you can offset these chimney systems.
You can use multiple number of offsets.
I think you can use up to four on this particular fireplace.
All of this information is always sent with these units.
They have very thorough, very intricate manuals that come with them, that explain all this stuff.
And that structure for the fireplace is now being trimmed out with real stone, right?
And John Nadler is here from Plymouth Quarries.
That is correct.
How are you Bob?
Now let me ask you, I mean we've used man-made stone products in kind of veneer or Ashlar installations before, but this is real stone.
This is actually real stone.
Taking the principle of the cultures own as you're familiar with.
They actually saw cut thin, they actually took real fit stone and saw cut it thin so it can be applied as you would a typical caulk and stone or a man made fabricated stone.
Is it native field stone in Massachusetts or what?
It's actually a New England field stone, it's from Connecticut.
This particular stone, but there are also stones from New York, and out west.
Ok.
And, how easy is it to cut it?
I mean isn't it...
You can cut it with a hammer.
You can cut it with a four inch grinder, you can cut it with a wet saw.
Its that easy to cut this thin stuff.
Okay, and the cost?
The cost typically between $12 and $15 a square foot, in some cases be a little bit less.
In some cases, it'll be a little bit more.
Depending on the type of stone, of course.
Yeah now normally when we think about field stone fireplaces you're thinking about big stones that are stacked all on top of one another...
That's correct.
... and there are tons of masonry there you have to support with a big concrete slab.
And you're 100% correct when you're saying tons of stone.
Yeah.
in this particular case, its a lightweight stone product.
its not the stone that's light weight, typically less than fifteen pounds to the square foot, as opposed to the natural stone or the four inch stone which is fifty pounds to the square foot.
Right.
This actually works from the top down.
You can actually hang this from the top down.
It doesn't require any structural footings underneath, so you have a cost savings there, too.
That's a big advantage.
Now we're going to interrupt Joe McDonough and Joe, I understand you built the original chimney when Howard built this house twenty-five years ago.
Yes.
Is that right?
Yes.
Well this is such counter intuitive work.
As normally, as I was saying a minute ago, you feel like you start at the bottom and go up, but you start at the top, and it looks
work our way down.
It looks beautiful.
Now how do you fill in the joints in between.
What we do is use a grout bag and we buy these at a pastry shop.
Yeah it looks like a cake decorating sleeve.
Exactly.
You just squirt.
The more that comes out
Can you show us?
just like that.
And you just go along.
That's a great tip.
Fills it right in.
It's nice and neat.
And then do you have to like use a trowel or anything to finish it off?
No what we use is we actually use a stick.
Just a pointed stick?
That's all it is.
Out of the woods.
It's old time.
And just scratch the joints out.
Yeah, as it dries out.
As it dries out, you let it set up, usually a couple of hours.
This has been setting for two or three hours now, Mike?
Yeah.
About two hours.
Yeah.
And then you just go over it and brush it and take a brush, and brush everything out.
Yup.
And that's it.
Right.
It's a beautiful job, congratulations.
Thanks John.
Thanks.
Very nice.
Alright So we're with Brian Miller, at Miller and Sons Painting right now.
Hi Brian.
And that's Joe up there.
Cutting in, right?
Yes he is, Bob.
Joe is cutting a straight line across where the two surfaces meet.
He's forming a straight line, so we can bring that wall right down to the ground.
So if you've never painted a room, you ought to know that the first thing you do before you even get a roller out is to go around all of these corners and edges, and fill in.
How wide should you normally go?
You should try to bring it down two to three inches, so you do have enough space to bring the roller up to where the wet paint is.
And not onto the ceiling.
Exactly.
Yeah.
What kind of paint are we using?
Today , we're using Sherwin-Williams Duration.
It's an interior latex paint.
Okay.
It's designed for one coat coverage.
It's a self priming paint as well.
All right, you've got a professional looking roller here, right?
Yes.
We like to use these eighteen inch rollers just to get a smooth finish, and decrease the lap marks.
Lap marks would sometimes occur with a nine inch roller so that's why we do use the eighteen.
And what about the thickness of it, the nap of it?
nap is a half inch nap.
It's designed to actually put more paint on the wall.
Yeah, that looks great, it looks like we'll get away with just one coat, right?
Bob, it looks that way, and that's exactly why we like use this application, this paint.
Very nice job.
Well, you've got 3 more to go, thanks Brian.
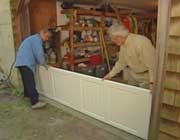
And Howard, not only are you the flooring genius, but you're a jack of all trades, you're putting up your own doors, right?
Yes, Bob.
Necessity makes us do many things.
How are you coming with the floors upstairs?
We're doing great, we're putting the bellawood, the pre-finished red oak.
Beautiful material, goes together nice, we're really having a good time.
That's a very good choice, yes.
Spinning towards our view.
Yes.
Old Sparky, we call it.
But anyway, Dean Stewart is with us right now to talk about our wonderful wood port doors, and what kind of a door is this?
This is a four panel contemporary door with what we call Mission sticking.
It's also commonly referred as a Shaker-style door.
Oh, 'cause the Shakers made all of the beautiful Shaker furniture that had the flat panels like that, usually on a horizontal design.
That's correct.
Very simple design.
Yeah.
Now what's the construction of the door?
The construction of the door, this is an engineered wood panel with a birch veneer over the top of it.
What's nice about birch and why Howard chose this for the project is simply because he wasn't sure whether he was going to stain or paint this door.
And because birch is such a versatile he wood, it'll turn out beautiful no matter what he ends up doing with it.
Now when you say an engineered core, just what does that mean?
What that is, is that is a veneer over the top of a very high-density fiberboard material.
Okay.
And it just makes the door a lot more stable, so that it doesn't warp or have some of the tendencies that a solid wood would have.
You have less danger of moisture being absorbed into the door or et cetera, we've all had doors warped.
Well, it's a beauty thanks.
You bet.
And Howard?
Good luck.
Thanks, Bob.
We're running out of time.
Until next time, I'm Bob Vila.
Thanks for joining us.